6 alarm setup and alarm activation – IC Realtime Combo Series: 8 Channel DVR with built-in 19 LCD monitor User Manual
Page 44
35
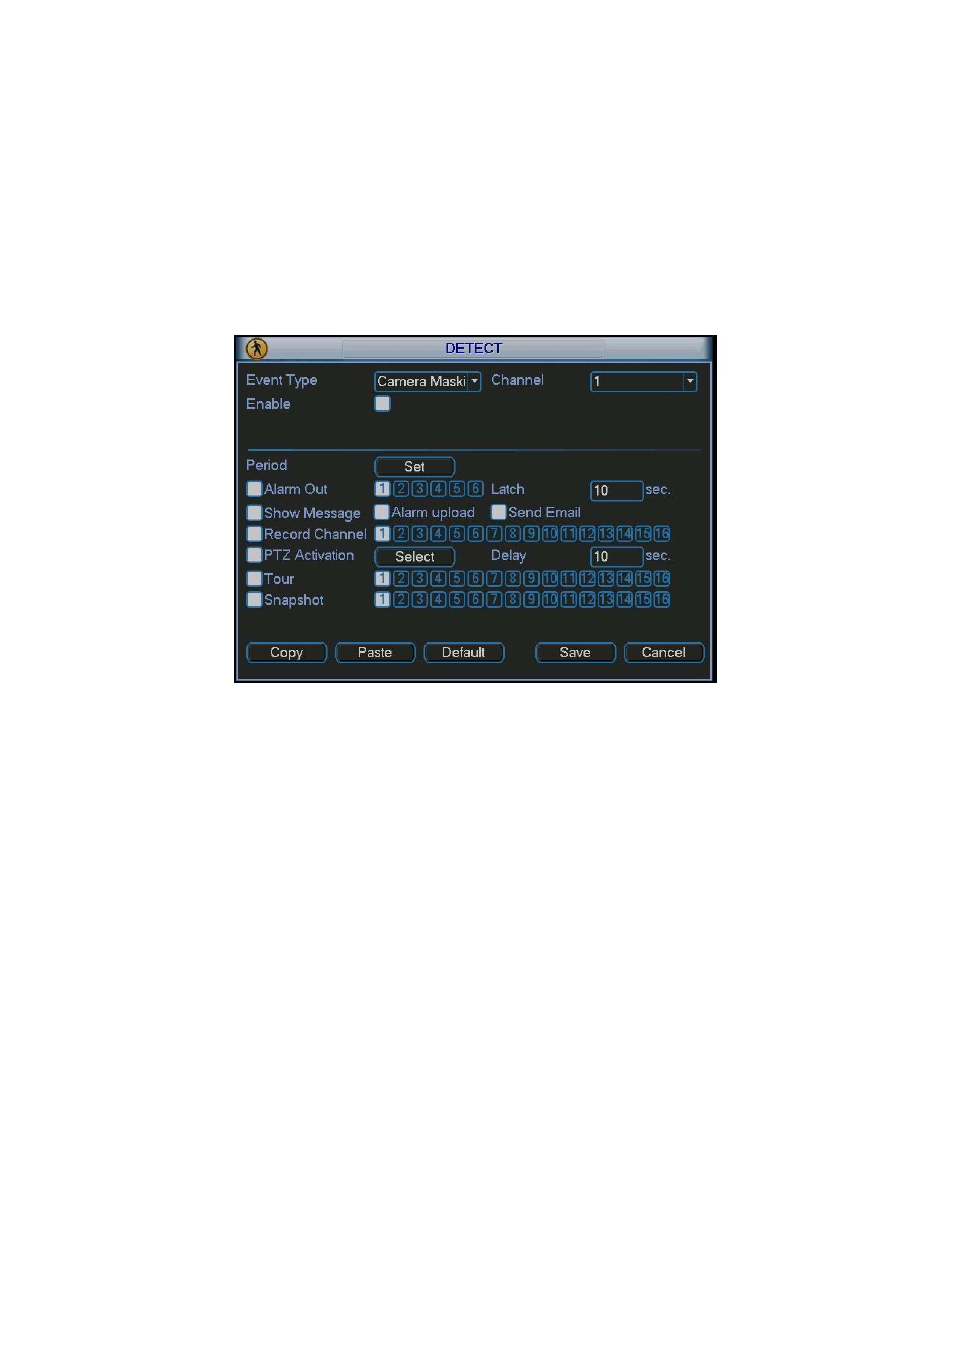
When someone viciously masks the lens, or the output video is in one-color due to the
environments light change, the system can alert you to guarantee video continuity. Camera
masking interface is shown as in
X312H312H312H
Figure 4-22
X
.
Tips:
You can enable preset/tour/pattern activation operation when video loss occurs.
Please refer to chapter 4.5.2 motion detection for detail information.
Note:
In Detect interface, copy/paste function is only valid for the same type, which means you can
not copy a channel setup in video loss mode to camera masking mode.
Figure 4-22
4.6 Alarm Setup and Alarm Activation
Before operation, please make sure you have properly connected alarm devices such as
buzzer.
4.6.1 Go to alarm setup interface
In the main menu, from Setting to Alarm, you can see alarm setup interface. See
X313H313H313H
Figure 4-23
X
.
4.6.2 Alarm
setup
Alarm interface is shown as below. See
X314H314H314H
Figure 4-23
X
.
z
Alarm in: Here is for you to select channel number.
z
Event type: There are two types. One is local input and the other is network input.
z
Type: normal open or normal close.
z
PTZ activation: Here you can set PTZ movement when alarm occurs. Such as go to preset,
tour& pattern when there is an alarm. Click “select” button, you can see an interface is
shown as in
X315H315H315H
Figure 4-24.
z
Period: Click set button, you can see an interface is shown as in
X316H316H316H
Figure 4-25
X
. Here you can
set for business day and non-business day. In
X317H317H317H
Figure 4-25
X
, click set button, you can see an
interface is shown as in
X318H318H318H
Figure 4-26
X
. Here you can set your own setup for business day and
non-business day.
z
Anti-dither:
Here
you
can set anti-dither time.