IC Realtime Combo Series: 8 Channel DVR with built-in 19 LCD monitor User Manual
Page 38
29
After system booted up, it is in default 24-hour regular mode. You can set record type and
time in schedule interface.
4.4.1 Schedule Menu
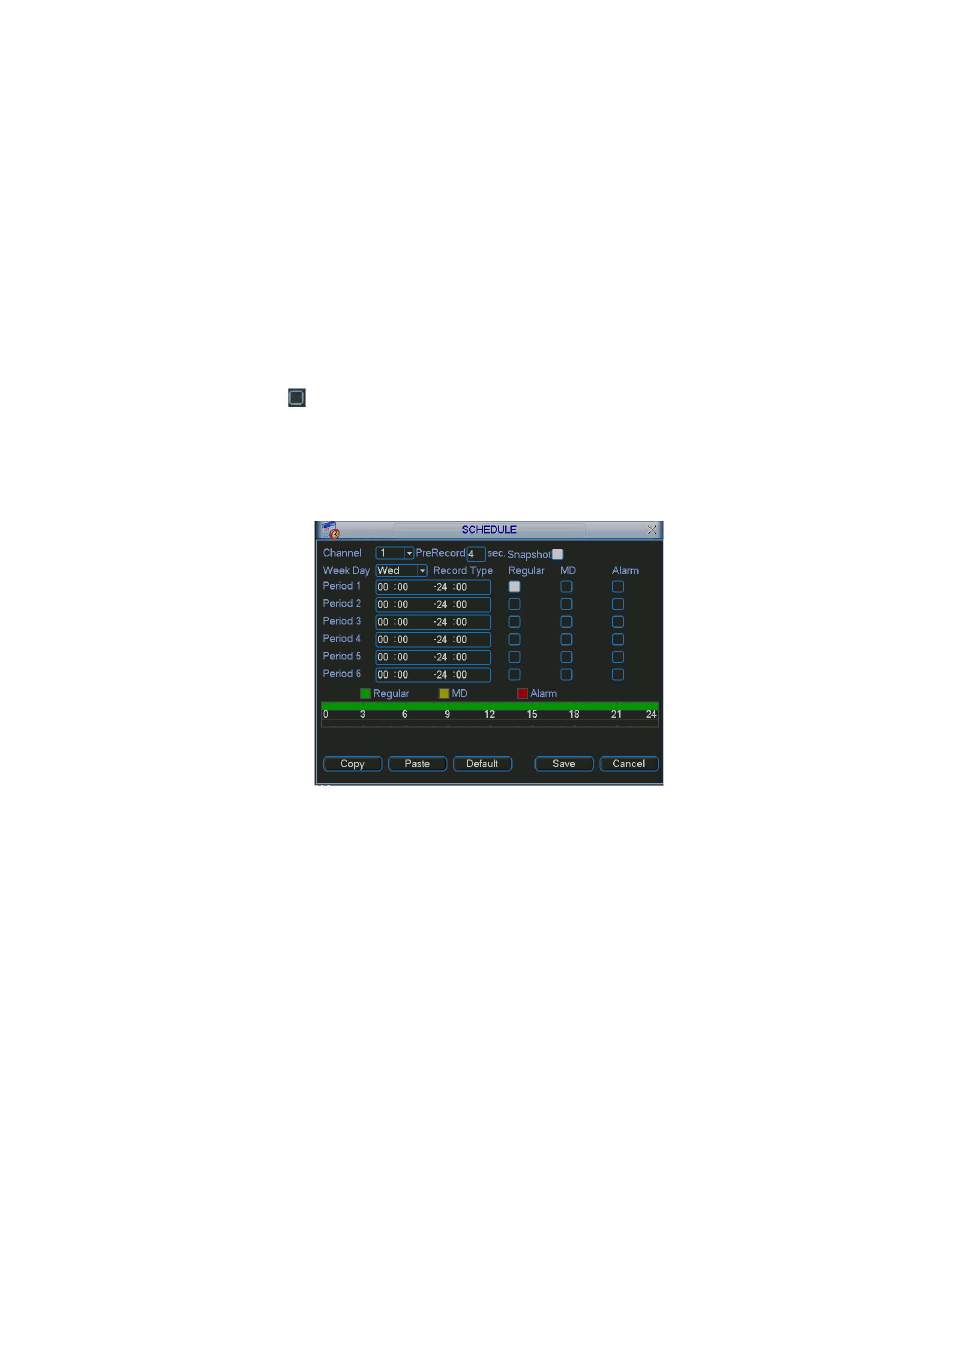
In the main menu, from setting to schedule, you can go to schedule menu. See
X301H301H301H
Figure 4-12
X
.
z
Channel: Please select the channel number first. You can select “all” if you want to set for
the whole channels.
z
Week day: There are eight options: ranges from Saturday to Sunday and all.
z
Pre-record: System can pre-record the video before the event occurs into the file. The value
ranges from 1 to 30 seconds depending on the bit stream.
z
Snapshot: You can enable this function to snapshoot image when alarm occurs.
z
Record types: There are three types: regular, motion detection (MD) and Alarm.
Please highlight icon
to select the corresponding function. After completing all the setups
please click save button, system goes back to the previous menu.
At the bottom of the menu, there are color bars for your reference. Green color stands for
regular recording, yellow color stands for motion detection and red color stands for alarm
recording.
Figure 4-12
4.4.1.1 Quick Setup
This function allows you to copy one channel setup to another. After setting in channel 1, you can
click paste button and turn to channel 2 and then click copy button. You can finish setting for one
channel and then click save button or you can finish all setup and then click save button to
memorize all the settings.
4.4.2 Snapshot
4.4.2.1 Schedule Snapshot
In Encode interface, click snapshot button to input snapshot mode, size, quality and
frequency.
In General interface please input upload interval.
In Schedule interface, please enable snapshot function.
Please refer to the following figure for detailed information. See Figure 4-13