Assemble the fuselage – Great Planes Yak-54 1.60 ARF - GPMA1411 User Manual
Page 11
❏
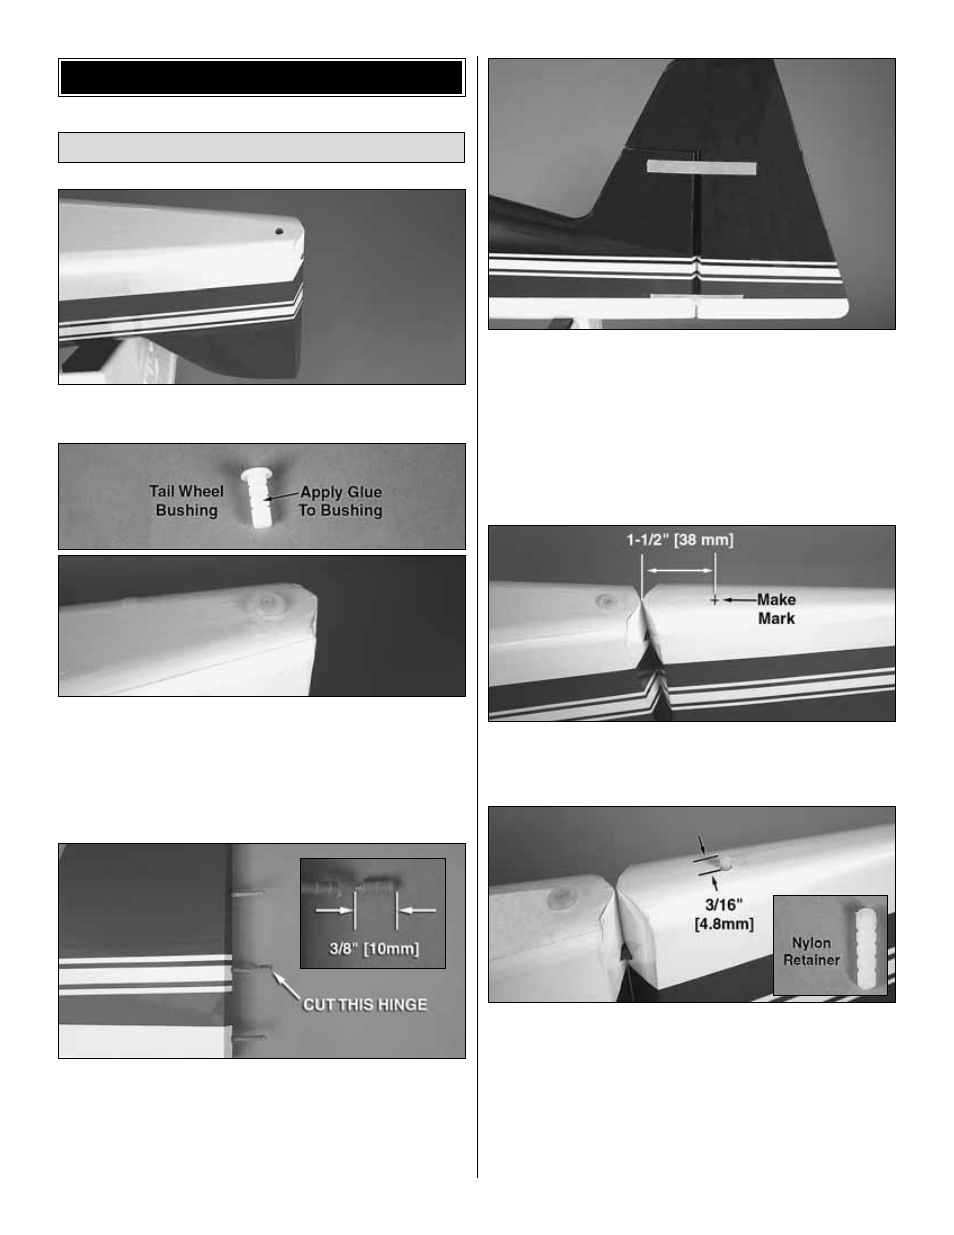
1. Trim the covering from the fuselage for the tail
wheel bushing.
❏
2. Apply CA or epoxy to the bushing and then, insert it
into the hole by gently tapping it into place until fully seated.
Be sure not to get glue into the hole in the bushing.
❏
3. Just as you did with the ailerons, prepare the hinge
point holes in the rudder and fuselage by test fitting the
hinges and enlarging the holes as necessary.
❏
4. Cut away 3/8" [10mm] from one end of the hinge that
will be installed in between the small blue and red stripes (the
hinge that is second from the bottom on the rudder). The end
that has been cut should be the end that gets installed into
the fuselage. Doing so will prevent this hinge from interfering
with the installation of the horizontal stabilizer.
❏
5. Mix up 1/4 oz. [7.5 cc] of 30-minute epoxy. Using a
toothpick or wood scrap, apply epoxy to the inside of each
hinge point hole. Apply a light coat of epoxy to one end of all
the hinges for the rudder. Insert the hinge points into the
holes, wiping away excess epoxy with a paper towel and
denatured alcohol. Be sure the hinges are inserted in the
correct orientation. Apply epoxy to the other ends of the
hinges and slide the rudder into place. Use masking tape to
hold the rudder in position while the epoxy cures.
❏
6. Measure 1-1/2" [38 mm] back from the leading edge
bevel of the rudder and make a mark on the underside
center of the rudder.
❏
7. Use a 5/32" [4 mm] drill bit to make a 1/2" [13 mm] deep
hole at the mark. Insert the nylon retainer into the hole by
tapping it gently, leaving 3/16" [4.8 mm] extending outside the
hole. Align the hole to run parallel with the rudder.
Install the Rudder &Tail Gear
ASSEMBLE THE FUSELAGE
11