Install the throttle servo – Great Planes Seawind .60-.91 ARF - GPMA1360 User Manual
Page 9
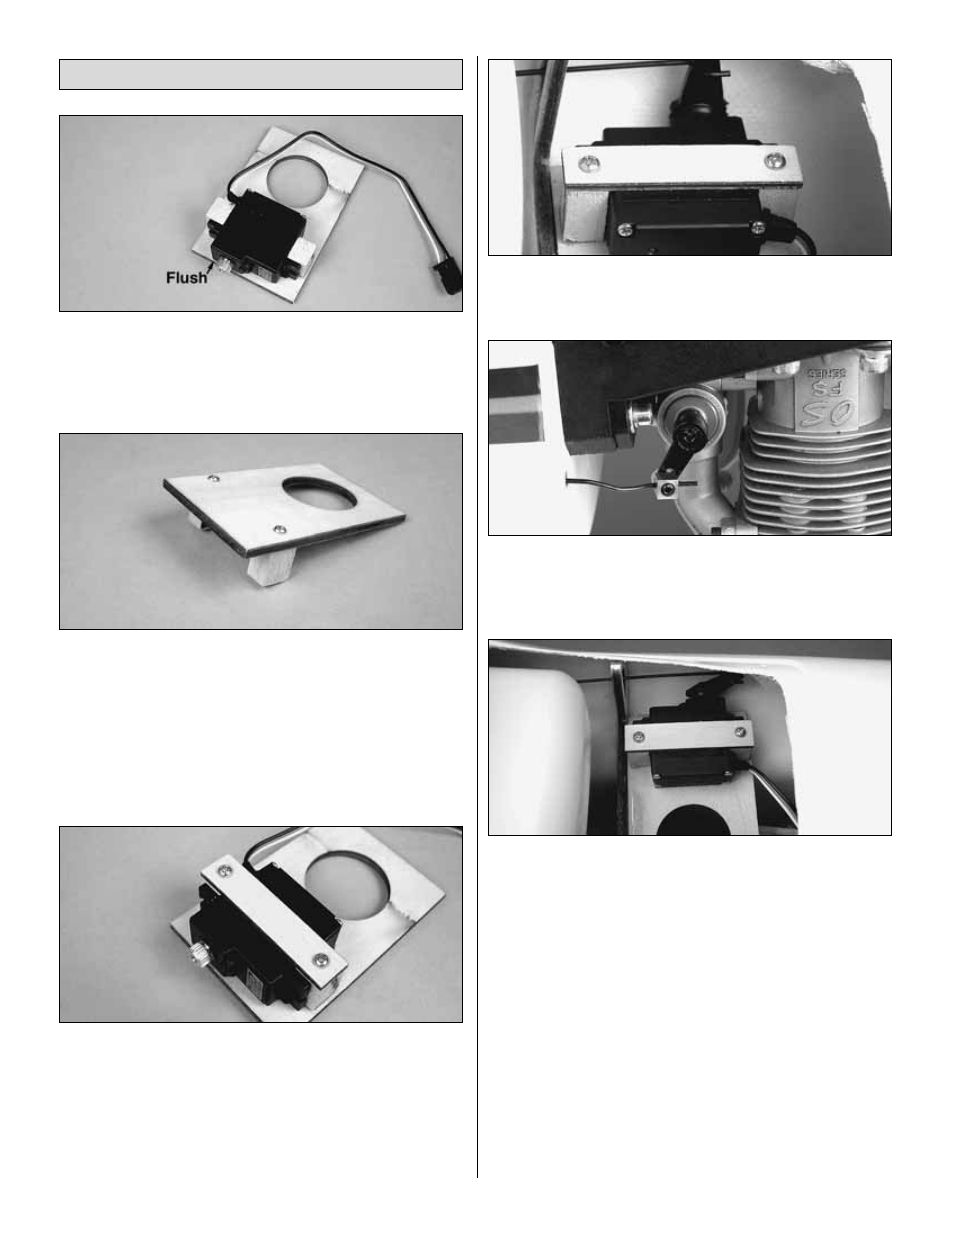
❏
1. Position the Micro servo with the top of the servo case
flush and centered with the edge of the throttle servo tray. Use
epoxy to glue the two hardwood servo tray blocks on each
side of the servo against the servo mounting flanges.
❏
2. Once the glue has cured, remove the servo, turn the
servo tray over and drill a 1/16" [1.6mm] pilot hole through the
servo tray and into the servo tray blocks, centered in the
blocks. Secure the servo tray blocks to the servo tray with two
#2 x 3/8" [9.5mm] self-tapping screws.
❏
3. Attach the 1" x 1" [25.4 x 25.4mm] double-sided tape to
the servo tray, between the servo tray blocks. Then attach the
throttle servo to the tape.
❏
4. Position the plywood servo retainer over the servo and
drill a 1/16" [1.6mm] pilot hole at each end through the retainer
and into the servo tray block.
❏
5. Connect a 36" [914mm] servo extension to the throttle
servo. Tie the string in the fuel tank compartment to the end of
the extension and pull the extension through the tube and into
the fuselage. Tape or heat-shrink the leads together.
❏
6. Insert the throttle pushrod in the pushrod tube. Insert the
Z-Bend in the throttle servo horn. Position the throttle servo in
the fuel tank compartment.
❏
7. Use a pliers to bend the throttle pushrod so that it can be
inserted in the screw-lock pushrod connector. Cut off the
excess pushrod and secure the pushrod in the screw-lock
pushrod connector with a 4-40 set screw.
❏
8. Use epoxy to glue the throttle servo tray in the fuel
tank compartment.
❏
9. Temporarily plug the throttle servo and receiver battery
into your receiver. Adjust the throttle pushrod so that the
throttle operates correctly. We normally set up our throttle so
that the engine can be stopped by moving a switch, causing
the throttle to close completely.
Install the Throttle Servo
9