Install the fuel tank – Great Planes Seawind .60-.91 ARF - GPMA1360 User Manual
Page 8
❏
2. Drill a 3/16" [4.8mm] hole through the front of the firewall.
Roughen the outer pushrod with sandpaper. Insert the outer
pushrod tube through the firewall and the former so that it
protrudes through the first former by approximately 1"
[25.4mm]. Trim the excess flush with the front of the firewall.
❏
3. Install a screw-lock pushrod connector on the throttle
arm and secure it with a nylon keeper.
❏
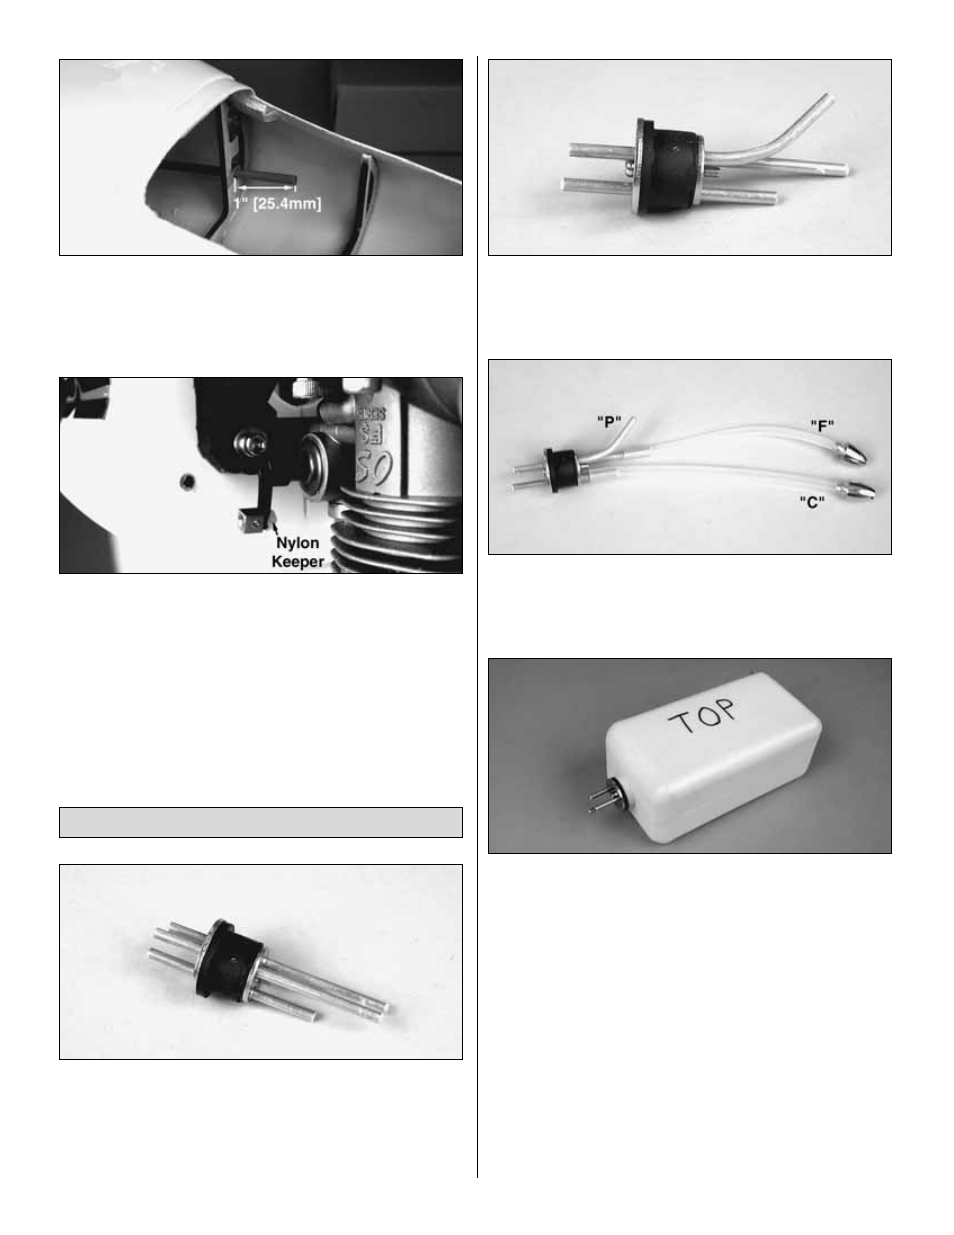
1. Remove the components from inside the fuel tank. Install
the three aluminum tubes in the fuel tank stopper. You will
need to use a hobby knife to open the third hole in the rubber
stopper. Slide the small metal plate over the tubes and thread
the screw into the plate until it makes contact with the back of
the rubber stopper. Do not tighten the screw.
❏
2. Carefully bend one of the long tubes so that it will angle
up toward the top of the fuel tank when inserted. Do not kink
the tube. Mark a “P” on the outside of the front plate to
designate pressure.
❏
3. Install a piece of fuel tubing on each of the other two
tubes. Attach a clunk on the ends of the tubes. Mark a “C” on
the outside of the front plate by the short tube, designating
carb, and an “F” by the remaining tube, designating fill.
❏
4. Insert the tank stopper in the fuel tank. Check that the
two clunks are able to move freely when the stopper is
inserted completely. Then, tighten the screw in the stopper to
seal the fuel tank. Write “top” on the side of the fuel tank where
the pressure tube sticks up.
❏
5. Install three pieces of fuel line on the three aluminum fuel
tubes in the front of the fuel tank. Insert the fuel tank into the
fuel tank compartment, routing the fuel line out of the firewall.
Make sure the top of the tank faces upward.
❏
6. Connect the correct fuel line to the carburetor and the
fuel line plug to the fill line. The pressure line will be connected
to the muffler once the cowl has been installed.
Install the Fuel Tank
8