Install the rudder install the stabilizer – Great Planes Seawind .60-.91 ARF - GPMA1360 User Manual
Page 16
❏
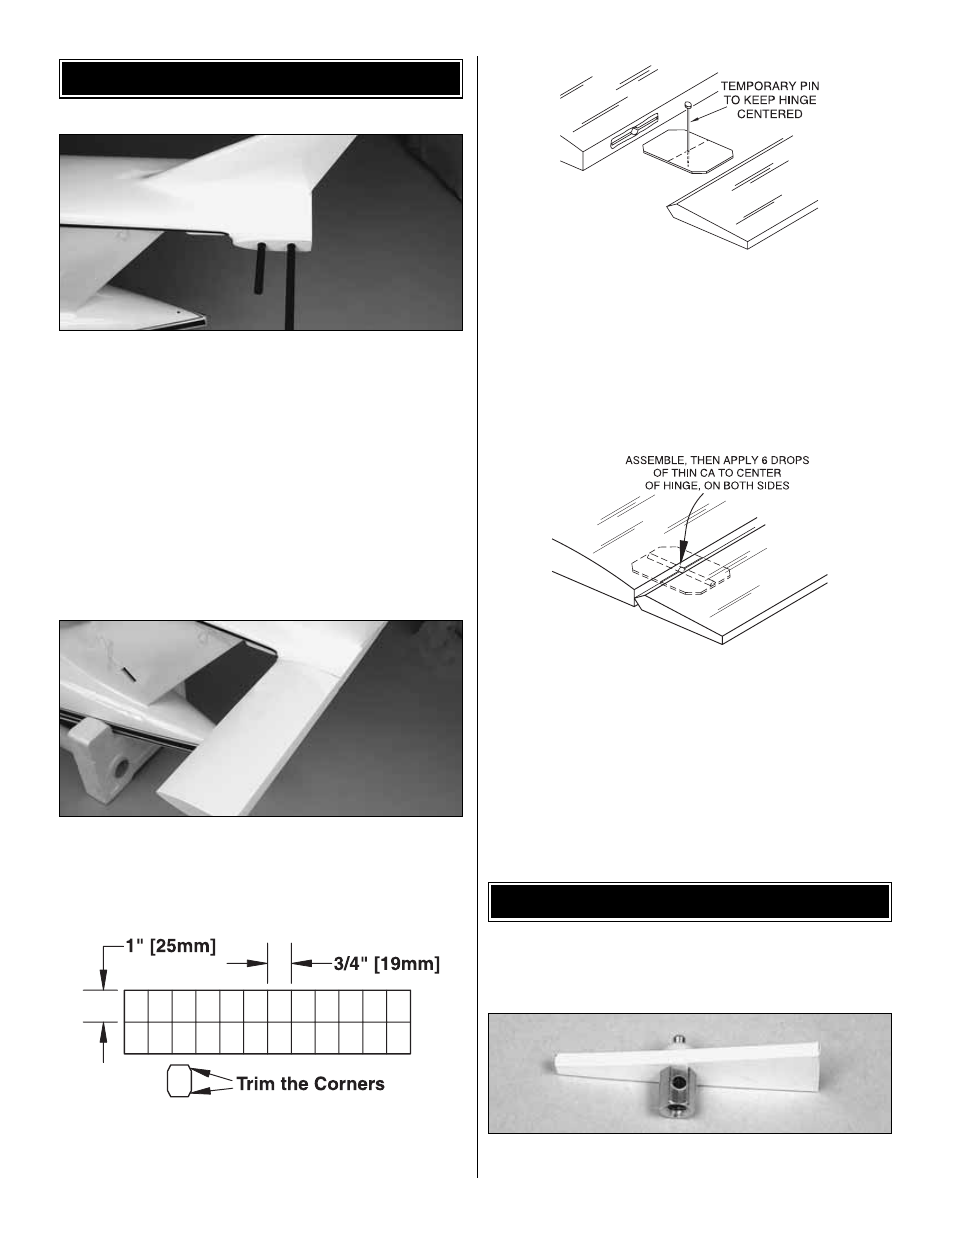
1. Install the horizontal stabilizer tubes in the tail. The short
tube is installed in the forward hole.
❏
2. Test fit the two stabilizer halves on the tubes. Make sure
the stabilizer halves fit tightly against the tail. Remove the
stabilizer halves and the tubes. Use sandpaper to roughen the
area where the stabilizer meets the tail and the two tubes.
Clean the area with denatured alcohol.
❏
3. Use 30-minute epoxy to glue the two stabilizer halves to
the tail and the carbon tubes.
❏
4. Cut the four 3/4" x 1" [19 x 25.4mm] hinges for the
stabilizer from the supplied 2" x 9" [51 x 228mm] hinge
material. Trim the corners of each hinge.
❏
5. To keep the CA hinges centered in the control surfaces
while installing them, insert a T-pin in the center of the
hinge. Insert the hinges in the stabilizer and install the
elevator. Remove the T-pins and adjust the control surface
so that the leading edge of the elevator is against the trailing
edge of the stabilizer.
Note: Make sure the hardwood block in the elevator is on the
bottom in-line with the elevator servo opening.
❏
6. Add 6 drops of thin CA to the center of all the hinges on
both the top and bottom.
Caution: Do not use accelerator on any of the hinges. Do
not glue the hinges with anything but thin CA and do not
attempt to glue 1/2 of the hinge at a time with medium or
thick CA. They will not be properly secured and the
controls could separate while the model is in flight.
Note: If you will be flying from land only, perform step 3 to
install the rudder.
❏
1. Use a nylon keeper to secure the screw-lock pushrod
connector on the triangular rudder base.
INSTALL THE RUDDER
INSTALL THE STABILIZER
16