Great Planes Seawind .60-.91 ARF - GPMA1360 User Manual
Page 7
❏
1. Remove the two styrofoam airplane stand ends and the
two 1-5/8" x 27-1/2" [41 x 660mm] plastic tubes. Slide the
tubes into the two ends.
We are going to install the engine in the upright position first
to prevent damaging other components of the plane while
maneuvering the plane around.
❏
1. Cut the “spreader bar” from the supplied Great Planes
engine mount. Use a hobby knife to remove any flashing left
over from the molding process so that the halves fit
together well.
❏
2. Temporarily attach the engine mount upright to the
firewall using four 8-32 x 1" [4 x 25.4mm] socket-head cap
screws, four #8 flat washers and four #8 lock washers.
❏
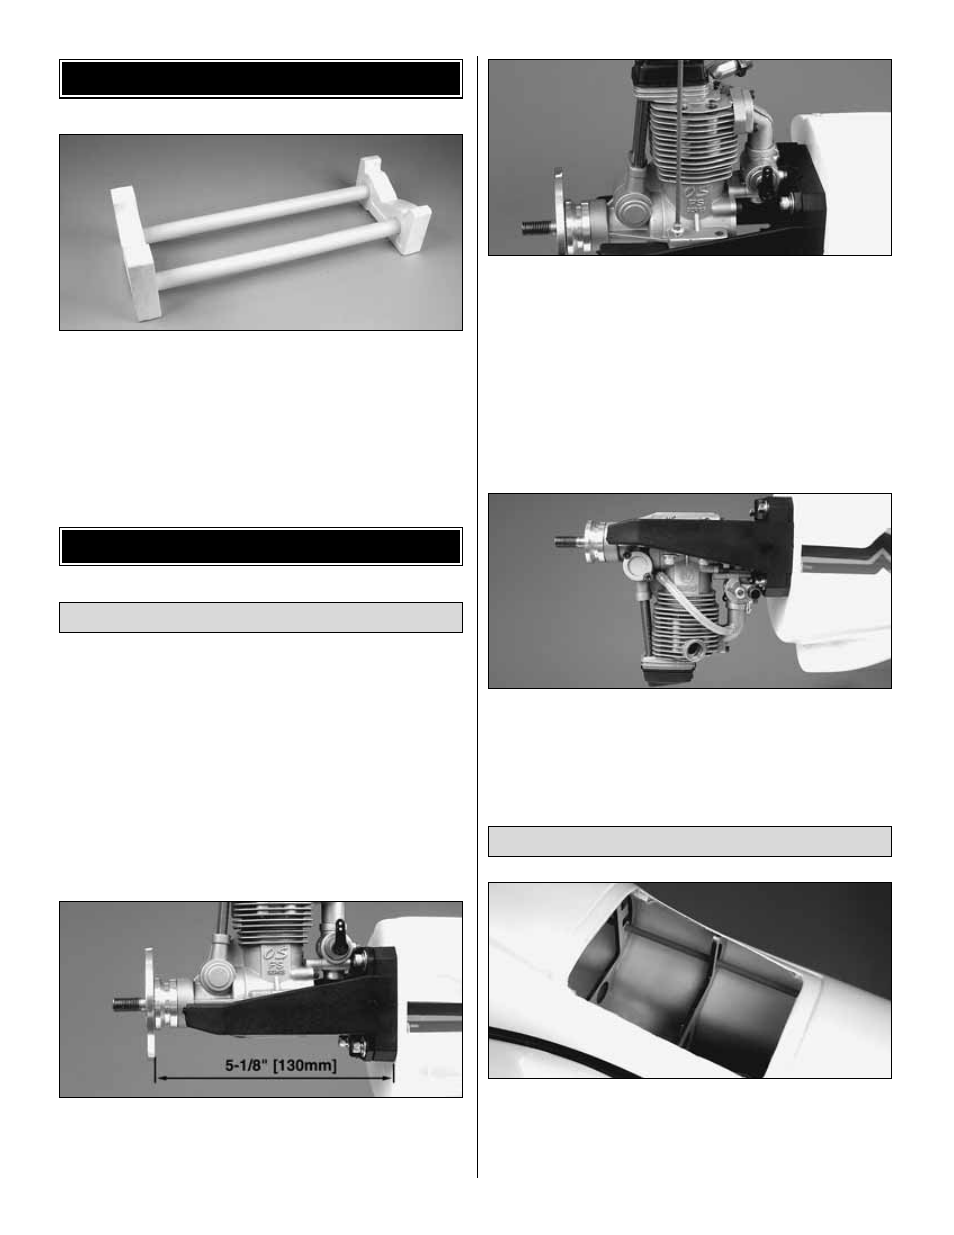
3. Position the engine on the engine mount so that the front
of the drive washer (or back of the spinner) is 5-1/8" [130mm]
from the firewall. Also make sure the engine is centered on the
engine mount.
❏
4. Use a Great Planes Dead Center
™
hole locator to mark
on the engine mount the four engine mounting holes.
❏
5. Remove the engine mount and use a drill press, if you
have one, to drill a 9/64" [3.5mm] hole at each mark,
perpendicular to the engine mount rails. Then, tap all four
holes with an 8-32 [6mm] tap.
❏
6. Using four 8-32 x 1" [6 x 25.4mm] socket-head cap
screws, four #8 lock washers and four #8 flat washers, install
the engine on the engine mount.
❏
7. Remove the four 8-32 [4mm] socket-head cap screws
from the engine mount and rotate the mount 180 degrees so
that the engine is mounted inverted. Be sure to use thread-
lock on the 8-32 [4mm] socket-head cap screws when
reinstalling them.
❏
1. Insert the 11-3/4" [298mm] gray outer pushrod tube in
the fuel tank compartment through the formers as shown.
Note the location that the pushrod tube hits the back of the
firewall. This will give you an idea where the pushrod must exit
the firewall to allow smooth operation.
Install the Throttle Pushrod
Install the Engine
ENGINE INSTALLATION
ASSEMBLE THE AIRPLANE STAND
7