Great Planes PT-E Trainer Electric Kit - GPMA0110 User Manual
Page 9
D 11. Temporarily mount the 1/32" ply hatch locking
tab using a #22 x 3/8" screw and the #2 washer,
and cut off the portion of the screw that protrudes
into the battery compartment.
D 12. Check the operation of the hatch Sand the edges
of the hatch slightly to provide a close but non-bind-
ing fit.
D 13. Disassemble the above and set the hatch, hinge,
locking tab and screws aside until later.
PREPARE F- 1
NOTE: The PT-Electric has a "fixed" (non-steering) nose
gear which you will rigidly attach to Former F-l. At first
you may be thinking that it will not be possible to steer
the airplane on the ground with this setup We just want
to assure you at this time that it actually does steer quite
well' Because there is very little weight on the nose wheel,
the wind moving past the tail of the airplane enables the
rudder to turn the airplane almost as if the nose wheel
were steerable.
D 1. Find the die- cut 1/8" ply former F-l, two nylon
landing gear brackets, four #2 x 3/8" screws, the
1/8" wire nose gear, and the two 1/32" x 1/4" x 3/4"
ply pieces which you previously cut.
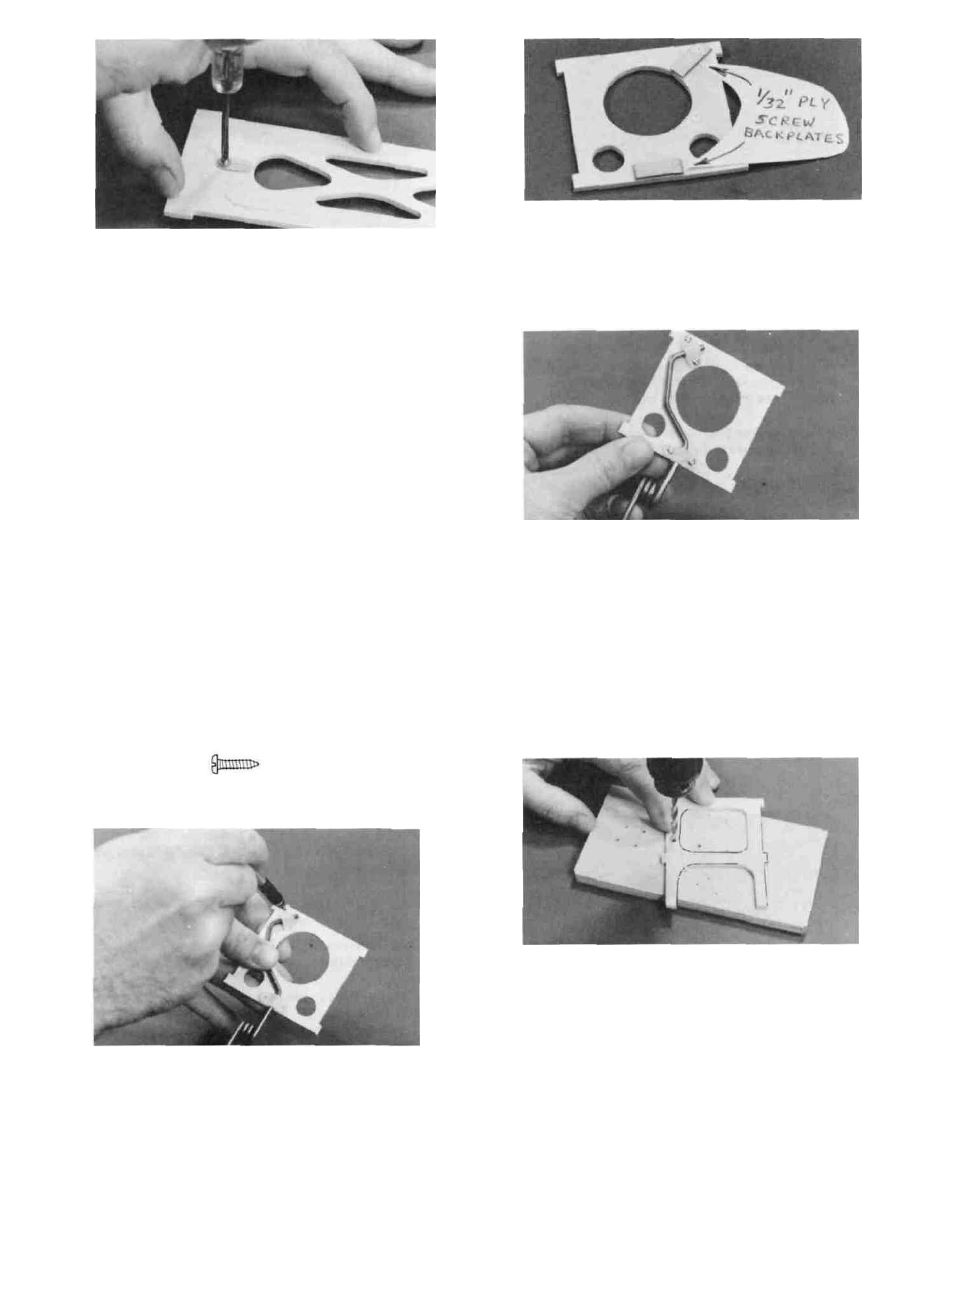
D 4. Glue the 1/32" ply screw backplates to the back
of F-l, using the pilot holes you previously drilled
to determine where to locate the ply backplates.
D 5. Now re-drill the pilot holes.
D 6. Temporarily mount the nose gear to F-l using the
nylon brackets and screws.
D 7 Disassemble the above parts, and set the nose
gear, brackets and screws aside until later.
PREPARE F-2
D 1. Find the die cut ply former F-2.
D 2. From the detail drawing of F-2 determine the lo-
cation of the on-off switch pushrod.
#2x3/8" SCREW
D 2. Study the detail drawing of F-l on the plan, and
position the nose gear and nylon brackets While
holding them in place, mark the locations of the
screw holes.
D 3. Drill an 11/64" hole in F-2 at the above location.
PREPARE F-4 AND F-5
D 1. Find the die-cut 3/32" balsa formers F-4 and F-5,
and the two 3/32" x 3/8" x 17-7/8" balsa sticks
D 2. Cut a 9-1/8" length from each of the 3/32" x 3/8"
x 17-7/8" sticks, mark them "Wing Saddle Dou-
bler", and set them aside.
D 3. Drill 1/16" pilot holes at the marked locations.
9