1/32" ply cutting pattern – Great Planes PT-E Trainer Electric Kit - GPMA0110 User Manual
Page 8
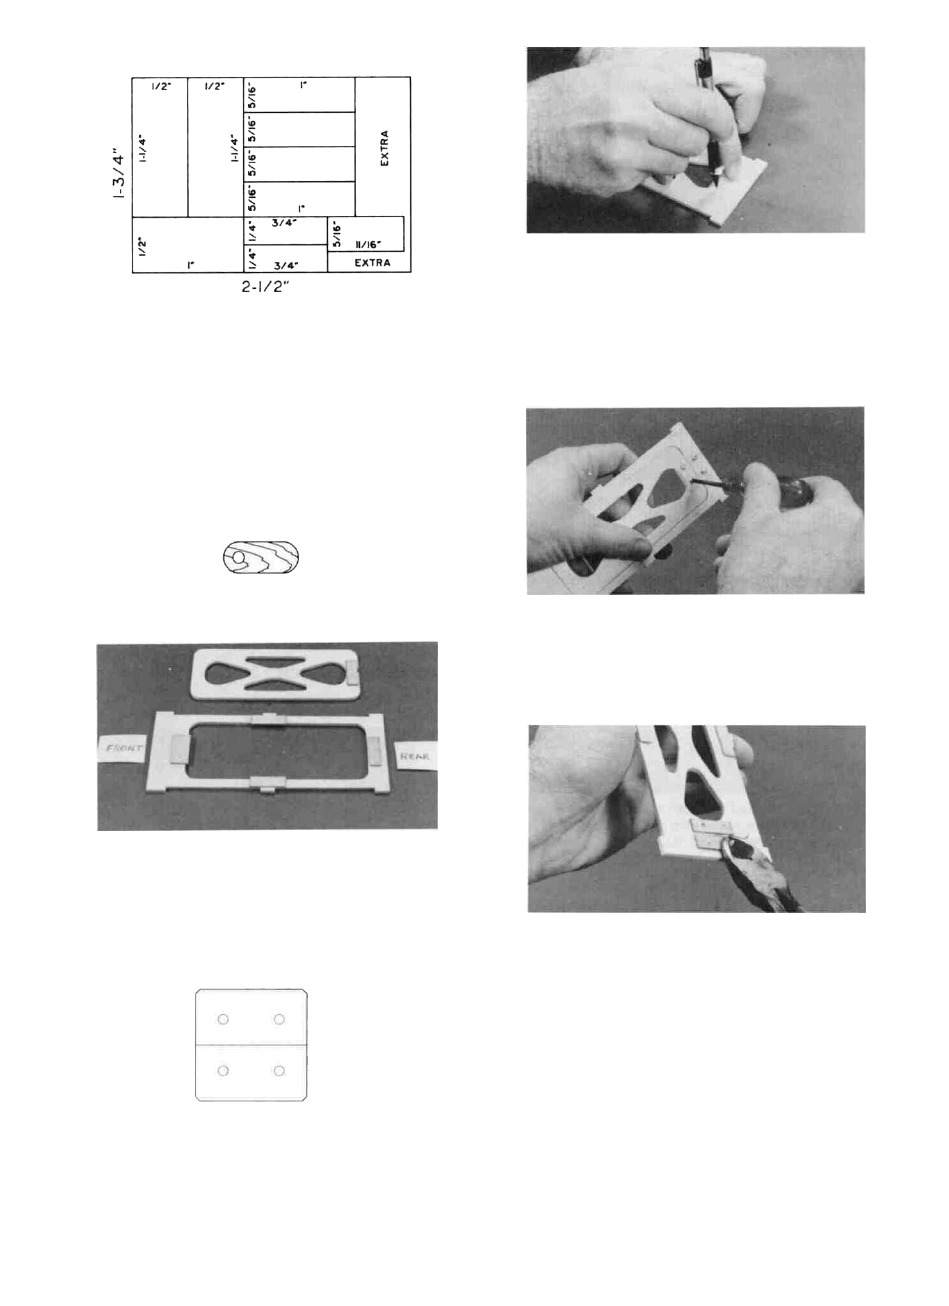
1/32" PLY CUTTING PATTERN
D 6. Lay the 1" hinge in place on the hatch and fuse
bottom, and mark the locations of the screw holes.
D 7. Drill 1/16" pilot holes at the marked locations.
D 2. Using the pattern given here, mark the 1/32" x
1-3/4" x 2" ply plate for cutting. Cut out the small
pieces with a scissors or Xacto knife. The two 1-1/4"
x 1/2" pieces are the wing plates. Set them aside
until later. The two 1/4" x 3/4" pieces will be used
in the "PREPARE F-l" section.
D 3. From the 1/32" x 5/16" x 11/16" ply piece that you
previously cut, make the hatch locking tab accord-
ing to the following sketch: (be sure to drill into a
wood backing to prevent splitting).
HATCH LOCKING TAB
1/32 PLY
D 8. Attach the hinge with four #2 x 3/8" screws.
D 4. Using thin CA, Glue the remaining 1/32" ply pieces
to the 1/8" ply hatch and fuse bottom in the locations
shown on the plan. Note that the two side pieces and
the front piece extend 1/16" into the hatch opening.
D 5. Cut off a 1" length of hinge strip material and
drill four 3/32" holes as shown in the following
sketch.
D 9. Cut or file off the portion of the screws that would
protrude into the battery compartment. NOTE: Pro-
tect your eyes from flying metal when cutting off
screws.
D 10. Drill a 1/16" pilot hole in the fuse bottom for the
hatch locking tab, at the location shown on the plan.
HATCH HINGE
8