Great Planes PT-E Trainer Electric Kit - GPMA0110 User Manual
Page 25
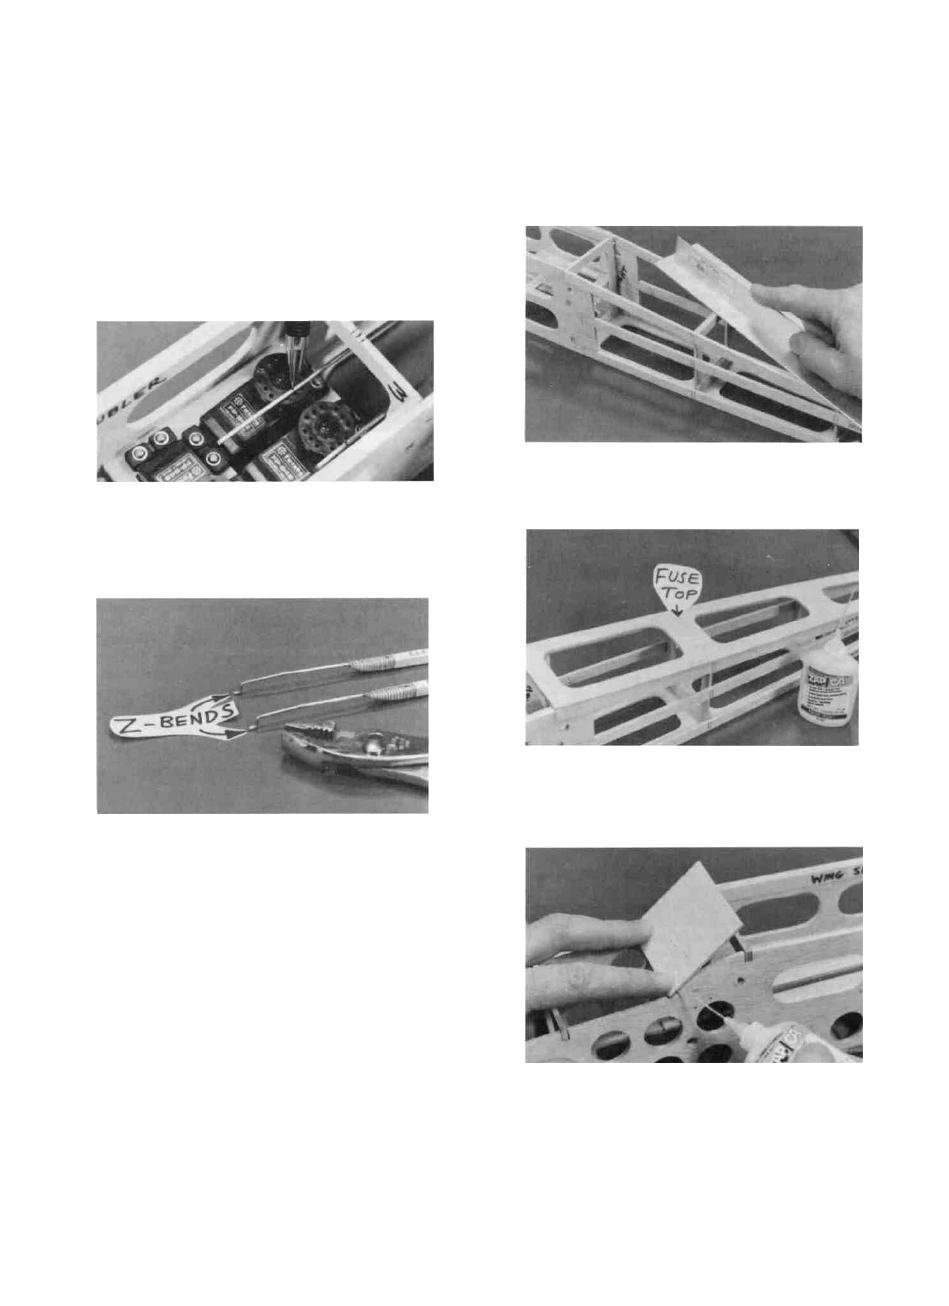
COMPLETING THE FUSELAGE
INSTALL PUSHRODS
D 1. Remove the nylon clevises from the pushrods.
D 2. Insert the pushrods, threaded end first, through
the openings in F-3, F-4, F-5 and F-6, then out
through the pushrod exit slots you previously cut.
Note: You may have to bend the wire slightly to
allow it to pass out through the exit slots. If so,
straighten the wire after it is out.
D 3. Screw the nylon clevises back onto the threaded
rods, then snap the clevises onto the nylon horns on
the rudder and elevator.
D 4. With the elevator, rudder and servos in the neutral
position, mark the front of the pushrod wires where
they cross the hole in the servo output wheels or
arms.
D 1. Remove the following items from the fuselage:
F-1B, Motor, Switch harness, receiver, radio switch,
radio battery, servos, pushrods, horns and hinges.
Note: If it seems strange to you to now remove these
items, please be assured that this will make it much
easier to perform the next steps, and it will be very
easy and fast to re-install these items later.
D 2. Carefully sand the top edges of F-3, F-4, F-5 and
F-6 until they are even with the top longerons, being
careful not to gouge into the upper longerons.
D 3. Trial fit the die-cut 3 32" balsa fuse top. It fits
against the front of the stab, and extends forward to
the front edge of F-3. Glue the fuse top in place.
D 5. Remove the clevises and remove the pushrods from
the fuselage and make "Z"-bends* in the wires at
the marks you just made.
*NOTE: You can make a "Z"-Bend with a regular pliers
(practice on a scrap first), or you may use a special "Z"-bend
pliers (available through your hobby shop). There are a
couple of alternatives to making Z-bends which you may
want to consider: 1. Use a solder-on clevis on the servo
end of the pushrod or 2. Use a Dubro No. 121 E-Z Connec-
tor to attach the pushrod to the servo arm.
D 6. Cut off the excess wire.
D 4. Find the 3 32" x 2-1/4" x 2-3'4" balsa windshield
and glue it to the fuse sides at the bottom front cor-
ners, using thin CA. Allow to harden.
25