Fuselage – Great Planes PT-E Trainer Electric Kit - GPMA0110 User Manual
Page 7
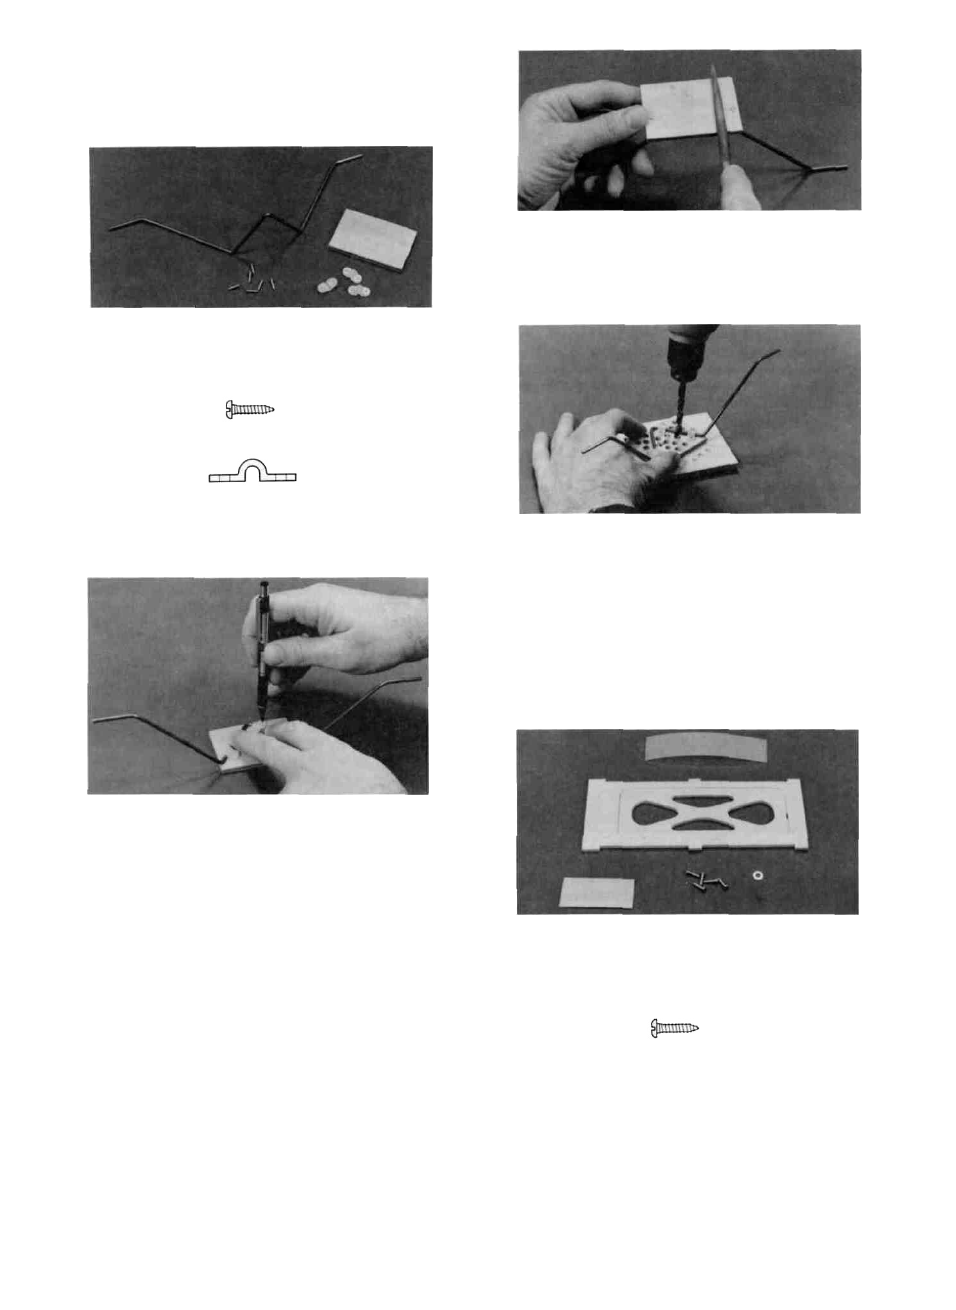
FUSELAGE
PREPARE THE LANDING GEAR PLATE
D 5. File the screws off flush with the surface of the
landing gear plate to prevent damage to the battery
pack.
D 1. Find the following items: 3/16" x 1-27/32" x 2-3/4"
plywood landing gear plate, three nylon landing gear
brackets, six #2 x 3/8" screws, and the 1/8" wire
main landing gear.
# 2 x 3 / 8 " S C R E W
LANDING GEAR STRAP
(NYLON)
D 2. Hold the landing gear on the ply plate in the
position shown on the plan and put the nylon brac-
kets in place. While holding, use a pencil down
through the bracket holes to mark the screw hole
locations.
D 3. Drill 1/16" pilot holes at the above locations.
TIP: Anytime you drill a hole in wood, use a T-pin to start
the hole (for accuracy), and use a scrap wood backing un-
derneath. This will prevent splitting out the back side of
the wood and will protect your work surface. The landing
gear screws will go in easier if you lightly scrape the screws
on a bar of soap to lubricate the threads.
D 4. Temporarily attach the landing gear to the ply
plate using the #2 x 3/8" screws and nylon straps.
D 6. Drill several 1/4" holes in the landing gear plate
as shown on the plan. These holes are for lightness,
and provide cooling air exit for the battery compart-
ment.
D 7. Remove the landing gear and sand the ply plate
smooth. Set the 6 screws aside in a bag marked "LG
SCREWS".
PREPARE THE HATCH
D 1. Find the following items 4 length of hinge strip
material, Die-cut 1/8" ply fuse bottom and hatch,
1/32" x 1- 3/4" x 2" ply, five #2 x 3/8" screws, and
the #2 washer.
# 2 x 3 / 8 " SCREW
7