Great Planes PT-E Trainer Electric Kit - GPMA0110 User Manual
Page 11
D 12. Lay the two fuse sides flat on the table, with the
bottom edges touching. Then, using a straightedge
and a pen, extend the former location lines onto the
fuse side that does not have them.
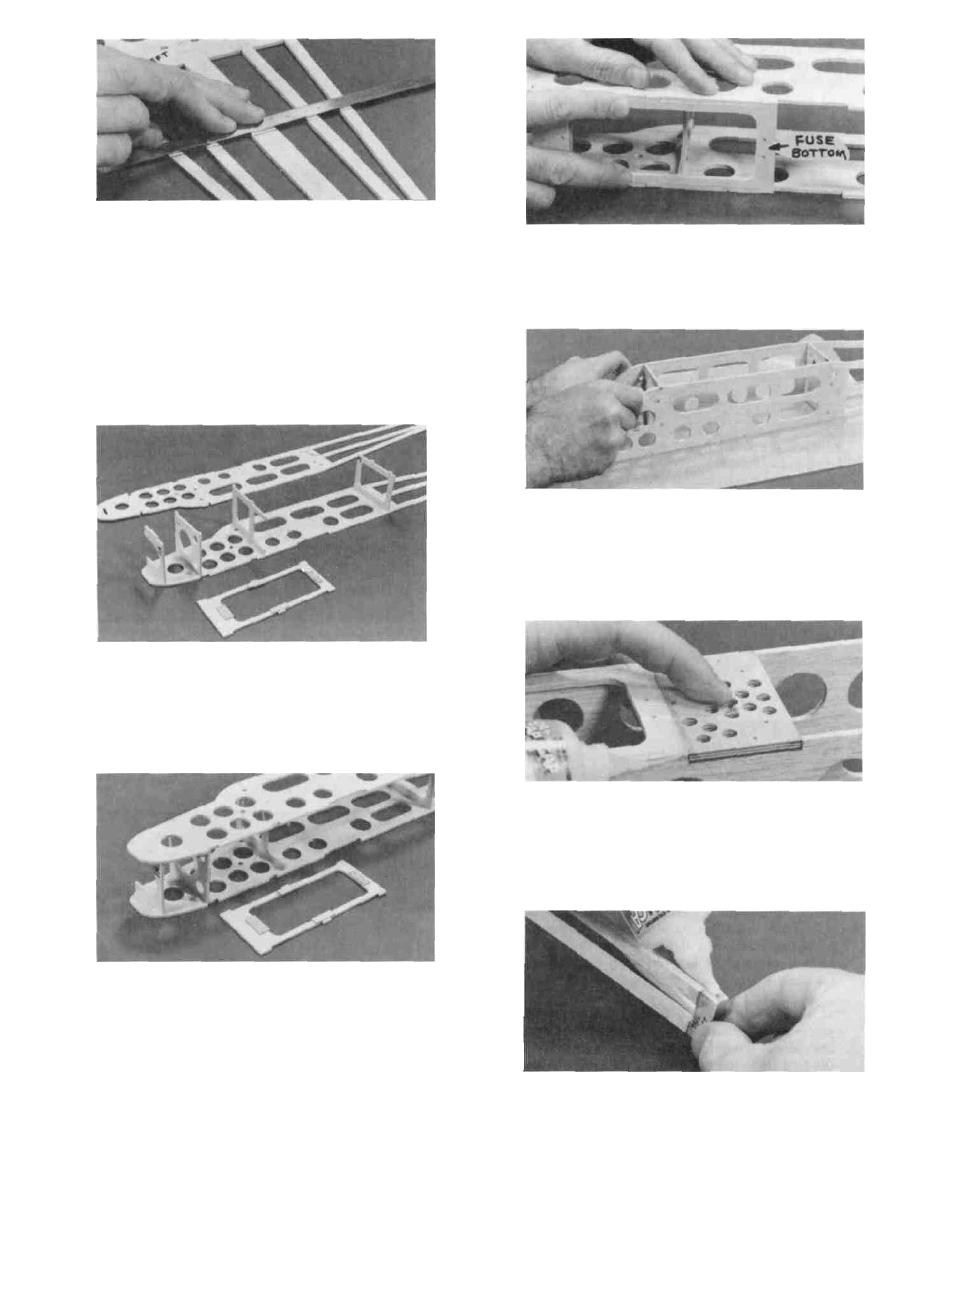
ASSEMBLE THE FUSELAGE
D 4. Press the 1/8" ply fuse bottom in place. Notice
that the interlocking parts automatically square-up
and align the front portion of the fuselage.
D 1. To begin, you'll need the following parts: The two
fuse sides you just built, Formers F-1A, F-l, F-2, F-3,
and the 1/8" ply fuse bottom.
D 2. Lay one of the fuse sides down flat on the table.
Insert the tabs of formers F-1A, F-l, F-2 and F-3 into
the slots in the fuse side. Check the plans and make
sure the formers are right side up. (Do not glue).
D 3. Lay the left fuse side in place on the formers,
working the tabs into the notches. (Do not glue).
D 5. Lay a piece of waxed paper on your flat table, then
set the fuse assembly upright on the waxed paper.
Make sure that all tabs are fully seated into the
slots and notches. While holding the assembly to-
gether, apply thin CA glue to all joints.
D 6. Turn the fuse upside down, and glue the 3/16" ply
landing gear plate in place in the notches in the
fuse sides (sand the ply plate, if necessary, for a good
fit). Add thick CA glue to the joint between the LG
plate and the 1/8" ply fuse bottom.
D 7. Turn the fuselage right side up, pull the tail posts
together, and apply thin CA glue to the tail posts.
11