Wing "a – Great Planes PT-40 Kit (original) User Manual
Page 6
GET READY TO BUILD
D 1. Unroll the plan sheet. Re- roll it inside out to
make it lie flat. Note: The fuselage plan is printed
on Side 1 and the wing plan is printed on Side 2.
D 3. Punch out all the die cut parts excepting the
sheets stamped "A" and "B". If a part does not come
out easily, cut around it with an X-Acto knife. Mark
the die cut parts before punching them out. Also
save any scrap wood until you are completely finished
building. You will use some scrap to build the model.
You will find that scrap wood is quite handy to use
for lots of things, like spreading epoxy for instance.
D 2. As you remove all parts from the box, use a felt
tip pen to write the name or number on each part.
To identify the parts, compare them with the plans
and with the die-cut parts patterns shown here:
DIE CUT PARTS PATTERNS
«
PT40W07 13 PER KIT WING RIBS 3/32x 3x12 BALSA
PT40F07 I PER KIT 1/8 x 3-7/8 x 12 3/4 PLY
FUSELAGE BOTTOM
C3
SERVO TRAY
PT40FIO 2 PER KIT 1/8 x 3-7/8 x 13-1/2 PLY
LOCKPLATES |
\ ^ STAB SADDLE DOUBLER /
F-l
J
1
PT40F05 I PER KIT 1/8 x 3-7/8 x 9-3/4 PLY PT40W15 1 PER KIT____1/8 x 4-1/4 x 11-1/2 PLY
D 4. Separate the p a r t s into four groups: 1-
FUSELAGE, 2- WING, 3- FIN & STABILIZER, 4-
HARDWARE
IMPORTANT: READ THIS BEFORE
STARTING TO BUILD
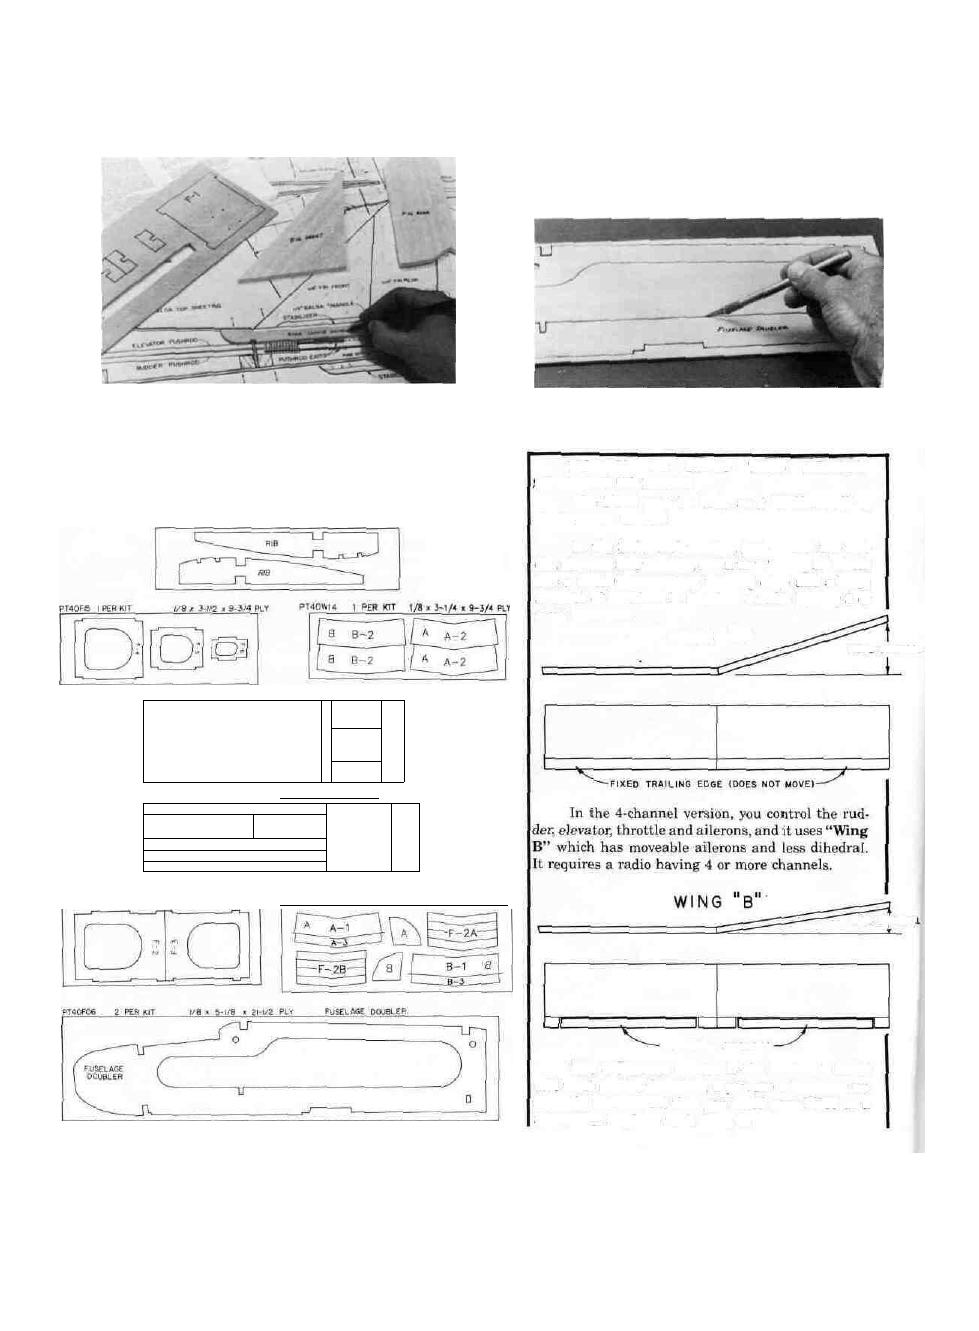
The PT40 may be built as a "3-Channel" or
"4-Channel" trainer.
In the 3-channel version, you control the rud-
der, elevator and throttle, and it uses "Wing A" which
has a fixed (non-moving) trailing edge and a large
amount of dihedral. It requires a radio having 3 or
more channels.
WING "A"
MORE DIHEDRAL
The 3-Channel version is the easiest to build
and most stable; therefore, if you are a beginner we
strongly recommend that you build your PT40 as a
3-Channel airplane with Wing A.
MOVEABLE AILERONS
LESS DIHEDRAL
i