Great Planes PT-40 Kit (original) User Manual
Page 34
D 21 By turning the clevises on the threaded ends
of the pushrods, adjust the elevator and rudder to
the neutral (not up or down) positions Also (for Wing
B) adjust the aileron pushrod clevises so the bottom
of the ailerons are even with the flat bottom of the
wing
Note The throttle pushrod should already be
properly adjusted according to "PUSHRODS", Step
35
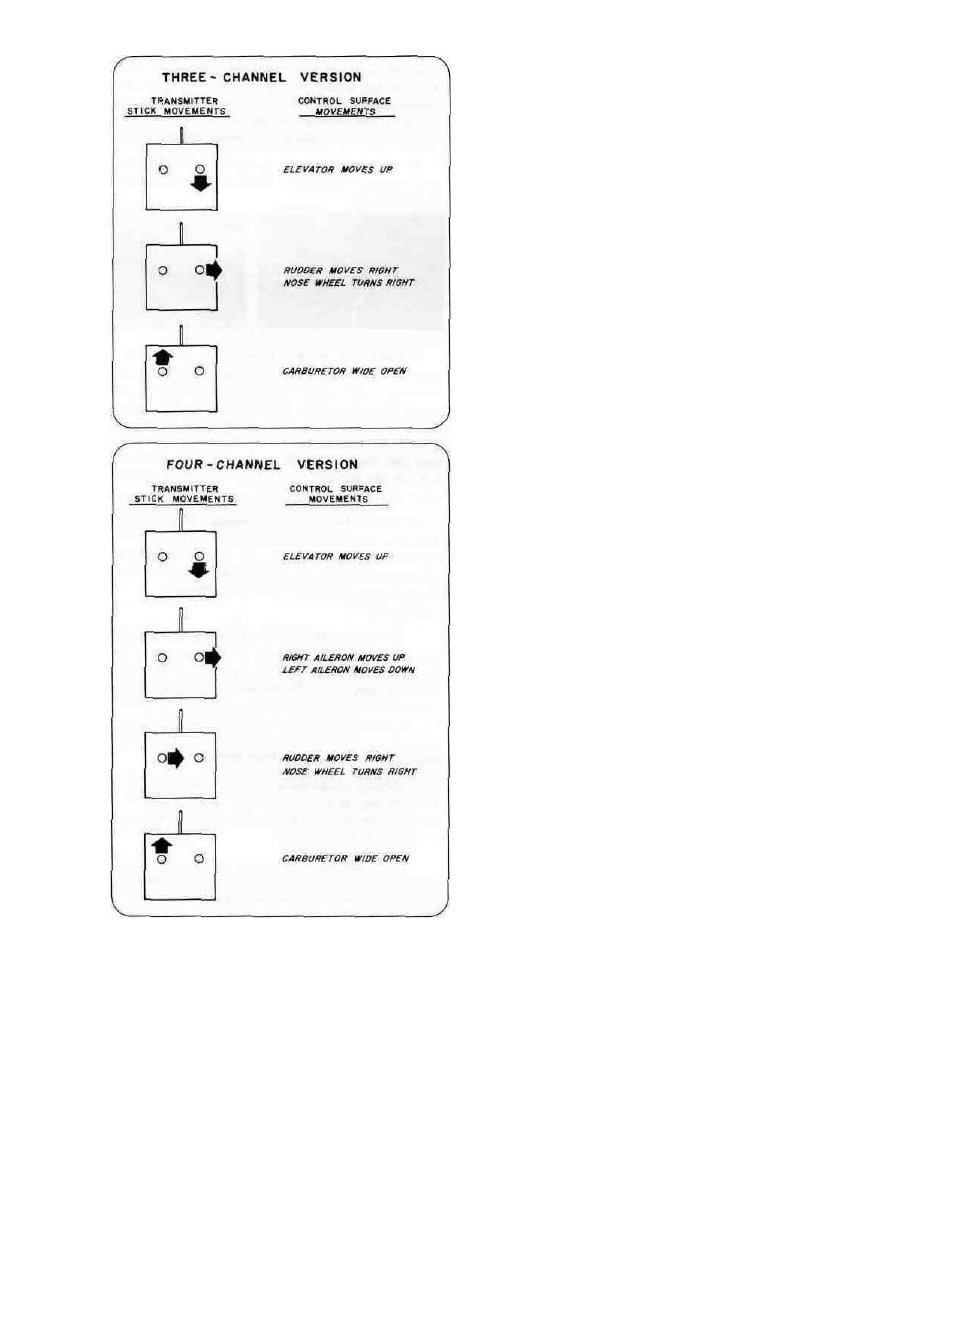
D 22 Adjust the pushrod hookups so the elevator,
rudder (and ailerons) move the correct amounts, as 34
given below, with full movement of the transmitter
sticks.
ELEVATOR = 3/16" up and 3/16" down
RUDDER = 3/16" right and 3/16" left
AILERONS = 7/16" up and 1/8" to 1/4" down
D 23 Write your name and address plainly on a
piece of paper and glue the paper inside the fuselage
onto one of the fuse sides If you lose your model the
finder will know who to contact
D 24. Temporarily attach the wing with 10 or 12
good #64 rubber bands
REMEMBER Proper installation of all R/C
components and accessories is crucial to the safe and
proper operation of your model, and that improper
or faulty installation of even one component or acces-
sory may result in damage or destruction of the entire
model, as well as cause serious personal injury or
property damage Therefore, if you are confused or
uncertain about any of the above final assembly
steps, please ask an experienced model builder for
assistance
BALANCE YOUR MODEL
NOTE: THIS STEP IS VERY IMPORTANT,
AND MUST NOT BE OMITTED!
D 1 With the wing rubber banded to the fuselage,
all parts of the model installed, and an empty fuel
tank, gently turn the model upside down.
D 2 By feel, determine the location of the center
of the main wing spar in the vicinity of the 2nd wing
rib (where the bottom center section balsa sheeting
ends).
D 3 From the center of the main wing spar, measure
exactly 5/8" back (toward the tail) and make a mark
Do this on both sides of the wing bottom Note For
ease of checking the balance, you may stick a
thumbtack into the bottom wing sheeting at these
balance point marks.
D 4 Turn the fuselage right side up, place your
index fingers under the wing and lift the airplane
at the balance point If the tail drops when you lift,
the model is "tail heavy ' and you must glue weights
into the nose of the model, either in the engine area
or fuel tank compartment until it balances right on
the balance point On the other hand, if the nose of
the model drops when lifting, the model is "nose
heavy" and you must glue a small amount of weight
to the tail (under the stab, near the fuse) until it
balances right on the balance point
FLYING
IMPORTANT: Regardless who you are or
where you live, we strongly urge you to seek the
assistance of a competent, experienced R/C pilot to
check your model for airworthiness AND to teach you
how to fly No matter how stable or "forgiving" your