Great Planes PT-40 Kit (original) User Manual
Page 14
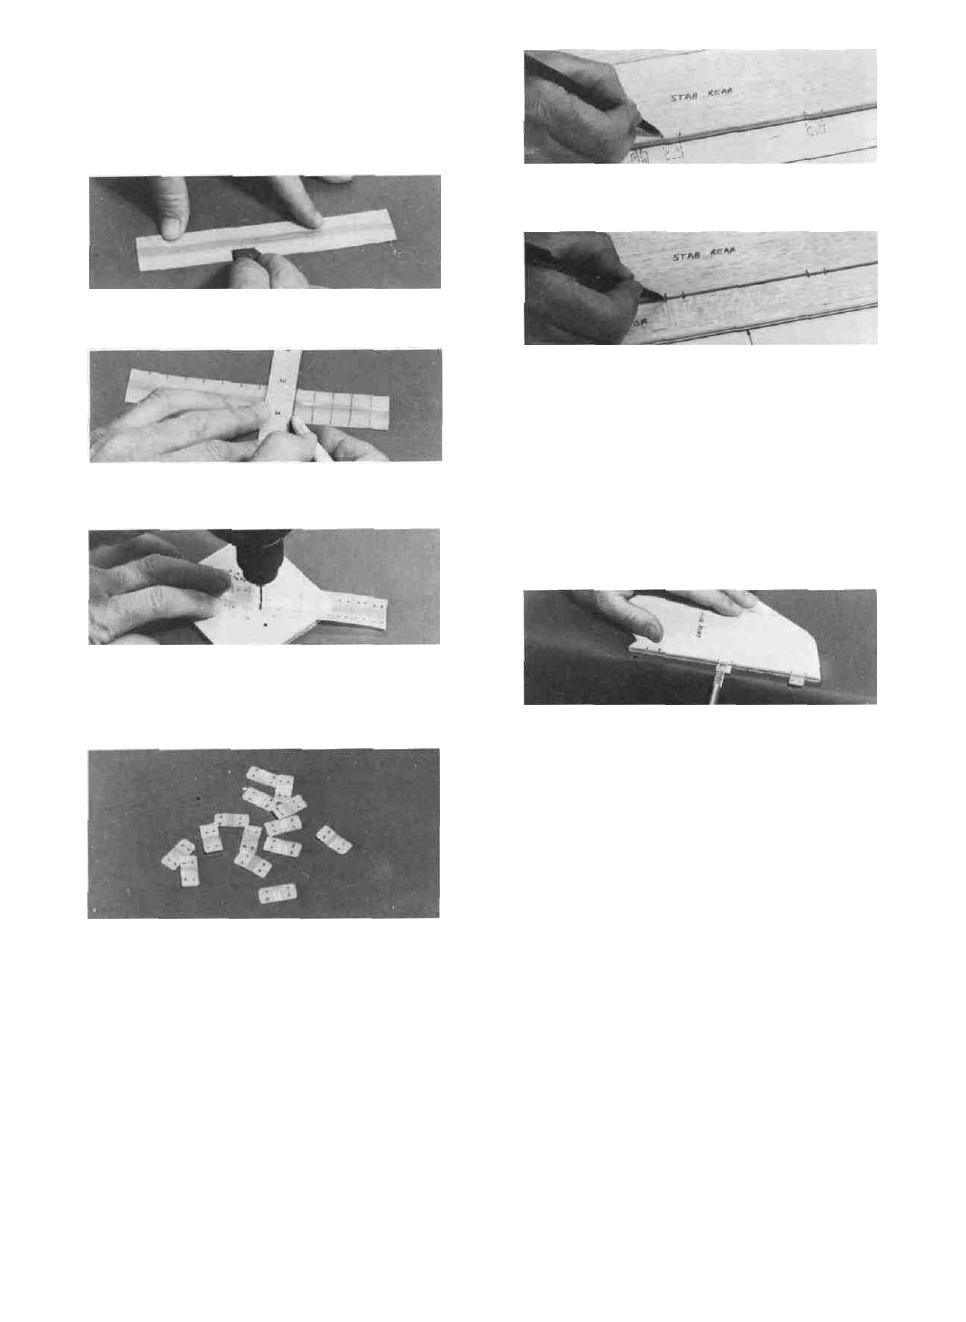
MAKE THE HINGES
D 1. Take the 9" strip of hinge material and roughen
both sides with 220 grit sandpaper. This is best done
with a small piece of sandpaper held with your fin-
gers, rather than a sanding block. Do not sand the
centerline of the hinge material.
D 2. Using a ruler and a ball point pen, draw lines
dividing the hinge material into eighteen 1/2" -wide
segments.
D 2. While holding the elevator in place against
the stab trailing edge, transfer the hinge locations
to the elevator leading edge.
D 3. Drill four 1/16" holes in each of the hinge seg-
ments as shown on the plan. Use a wood block as a
backing to drill into when drilling these holes.
D 4. Fold the hinge material back and forth a few
times on the centerline to "condition" the hinges.
D 5. Cut the hinges apart with a scissors on the
lines you previously drew. Also snip off a small piece
of each hinge comer.
Note: You should end up with 18 hinges, 8 of
which you will use for the ailerons if you are building
the "B" wing.
MARK THE HINGE LOCATIONS
D 1. Lay the stab on the plan and mark the hinge
locations on the stab trailing edge (both sides are
the same).
D 3. Repeat the above process marking the hinge
locations on the fin and rudder. Don't forget to mark
the bottom hinge location on the rudder.
CUT THE HINGE SLOTS
D 1. Move the fin trailing edge close to the table
edge. Place a small piece of 1/8" plywood (from die-cut-
ting scraps) next to the hinge slot location.
D 2. Hold your X-Acto knife straight on the scrap
wood and cut straight into the fin. The slots should
be about 1/2" deep (enough for half of the hinge to
fit into).
D 3. Trial fit by pushing the hinges (no glue) into
the slots to make sure you have cut the slots wide
enough and deep enough.
D 4. Repeat this process for the rudder, elevator
and stab.
MOUNT THE STAB ON THE FUSE
D 1. Remove the nylon nose gear bearing and the
main gear from the fuselage.
D 2. Lay the stab on the plan and carefully line it
up with the outside lines. While holding it in this
position, lay a straight edge along the "fuselage cen-
terline" as shown on the plan. Draw the fuselage
centerline on the top of the stab with a fine point
marker. Work as carefully as you can when doing this!
(See photo, top of next page)
14