Great Planes PT-40 Kit (original) User Manual
Page 18
D 13. Apply thin Ca to all joints. After the thin CA
has cured, apply some thick CA to each joint.
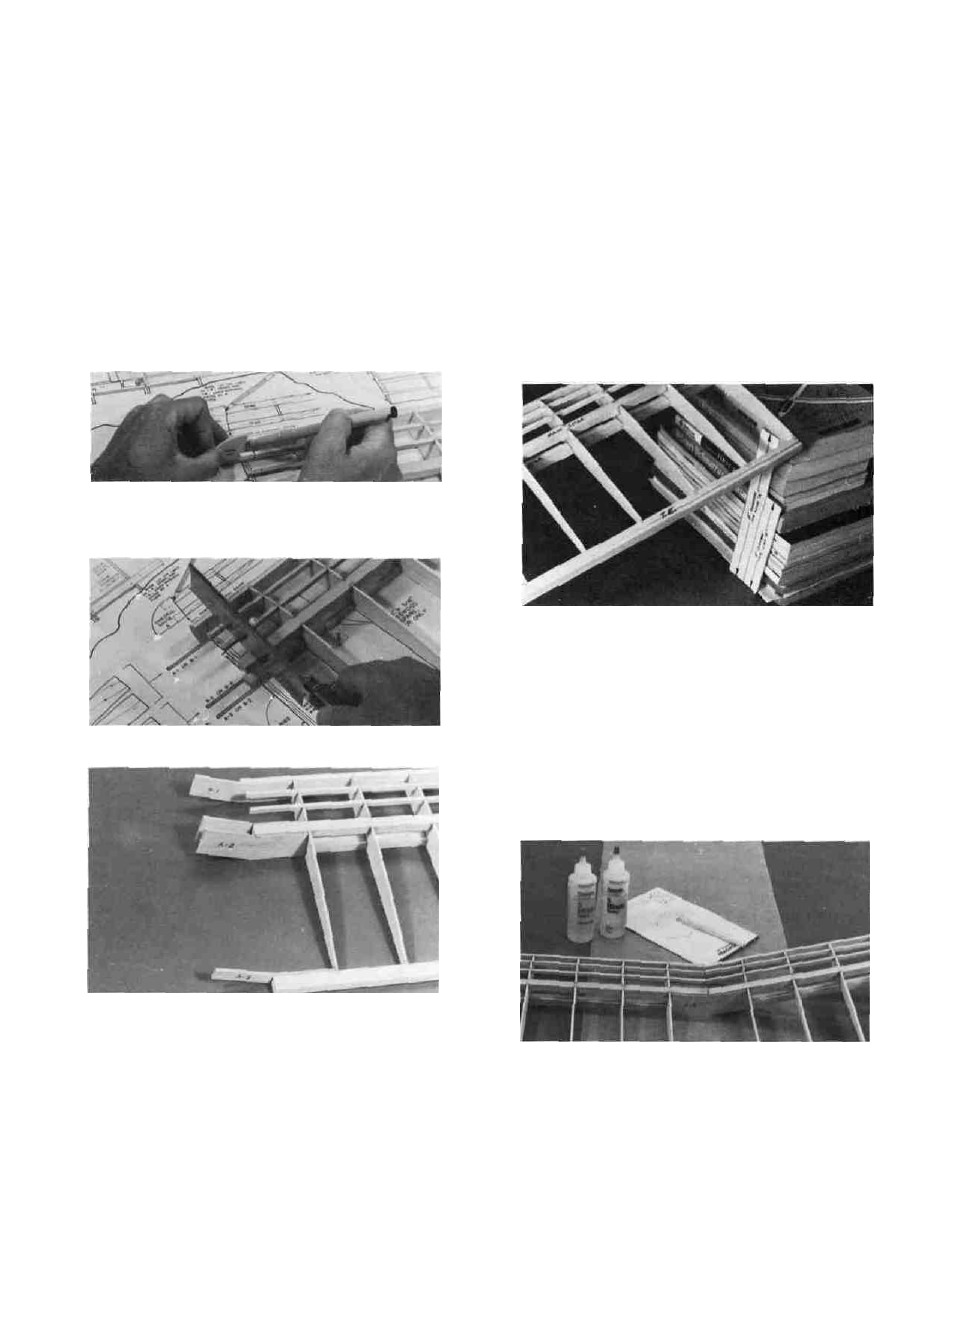
D 14. Find the die-cut plywood sheets containing the
Dihedral Braces, Wing Braces, F-2's and Gauges
(PT40W14 & PT40W15). If you are building wing "A"
(without ailerons), punch out all the parts that apply to the
"A" wing. Compare each part with the drawings on page
6 and mark them with their correct letter and number (A-
1, A-2, etc.). If you are building the "B" wing, use only
the parts with a "B" on them.
D 15. Using the "dihedral gauge" (A or B, depending
on your wing choice), draw cut-off lines on the back
of the L.E. and the front and back of the spars and
T.E. (See the sketch on the plan showing how to do
this.) The point of the dihedral gauge must be
exactly on the centerline when marking the cut-
off lines.
D 16. Using a razor saw (or any fine-toothed saw),
carefully cut off the L.E., spars and T.E. on the lines
you just drew.
D 17. Using 5 minute epoxy:
Glue A-l or B-l to the back of the leading edge.
Glue A-2 or B-2 to the front of the main spars.
Glue A-2 or B-2 to the back of the main spars.
Glue A-3 or B-3 to the front of the trailing edge.
Remove any excess glue with a tissue.
NOTE: Skip to page 39 and add the
shear webs as described on that page.
18
Clamp or hold the parts until the glue hardens.
Set the right wing panel aside, and turn the
plan around so the left wing panel is facing you.
D 18. Build the left wing panel in the same manner
as you did the right panel, following steps 1 through
16.
JOIN THE WING PANELS
D 1. Lay the left wing panel flat on the building
surface or a large flat table. Place a sheet of waxed
paper under the "center" portion of the panel where
it will be joined to the right half.
D 2. Slide the right wing panel into position, so
the spars touch the spars of the left panel. Block up
the right tip with a stack of books The stack of books
must be 8" high for wing A and 5" high for wing B.
D 3. Check to make sure the L.E., spars and T.E.
are touching. If not, sand off any long ones slightly
until they all touch. Now slide the panels apart.
NOTE: PRACTICE THE NEXT STEP
"DRY" BEFORE ACTUALLY DOING IT!
D 4. Mix up a batch of epoxy (30 minute epoxy is
preferred here to give you more time, or 5 minute
epoxy may be used if you work quickly), and apply
it to the dihedral braces, L.E., spars and T.E. Slide
the panels together and wipe up the excess glue with
a tissue.
Make sure the wing panels remain in posi-
tion until the epoxy has fully hardened.