Great Planes Fun One 40 - GPMA0490 User Manual
Page 21
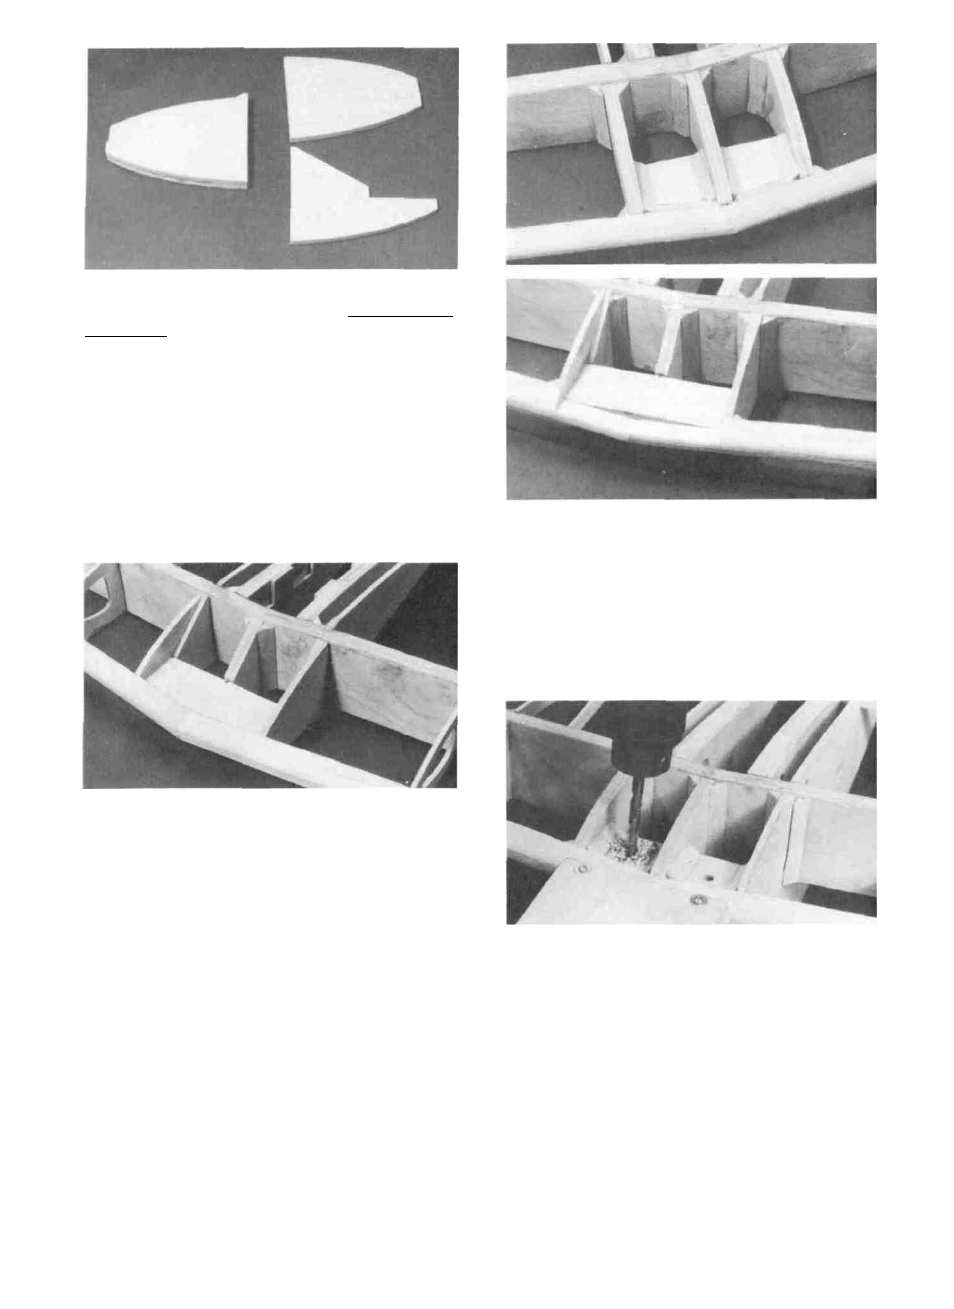
D 15. Glue the 1/8" plywood W2A's (FLJN1W01) to
the 1/8" balsa W2C ribs (FUN 1W02). Make a RIGHT
and a LEFT!
D 16. Measure to find the middle of the 1/4" plywood
wing bolt plate (FUN1 Wl 5) and make a mark at the front
edge. Tack glue it in place on the two Wl A ribs with the
mark in the middle of the two ribs and pushed up against
the leading edge and level.
D 17. Tack glue the W2 front rib assemblies in place
making sure they are centered up and down on the leading
edge and spars and pressed against the ends of the wing
bolt plate.
D 20. When satisfied with the wing alignment the front
pieces must be securely glued in place. Add med/thick
CA to all joints that have only been tack-glucd. Add pieces
of 1/4" tri around the wing bolt plate and the W2 rib assem-
blies.
D 18. On the side of the wing with the dowels sticking
out (the bottom of the wing) the leading edge should be cut
away flush with the wing bolt plate between the W2 front
ribs (See bottom photo at step 20).
D 19. Replace the wing on the fuselage and recheck its
alignment. Also set the fuselage flat on the work surface
and make sure the wing is parallel to the surface. If it is not,
adjust the wing bolt plate or the dowel notches in former
F4 until they are.
D 21. Replace the wing on the fuselage with the align-
ment marks lined up and hold the wing tightly to the
fuselage. Drill two 13/64" holes through the wing bolt
plate and down through the wing boll block as shown
above. The holes should be approximately centered in the
open part of the plate. Keep the drill perpendicular to
the wing bolt plate while doing this and do not allow the
wing to move while drilling.
D 22. Remove the wing and re-drill me holes in the
wing only to 1/4".
21