Fuselage construction – Great Planes Fun One 40 - GPMA0490 User Manual
Page 10
D C. Trial fit the hinge into the slot. If the hinge is
difficult to push in, re-insert the knife and move it back and
forth in the slot a few limes to enlarge the slot.
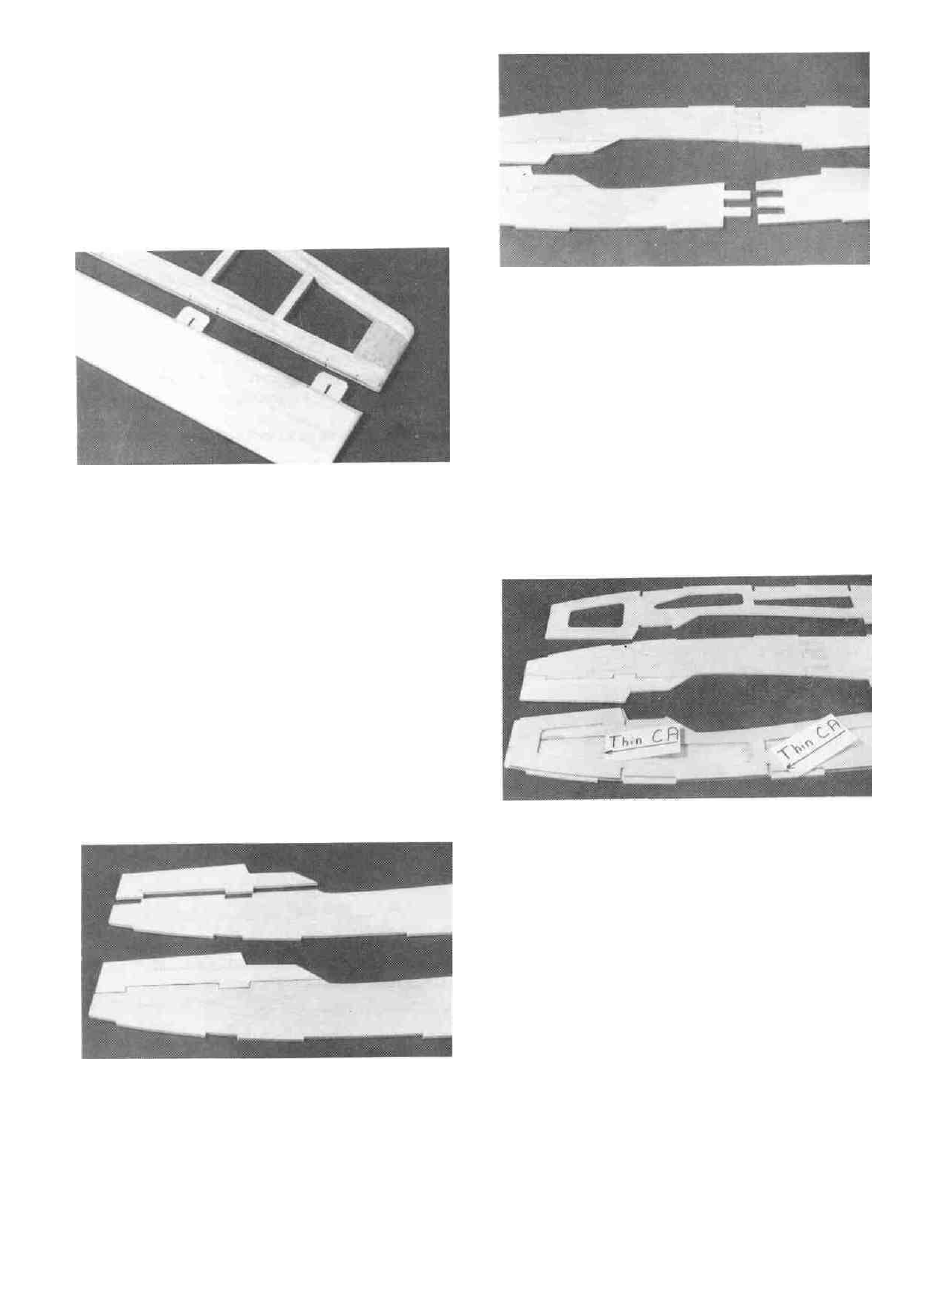
D 2. Position one of the 1/8" die-cut balsa rear fuse
sides (FUN1F02) behind the front fuse side you just
assembled. Slide the two parts together pressing them Hard
against the work surface. Line the two parts up over the
plan and apply thin CA along the joint. Sand both sides of
the balsa fuse side smooth.
D 3. Insert the hinges into the slots and trial fit the
rudder and elevators in place on the fin and stab. Do not
glue the hinges until you are instructed to do so later in
this book. Hinge gluing instructions are included later.
FUSELAGE
CONSTRUCTION
PREPARE FUSE SIDE
NOTE: The photos show both fuse sides being as-
sembled at the same time to help you identify the parts.
You should assemble one side first as the instructions
explain.
D 3. Lay one of the 1/8" die-cut plywood front fuse
doublers (FUN1F06) on lop of the balsa fuse side. The
doubler should line up with the fuse side at the front 1/2"
of the doubler, the rear 3-1/2" of the doubler and around
the wing saddle area. Study the plan and photo carefully
to make sure you correctly position the doubler. When
you have it in position apply thin CA around all edges of
the doubler, including the inside lightening holes.
D 1. Position one of the 1/8" die-cut balsa upper
front fuse sides (FUN1F03) above one of the 1/8" die-
cut lower front fuse sides (FUN1F01). Slide the two
parts together pressing them flat against the work surface
and apply thin CA along the joint.
D 4. Glue one of the 3/32" balsa die-cut rear fuse
doublers (FUN1F05) to the fuse side lining it up with the
back edge of the fuselage and the top and bottom of the
fuse side. Use thin CA to glue it in place. (The photo for
this step is at the top of the next page).
10