Cut here – Great Planes Fun One 40 - GPMA0490 User Manual
Page 14
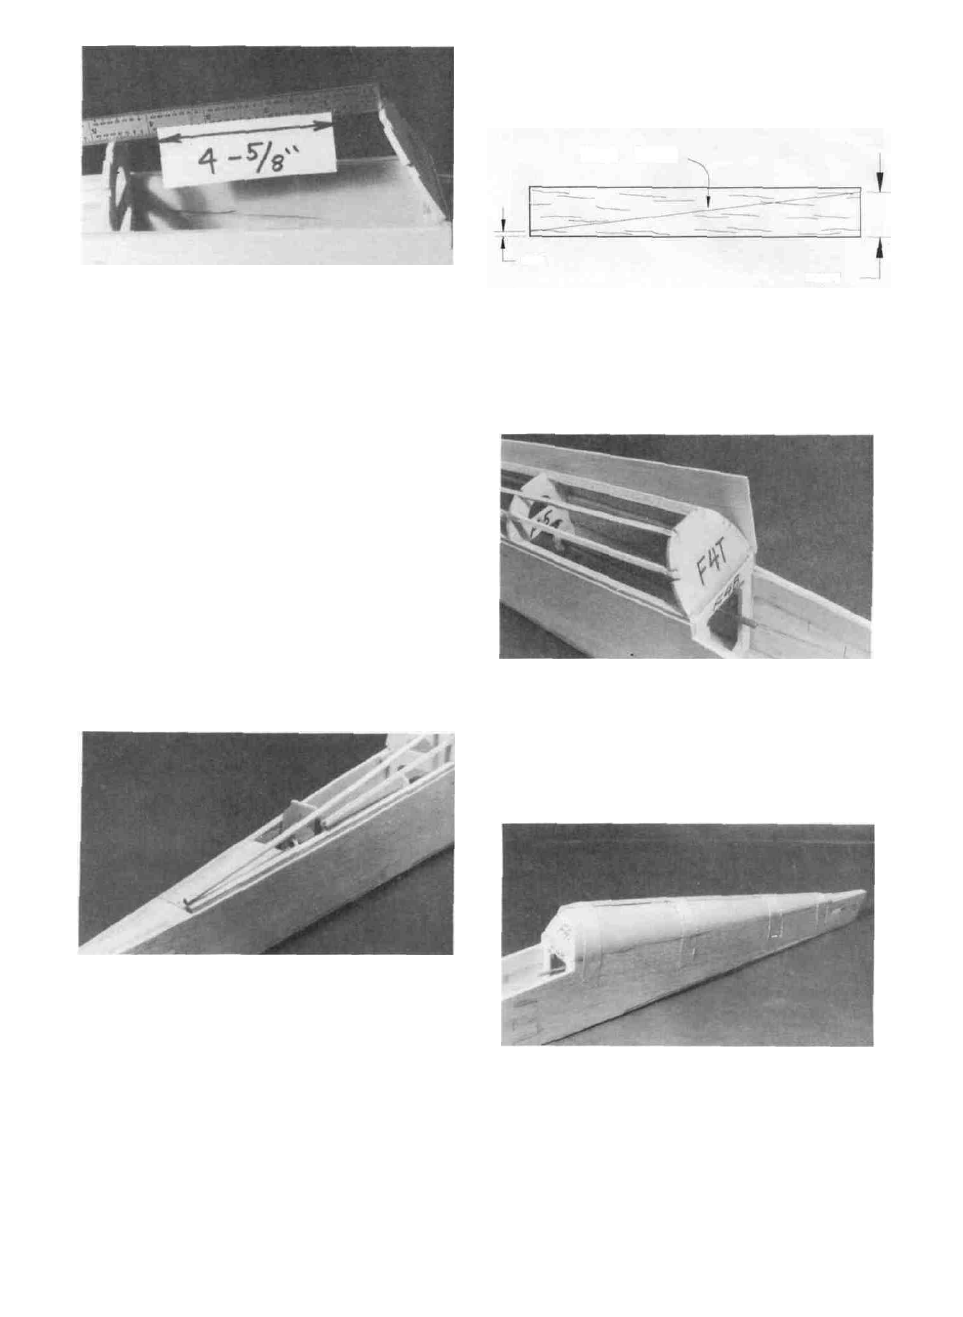
D 14. Center former F4T (FUN 1F08) on top of former
F4A/B. The back of F4T should be lined up with the back
of F4B and it should be tilted back until the top of F4T is
4-5/8" from F5. When positioned correctly glue it in place
with med/thick CA.
D 17. Locate the 1/16" x 2-5/8" x 16" turtle deck
sheeting (FUN1F16) and cut it in two as shown in the
sketch below.
Cut here
1/4"
2-3/8"
Turtle Deck Sheeting
D 15. Notice an embossed line across the slab bed
3-7/8" from the rear. This is where the front of the stab will
be. If it is hard to see draw a line there.
D 18. Glue the sheeting onto the little ledge formed by
the fuselage side and the bottom stringer.
D 16. Glue three 1/8" x 3/16" x 18" balsa stringers
(FUN1 F14) in place as shown in the photo. The bottom
stringer should start at the line you just drew on the stab
bed and remain 1/16" away from the edge of the fuselage
side to allow for the turtle deck sheeting which will be
applied later. The top stringer should be attached to the
bottom stinger near the stab bed but not be touching the
stab bed as shown in the photo. The middle stringer should
start at former F6. Cut the excess stringers off flush with
former F4T. Do the same for the other side of the turtle
deck.
14
D 19. Use a damp rag to wet the outside of the turtle
deck sheeting to make it bend easier. Apply some med/
thick CA to formers F4T, F5 and F6 and bend the sheeting
into place. Use at least four strips of masking tape to hold
the sheeting. Apply thin CA along the stringers and allow
the glue to cure. Glue the other piece of sheeting in place.