Great Planes RV-4 40 Kit - GPMA0180 User Manual
Page 46
❏
4. Add six drops of thin CA to the center of the hinges on both
the top and bottom. The holes you drilled in the hinge slot will
wick the CA into the entire hinge surface. Use a paper towel to
absorb excess CA from the hinge gap before it cures.
❏
5. Use the same hinging method to join the rudder to the
fin, the ailerons to the wing and the flaps to the wing.
❏
6. Reinstall the pushrods you disconnected before
covering and mount the control horns to the ailerons, flaps,
elevator and rudder. Reinstall any hardware and other
components you may not already have in place such as the
fuel valve, fuel lines, servos, on/off switch, etc.
❏
1. Cut the canopy on the cut line. Position the canopy in
place on the top of the fuselage after the covering of the
fuselage is complete.
❏
2. When you are satisfied with the fit, apply a small bead of
Z-56 canopy glue to the bottom of the canopy where it comes
in contact with the fuselage. (We recommend this glue
because it dries virtually clear.) Hold the canopy in place with
masking tape until the glue is fully cured (overnight).
❏
1. Turn on the transmitter and receiver and center the
trims. If necessary, remove the servo arms from the servos
and reposition them so they are centered. Reinstall the
screws that hold on the servo arms.
❏
2. With the transmitter and receiver still on, check all the
control surfaces to see if they are centered. If necessary, adjust
the clevises on the pushrods to center the control surfaces.
❏
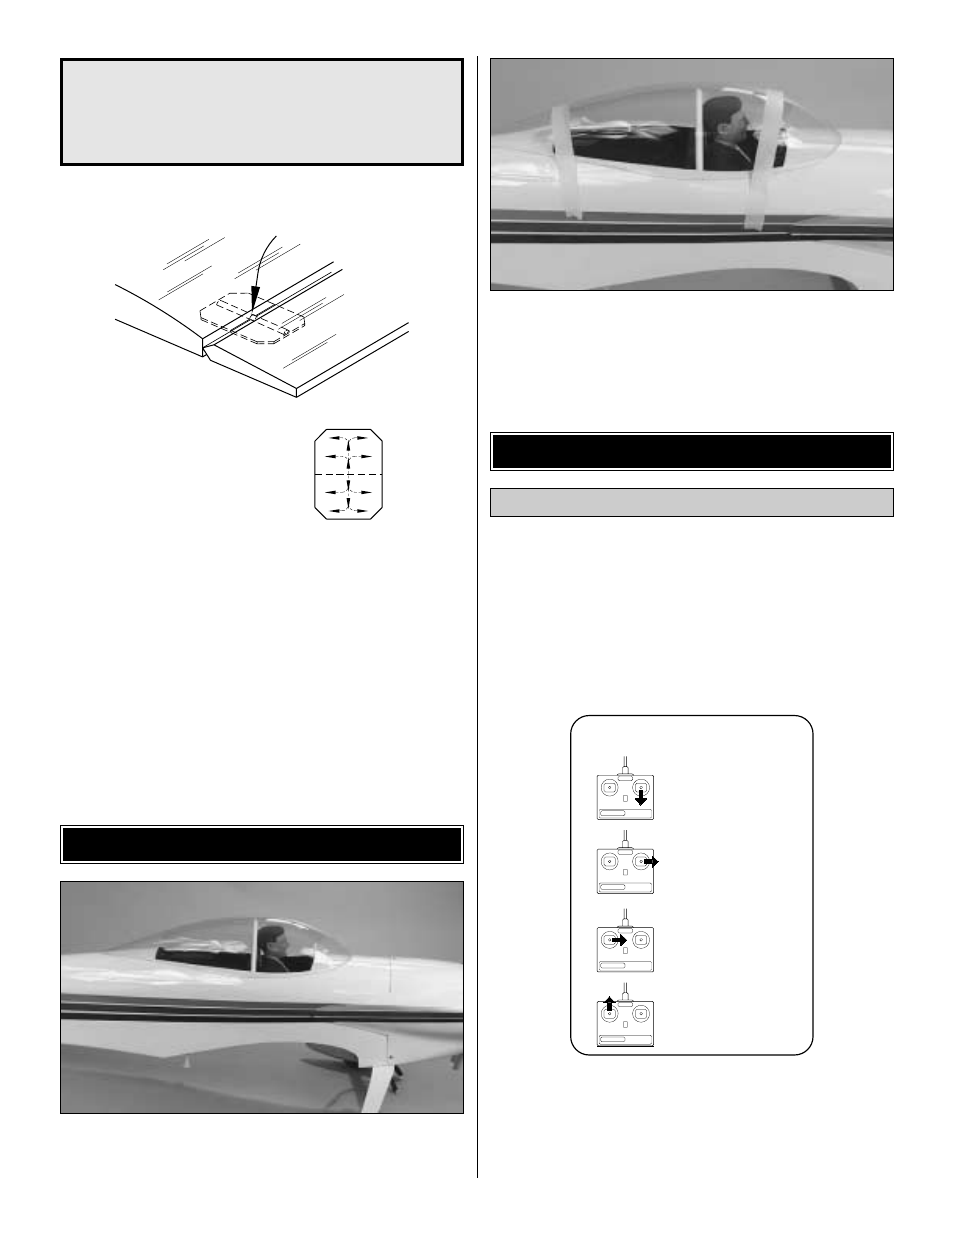
3. Make certain that the control surfaces and the
carburetor respond in the correct direction as shown in the
diagram. If any of the controls respond in the wrong direction,
use the servo reversing in the transmitter to reverse the
servos connected to those controls. Be certain the control
surfaces have remained centered. Adjust if necessary.
CARBURETOR WIDE OPEN
RUDDER MOVES RIGHT
LEFT AILERON MOVES DOWN
RIGHT AILERON MOVES UP
ELEVATOR MOVES UP
4-CHANNEL
TRANSMITTER
(STANDARD MODE 2)
4-CHANNEL RADIO SETUP
TRANSMITTER
4-CHANNEL
TRANSMITTER
4-CHANNEL
TRANSMITTER
4-CHANNEL
Check the Control Directions
GET THE MODEL READY TO FLY
CANOPY INSTALLATION
THE CA WICKS
ALONG THE "TUNNELS"
TO THE ENTIRE
HINGE SURFACE
ASSEMBLE, THEN APPLY 6 DROPS
OF THIN CA TO CENTER
OF HINGE, ON BOTH SIDES
Do not use CA accelerator on any of the hinges and do
not glue the hinges with anything but thin CA. Do not
attempt to glue one half of the hinge at a time. The
hinges will not be properly secured and could come out
while the model is in flight.
46