Great Planes RV-4 40 Kit - GPMA0180 User Manual
Page 14
❏ ❏
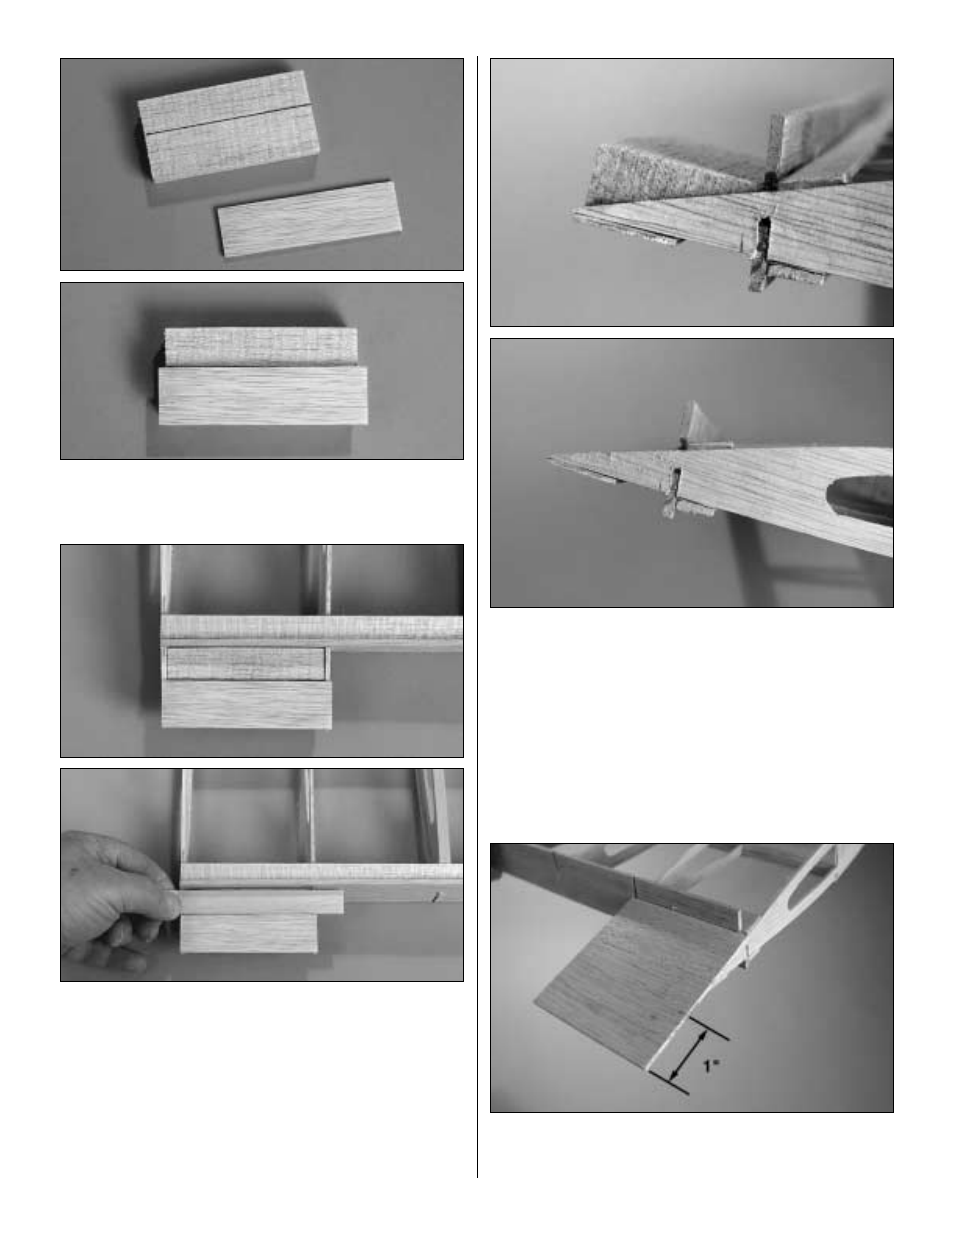
30. Glue WBS to the balsa block between the end of the
block and the line you have made on the balsa block. Position
WBS so that it extends equally over each end of the balsa block.
❏ ❏
31. Trial fit WBS and the balsa block in place between
the W2 ribs at the inboard of the wing. Using a leftover piece
of 3/32" [2.4mm] sheet, lay it in place across the W2 ribs
and the balsa block. Check to be sure the sheeting and
WBS match in thickness. If WBS is slightly high, sand a bit
more from the sheeting as indicated in step 29. Note: Make
sure you work from the bottom of the wing.
❏ ❏
32. One you are satisfied with the fit of the balsa block
and WBS, glue it in place between the W1 and W2 ribs.
❏ ❏
33. When the balsa block is glued in place you will see
that the block extends well beyond the W2 rib. Use a razor
plane to shape the block to match the shape of the W2 rib.
If you do not have a hobby razor plane you can cut this block
down with a long bladed knife or a sanding block. Hint: If
you do not currently own a hobby plane it really is one of the
most worthwhile tools you can own. It is worth a trip to the
hobby shop to purchase one.
❏ ❏
34. Sheet the top of the wing between W1 and W2.
Sheet the area from the wing trailing edge (WTE) to 1"
[25mm] beyond the end of the ribs.
14