Install the fuselage components – Great Planes RV-4 40 Kit - GPMA0180 User Manual
Page 36
❏
8. Remove the engine from the firewall. Mix 1/4 ounce of
6-minute epoxy. Using an epoxy brush, apply a coating of
epoxy to the entire firewall and the area under the firewall
where the engine muffler will exit the cowl. Do not get any glue
into the threads of the blind nuts. A dab of Vaseline
®
applied into
the threads of the blind nut will prevent any epoxy from sticking
to the threads. You may want to remove the fuel tank cover so
that it does not get glued in place. If you chose to leave it in
place you may need to cut the glue to remove the hatch cover.
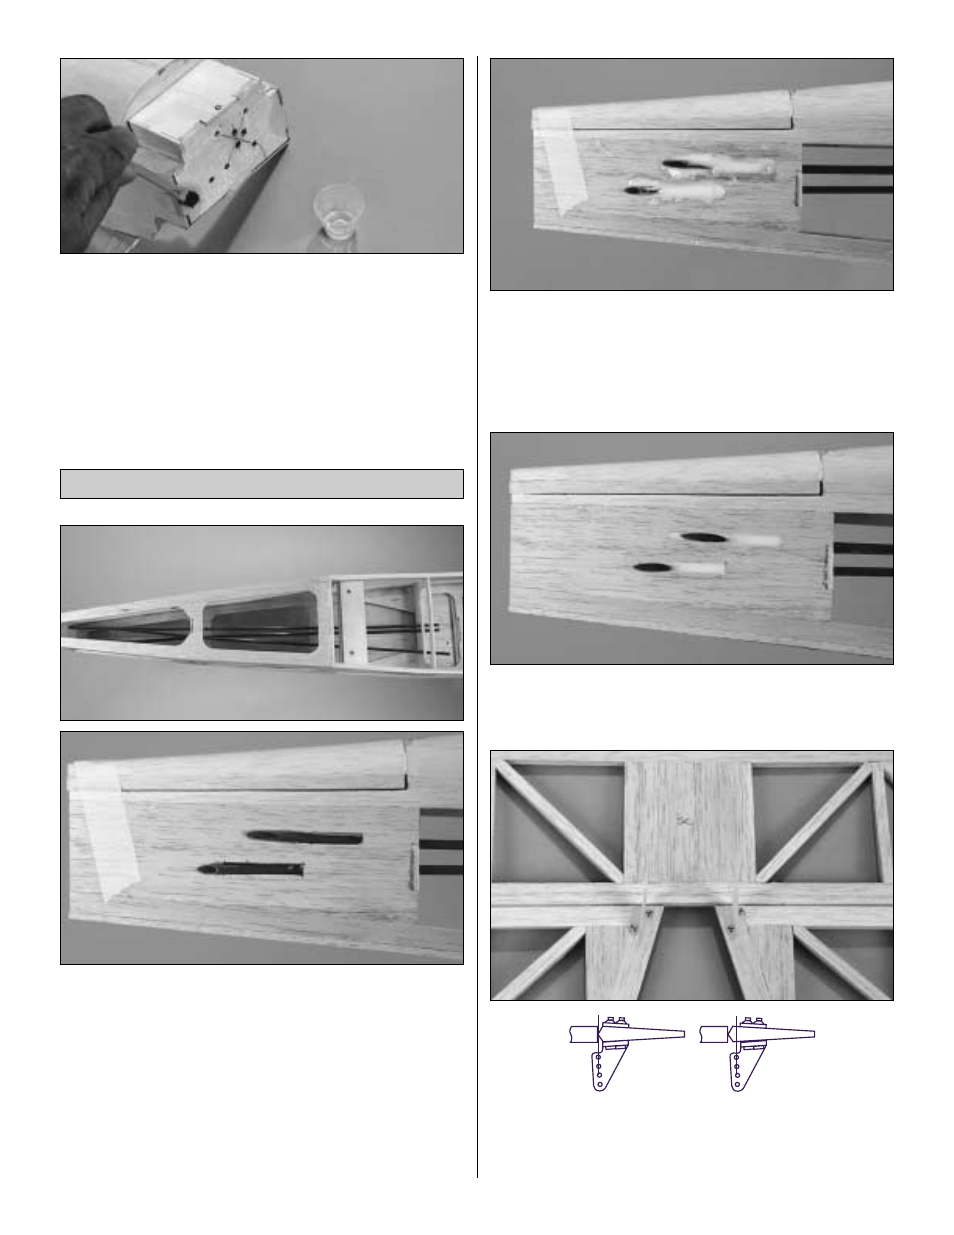
❏
1. Locate three 36" [914mm] plastic flexible outer
pushrod tubes. Using the plan as your guide, install the
outer pushrods into the holes in fuselage formers, exiting the
slots in the rear of the fuselage.
❏
2. Make a mark on the tubes where they contact the
fuselage and fuselage formers. Remove the tubes. Then
roughen the tubes with sandpaper at the marks you have
made. Reinstall the outer pushrods tubes back into the
fuselage and use a small amount of 6-minute epoxy to glue
the tubes to the fuselage formers.
❏
3. Cut the tubes at an angle where they exit the fuselage.
Fill the slots where the tubes exit the fuselage with a 50/50
mix of 6-minute epoxy and micro balloons. The addition of
the micro balloons thickens the epoxy, preventing it from
running and making it sand easier. Do this for both the left
and right side of the fuselage.
❏
4. After the epoxy is fully cured, use a sanding bar to sand
the pushrod exits flush with the fuselage on both sides of
the fuselage.
❏
5. Refer to your plan for the proper position of the elevator
control horns. Position the control horn on the bottom of
Correct
Incorrect
Install the Fuselage Components
36