Build the wing panels build the wing – Great Planes RV-4 40 Kit - GPMA0180 User Manual
Page 10
❏
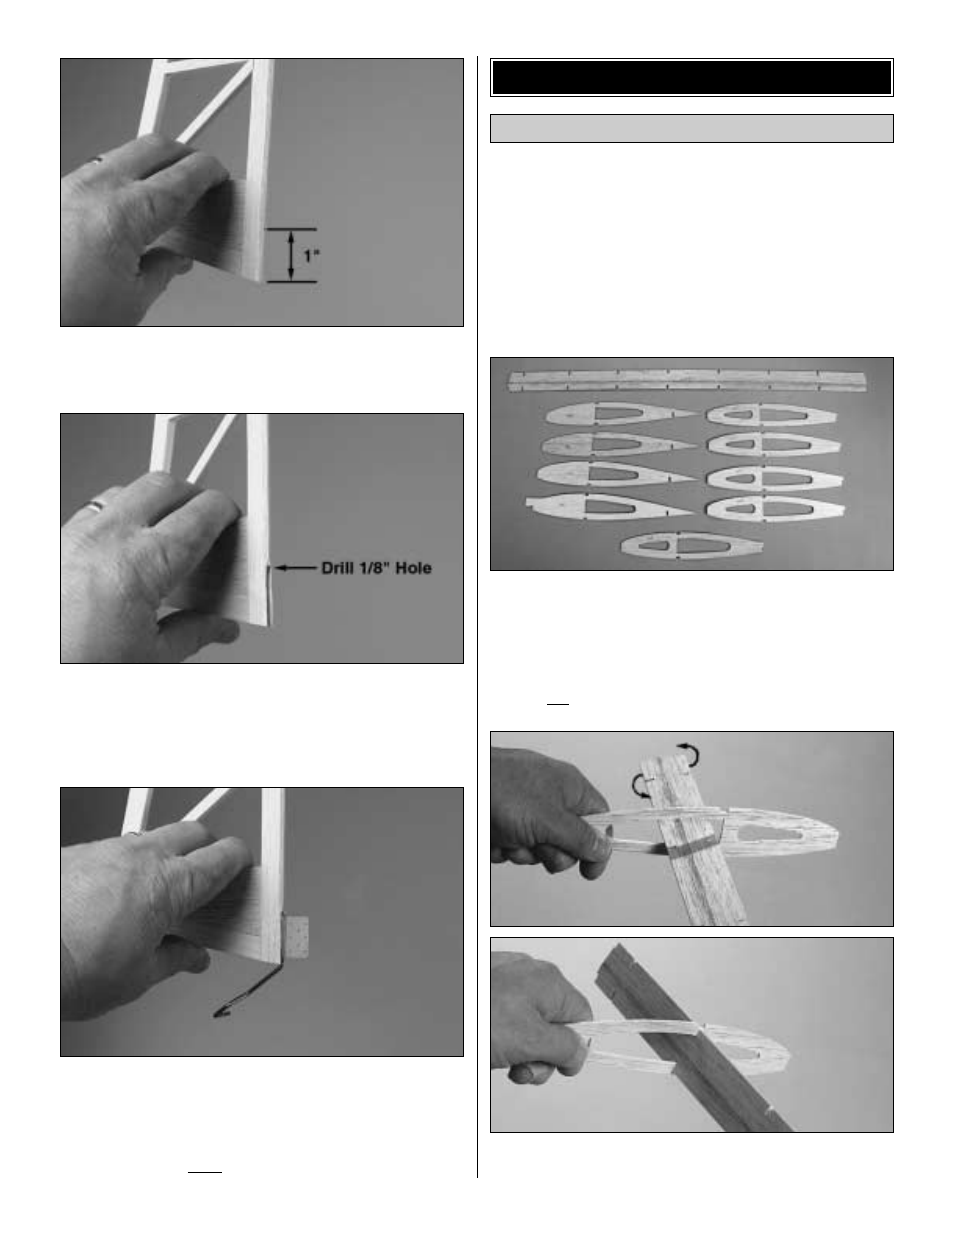
13. Remove the rudder from the fin. Measure up from the
bottom of the rudder 1" [25mm] and make a mark on the
leading edge of the rudder.
❏
14. On the mark drill a 1/8" [3mm] hole 3/4" [19mm] deep
into the leading edge of the rudder. From the bottom of the
rudder up to the hole you have drilled, cut a groove 1/8"
[3mm] wide. Hint: A perfect tool for this is the Great Planes
Groove Tube (GPMR8140).
❏
15. Locate the tailwheel wire assembly. Trial fit it into the
hole and slot. When you are satisfied with the fit, mark the
location for the nylon bushing on the fin. Cut a slot in the fin
to accept the bushing. Trial fit the rudder with the tailwheel
wire into the fin. Do not glue the nylon bushing in place.
This will be done after the model has been covered.
❏
1. Unroll the plan sheets. Roll them inside out so they will
lie flat.
❏
2. Locate the left wing panel on the plan. You may find it
helpful to cut the plans in half, making them a more
manageable size to pin to your building board.
❏
3. Position the left wing plan flat on the building board.
Cover the plan with Great Planes Plan Protector or wax
paper so glue will not adhere to it.
❏ ❏
4. Locate the die-cut 1/8" [3mm] balsa wing shear web
(WSW), three die-cut 3/32" [2.4mm] balsa W2 ribs, five die-cut
3/32" balsa W3 ribs and one die-cut 3/32" [2.4mm] W1 rib.
Note: In the following steps it is important to pay careful
attention to assemble the parts exactly as instructed. Failure
to do so will result in a wing that is not straight.
❏ ❏
5. Locate the die-cut 1/8" [3mm] balsa wing shear web
(WSW). Insert the end of WSW into one of the W3 ribs.
Build the Wing Panels
BUILD THE WING
10