Mount the wing to the fuselage – Great Planes RV-4 40 Kit - GPMA0180 User Manual
Page 30
❏
1.Turn the fuselage upside down.
(Hint: Position a small
box under the cockpit to support the plane on your bench.)
Install the wing onto the wing saddle.
❏
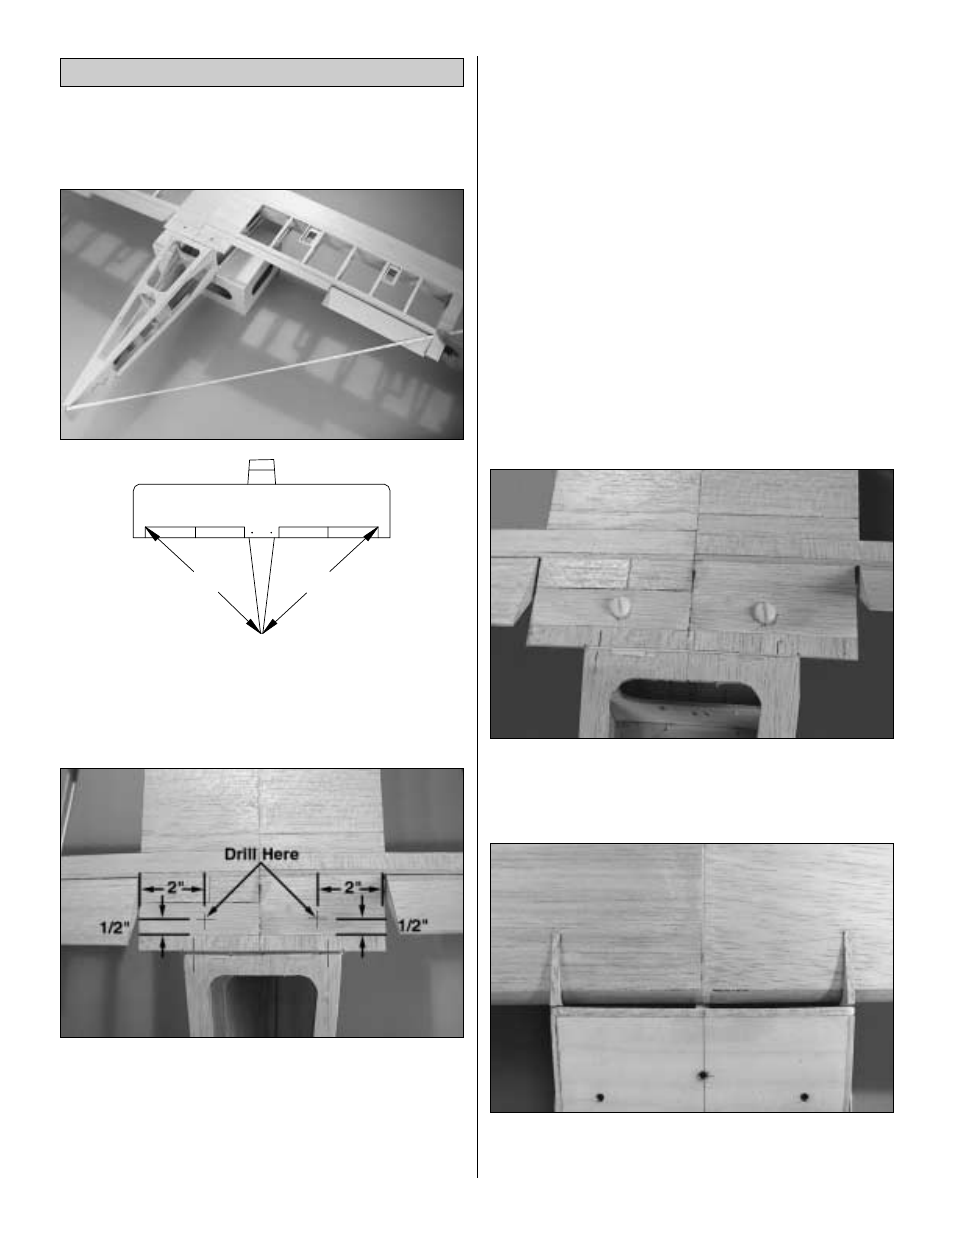
2. Measure from the tip of the tail to a point on the end of
the wing. The distance from the tip of the wing to the tail
needs to be equal on both sides. Once the wing is positioned
properly, make reference marks on the wing and the fuselage.
❏
3. With the wing still resting in the wing saddle and aligned
on the marks you have made, mark the location to drill the
wing bolt holes. From the outer end of the wing bolt plate
measure in 2" [51mm] and draw a line. Measure up from the
side of the wing bolt plate 1/2" [13mm] and draw another
line. Where the two lines intersect is where you will drill the
wing bolt holes.
❏
4. At the intersection of the lines on the wing bolt support,
drill a 9/64" [3.6mm] (or use a #25 drill bit) pilot hole
perpendicular to the bottom of the wing, through the wing
and the wing bolt mounting plate in the fuselage.
❏
5. Remove the wing. Tap the holes in the wing bolt
mounting plate with a 1/4-20 tap. After they have been
tapped, apply a small amount of thin CA to the threads.
Once the glue has cured run the tap through the threads
once more to clean out any excess glue.
❏
6. Enlarge the wing bolt holes in the wing by drilling a
17/64" [6.7mm] hole through the 9/64" [3.6mm] holes you
drilled in Step 4. This will provide clearance for the nylon
wing bolts. Be sure you only drill the hole in the wing, not
the wing bolt mounting plate.
❏
7. Attach the wing to the fuselage with the nylon wing
mounting bolts, checking to be sure the wing fits well.
❏
8. Locate two die-cut 1/8" [3mm] balsa wing fairings
(WF). Glue them to the leading edge of the wing flush with
the top of the fuselage. Remove the wing.
A
A
A = A
Mount the Wing to the Fuselage
30