Build the ailerons & flaps – Great Planes RV-4 40 Kit - GPMA0180 User Manual
Page 17
❏ ❏
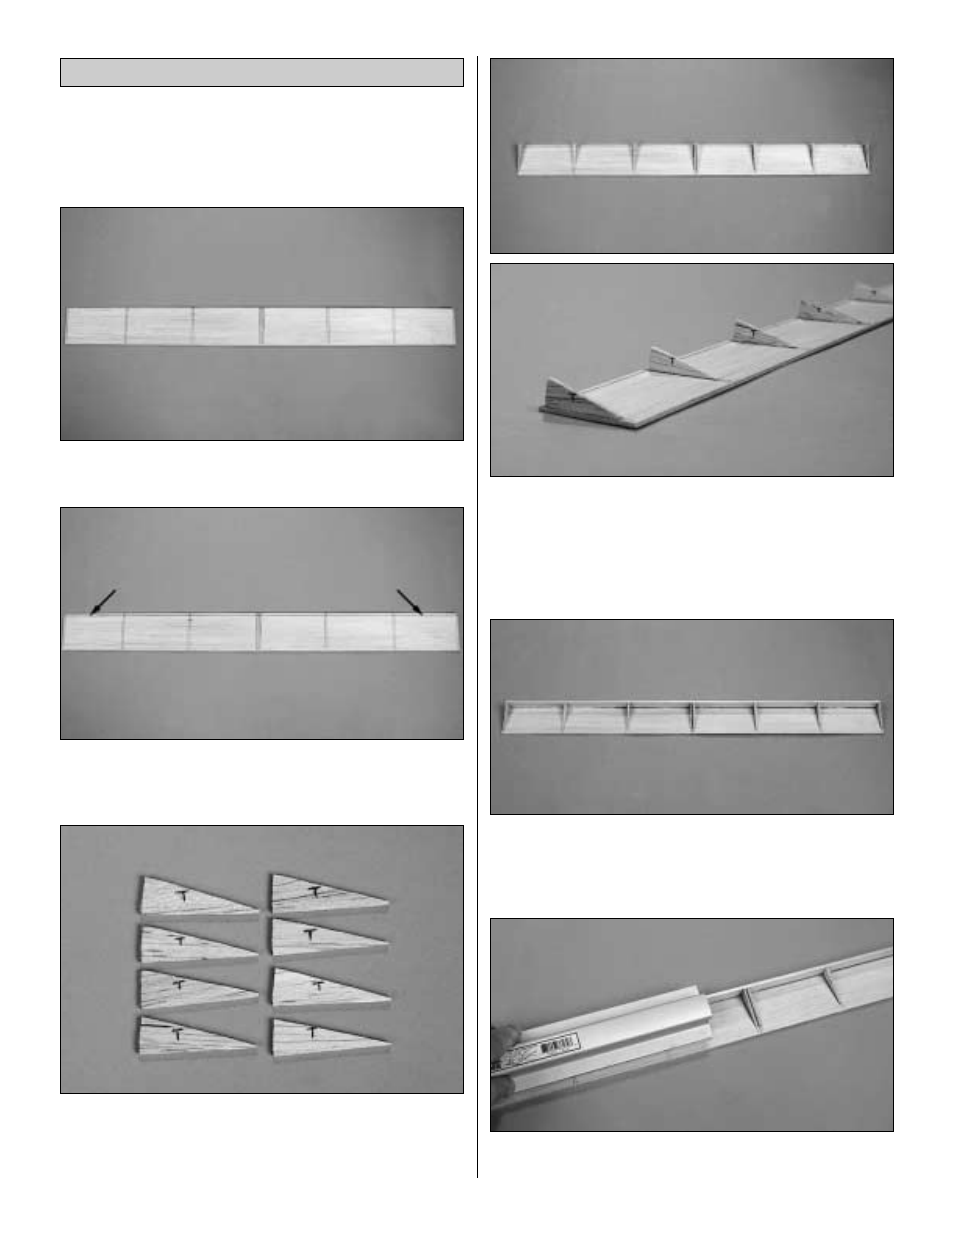
1. Locate a 3/32" x 4" x 24" [2.4 x 102 x 610mm] balsa
sheet. Cut it into two pieces 2" wide and cut each piece to a
length of 21-3/16" [537.8mm]. These will become the top
and bottom aileron/flap sheeting.
❏ ❏
2. Using the plan as your guide, mark the location of
each of the W4 ribs onto one of the aileron/flap sheets.
❏ ❏
3. On one edge of the sheeting, draw a line the length
of the sheeting, 1/8" [3mm] from the edge of the sheet.
❏ ❏
4. Locate the wing plan. On the wing plan there is a
pattern of the W4 ribs with the top of the rib being shown on
this drawing. Find the die-cut ribs and mark each of the ribs
with a “T” to indicate the top of the rib.
❏ ❏
5. Glue eight W4 ribs onto the marks you have made
on the sheeting. The front edge of each W4 rib should be
placed on the line, 1/8" [3mm] from the edge of the sheeting.
Be sure that each of the ribs is glued onto the sheeting with
the top of the ribs perpendicular to the sheeting as shown in
the photograph.
❏ ❏
6. Locate the 1/8" x 1/2" x 24" [3 x 13 x 610mm] balsa
aileron/flap sub leading edge. Position this on the lower
skin and against the front of each of the W4 ribs. Glue them
in place with thin CA.
❏ ❏
7. Sand the balsa aileron / flap sub leading edge with a
sanding bar to match the shape of the W4 ribs.
Build the Ailerons & Flaps
17