Aileron installation – Great Planes RV-4 40 Kit - GPMA0180 User Manual
Page 19
❏ ❏
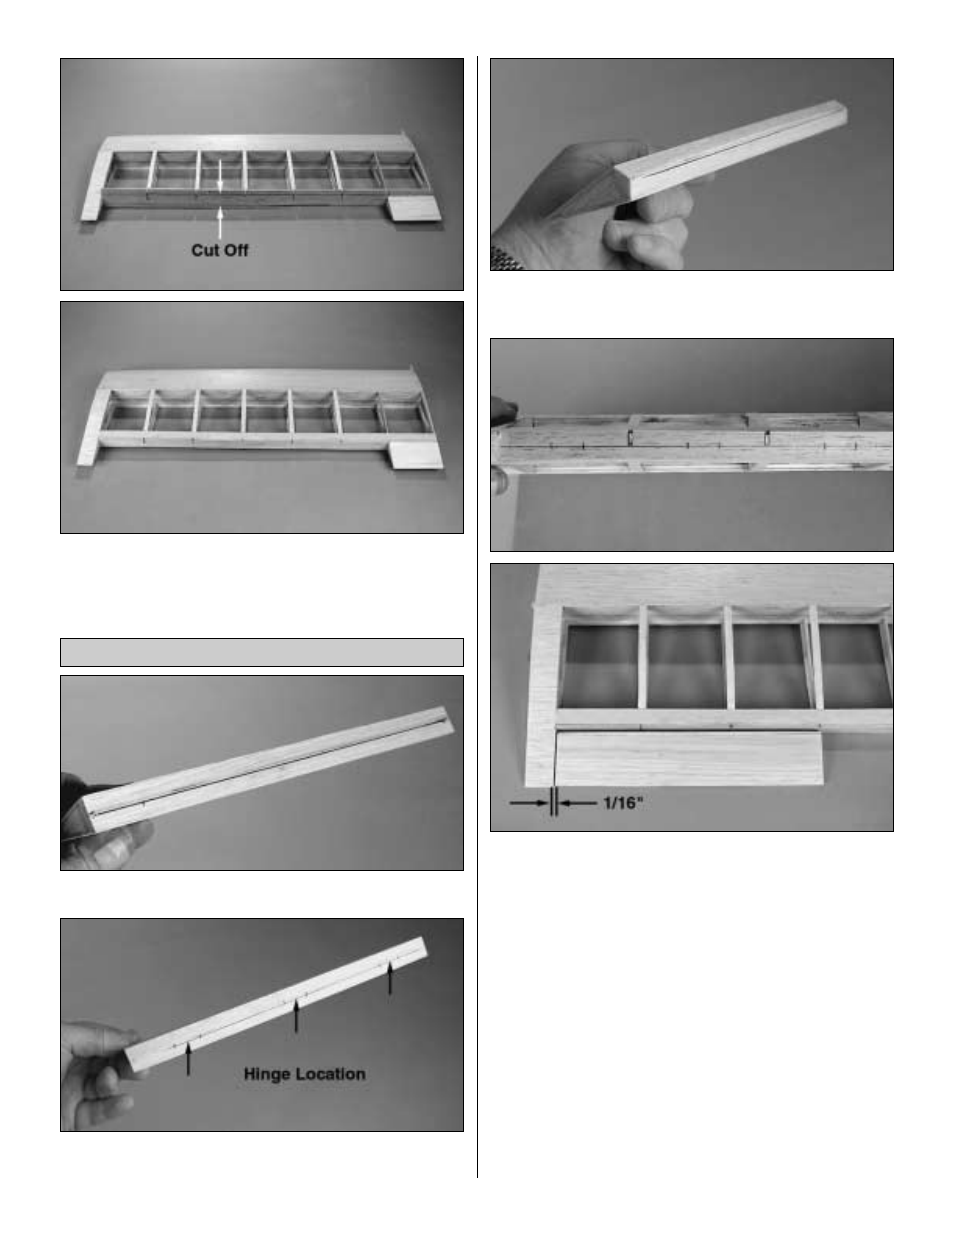
17. Cut off the top and bottom of the wing trailing edge
that extends above and below the surface of the wing. Sand
the wing trailing edge to match the wing surface.
❏ ❏
1. Mark a center line the length of the aileron.
❏ ❏
2. Using the plan as your guide, mark the location of the
hinges on the center line of the aileron.
❏ ❏
3. Shape the leading edge of the aileron to match the
shape shown on the aileron cross section on the plan.
❏ ❏
4. Draw a center line on the trailing edge of the wing
where the aileron will be installed. Place the aileron in
position at the trailing edge of the wing making sure that you
leave at least 1/16" [1.6mm] clearance between the end of
the aileron and the outboard end of the wing. Transfer the
location of the hinge slots from the aileron to the trailing
edge of the wing.
❏ ❏
5. Refer to your plans for the location of the aileron
control horn. The aileron cross - section shows where the
clevis needs to be positioned in relation to the hinge line.
Mark the location for the mounting screws. Drill 1/16"
[1.6mm] pilot holes in the aileron. Important: When you drill
the holes you should be drilling into the plywood control
horn plate. If you do not hit the plate check to make sure you
are drilling into the bottom of the aileron which is where the
plate is located. Attach the control horn with two #2 x 3/8"
[9.5mm] sheet metal screws.
Aileron Installation
19