Install the cowl – Great Planes Revolver GP/EP ARF 59" - GPMA1018 User Manual
Page 22
22
Install the Cowl
❏
1. Before fi tting the cowl, make any cutouts necessary
for your power system. If you are installing a glow engine, a
cutout must be made for the engine head, exhaust outlets,
and needle valve access. The picture here shows a cutout
for the ESC in a brushless motor installation which will also
double as a cooling hole. A rotary tool such as a Dremel
works very well for cutting holes in fi berglass.
❏
2. Apply a piece of masking tape to each side of the
fuselage in the location shown and mark the location of the
middle of each cowl mounting block.
❏
3. Fit the cowl to the fuselage and align it with the colors
on the fuselage. Temporarily install the spinner backplate
onto the motor shaft and make any adjustments to the cowl
position so that the backplate is centered with the front of the
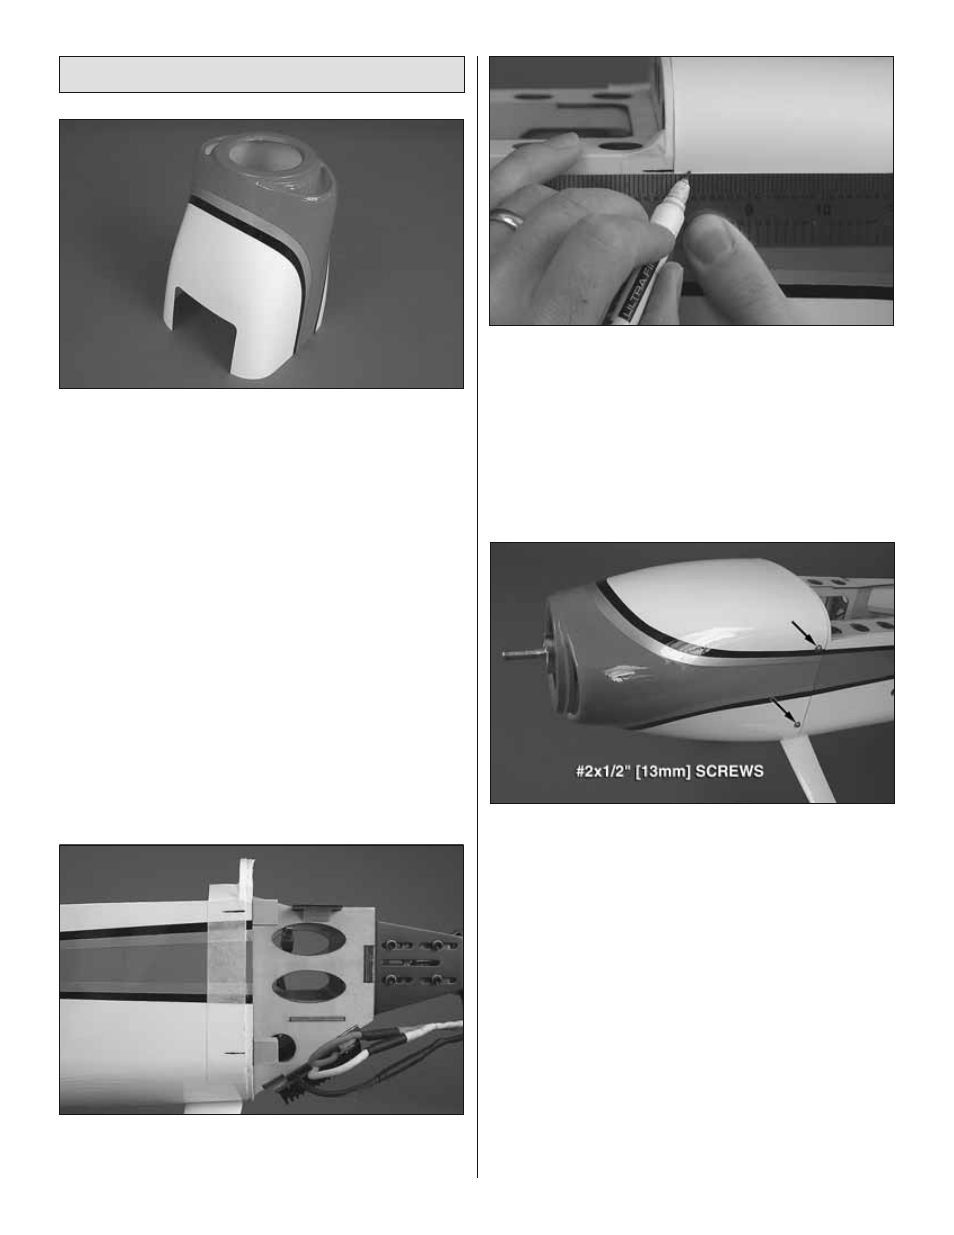
cowl. When satisfi ed, tape the cowl into position. Measure
3/8" [9.5mm] forward from the aft end of the cowl at each
mark you made on the masking tape. Mark the cowl for each
of the four cowl mounting screws.
❏
4. Drill 1/16" [1.6mm] holes at the marks you made on the
cowl through the cowl mounting blocks. Remove the cowl and
thread a #2 x 1/2" [13mm] self-tapping screw into each hole in
the cowl mounting blocks and back it out. Apply a couple drops
of thin CA to each hole in the blocks. Enlarge the four holes in
the cowl with a 3/32" [2.4mm] bit. If you are using a brushless
motor, now is a good time to confi rm the proper rotation of the
motor using your radio system and a battery pack. If the motor
rotates in the wrong direction, unplug any two of the three
motor leads and swap their positions. When satisfi ed, install the
cowl onto the fuselage using four #2 x 1/2" [13mm] self-tapping
screws, four #2 fl at washers, and four #2 lock washers.