Finish the wing panels – Great Planes Revolver GP/EP ARF 59" - GPMA1018 User Manual
Page 10
10
❏
11. Drill 1/16" [1.6mm] holes at the marks you made
through the plywood plates. Do not drill all the way through
the ailerons! Thread a #2 x 3/8" [9.5mm] self-tapping screw
through each hole and back it out. Apply a couple drops of
thin CA glue to each hole to harden the wood. When the glue
has dried, install the control horns onto the ailerons using
four #2 x 3/8" [9.5mm] self-tapping screws.
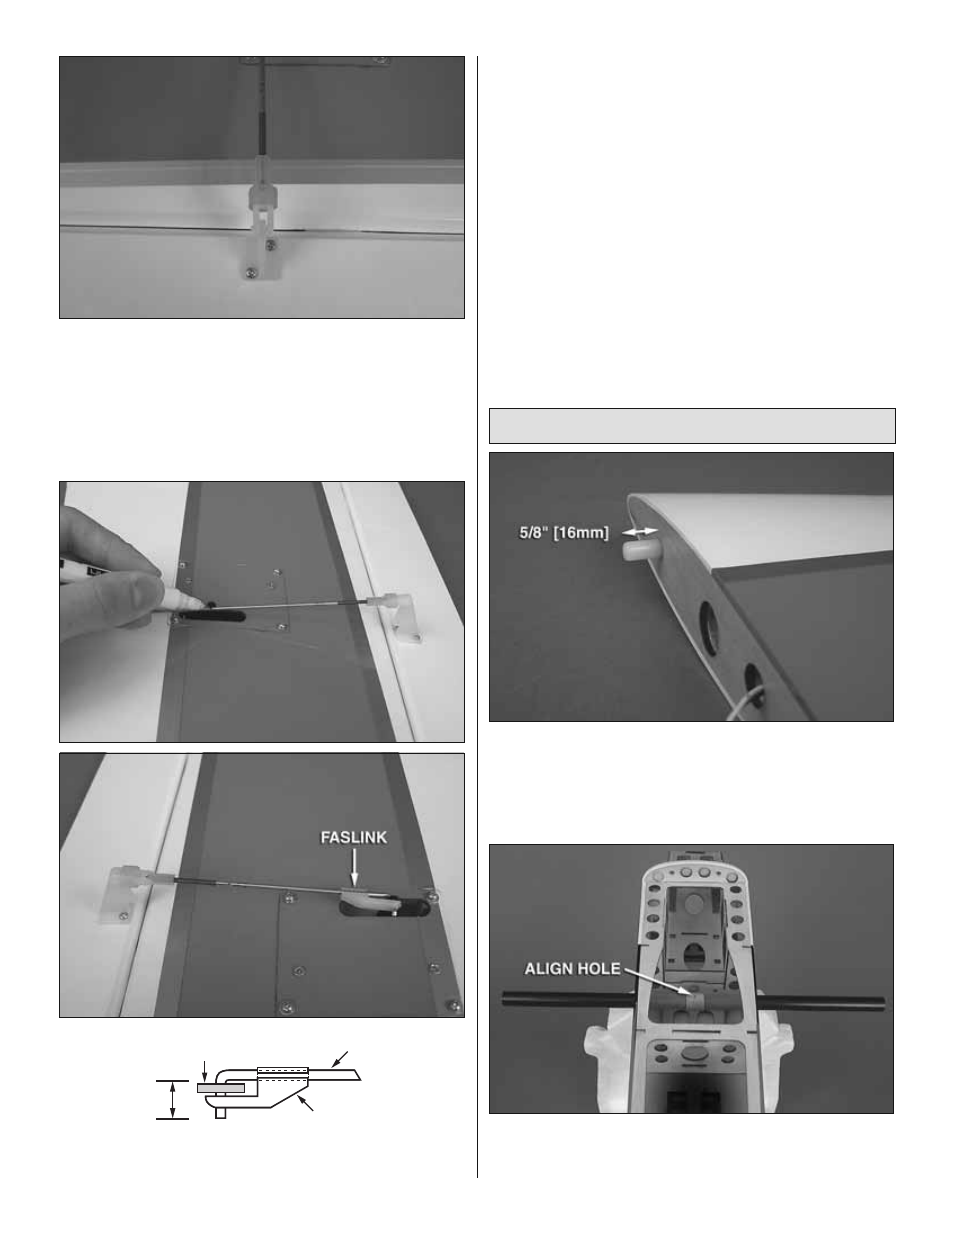
Faslink
2-56(.074") Pushrod Wire
Servo Arm
1/4” [6mm]
❏
12. Use tape or a small clamp to hold the ailerons in the
neutral position. Make a mark on the pushrods where they
cross the outer holes in the servo arms. Make a 90 degree
bend at the mark on the pushrod and cut off the excess pushrod
1/4" [6mm] beyond the bend. Attach the pushrods to the servo
arms using nylon FasLinks. Thread the clevises up or down
on the pushrods as necessary to center the ailerons with the
servo arms centered. When satisfi ed, slide the silicone clevis
retainers to the ends of the clevises to secure them.
Finish the Wing Panels
❏
1. Use epoxy to glue the anti-rotation pins into the holes
in the root ribs of the wing panels near the leading edge.
The pins should protrude from the root ribs approximately
5/8" [16mm]. Use a paper towel dampened with denatured
alcohol to wipe away any excess epoxy.
❏
2. Slide the aluminum wing tube into the fuselage
aligning the hole in the center of the wing tube with the hole
in the fi berglass tube in the fuselage.