Great Planes Revolver GP/EP ARF 59" - GPMA1018 User Manual
Page 17
17
17
❏
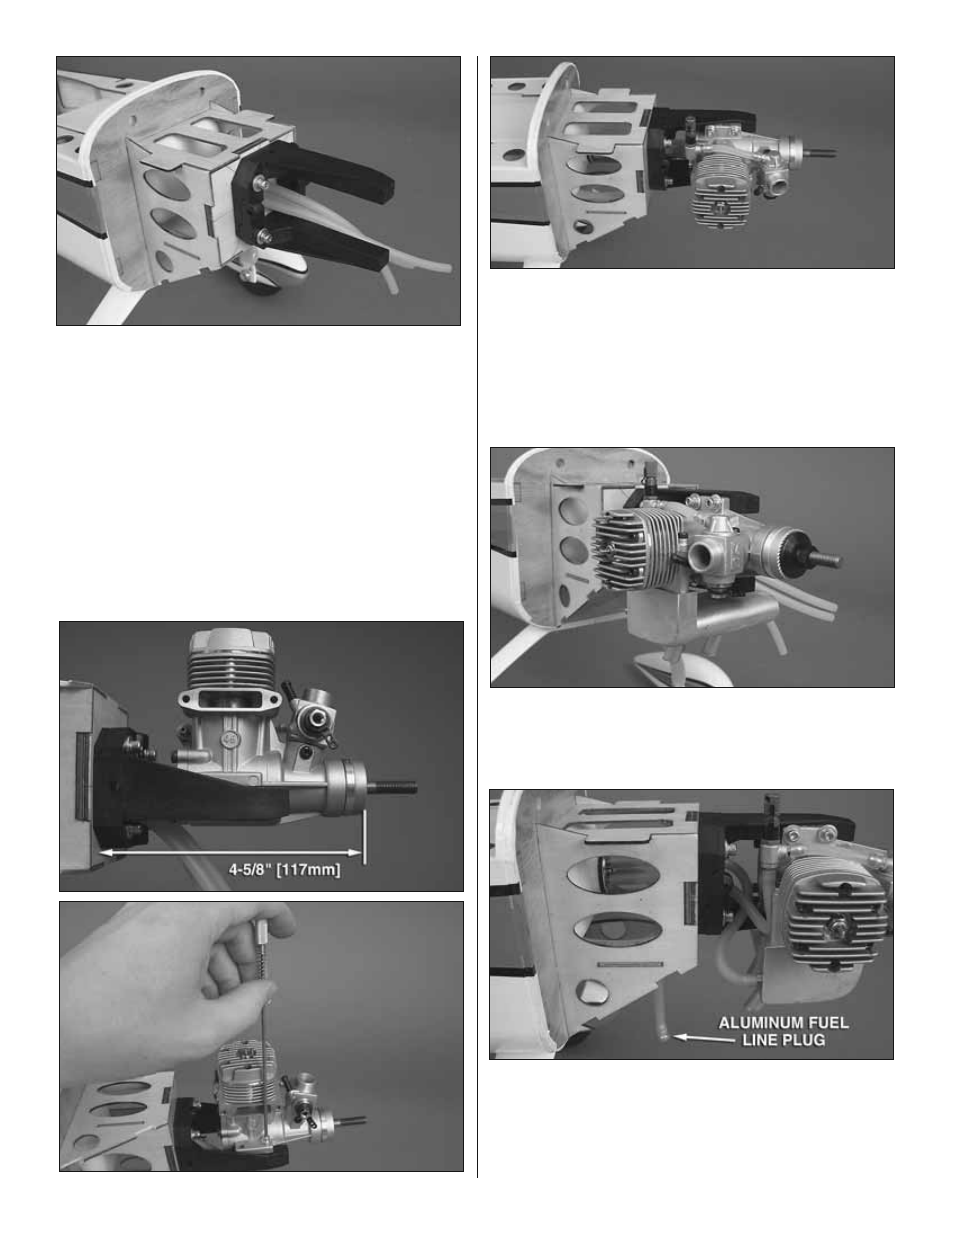
4. Using four 6-32 x 1" [25mm] SHCS, four #6 fl at washers,
four #6 lock washers, and thread locking compound, attach
the engine mount side-mounted to the fi rewall so that the
engine head will be on the right side. Leave the screws
slightly loose. Test fi t your engine between the mount halves.
Slide the mount halves against the sides of the engine and
fi nish tightening the mount screws.
❏
5. Position the front of the engine drive washer 4-5/8"
[117mm] from the front of the engine mounting box. Mark
the location of the engine mount holes onto the mount rails
using a Dead Center Hole Locator (GPMR8130). Remove
the engine from the mount and use a 6-32 tap and drill set to
create threads in the four mounting holes. Attach the engine
to the mount using four 6-32 x 3/4" [19mm] SHCS, four #6
fl at washers, and four #6 lock washers.
❏
6. If you installed a two-stroke engine, attach a Pitts-style
in-cowl muffl er. The stock muffl er could also be used, but
excessive cutting of the cowl would be necessary. We suggest
using a Pitts-style muffl er as shown in the picture.
❏
7. Cut the fuel tubing coming from the tank to the proper
length and connect the pressure and carb lines to the engine.
The fi ll line (if installed) should be plugged with the included
aluminum fuel line plug and able to hang free from the bottom
of the plane. Be sure to replace the fuel line plug after fi lling
or draining the fuel tank.