Great Planes Giant Citabria 30cc/EP ARF - GPMA1435 User Manual
Page 30
30
❏
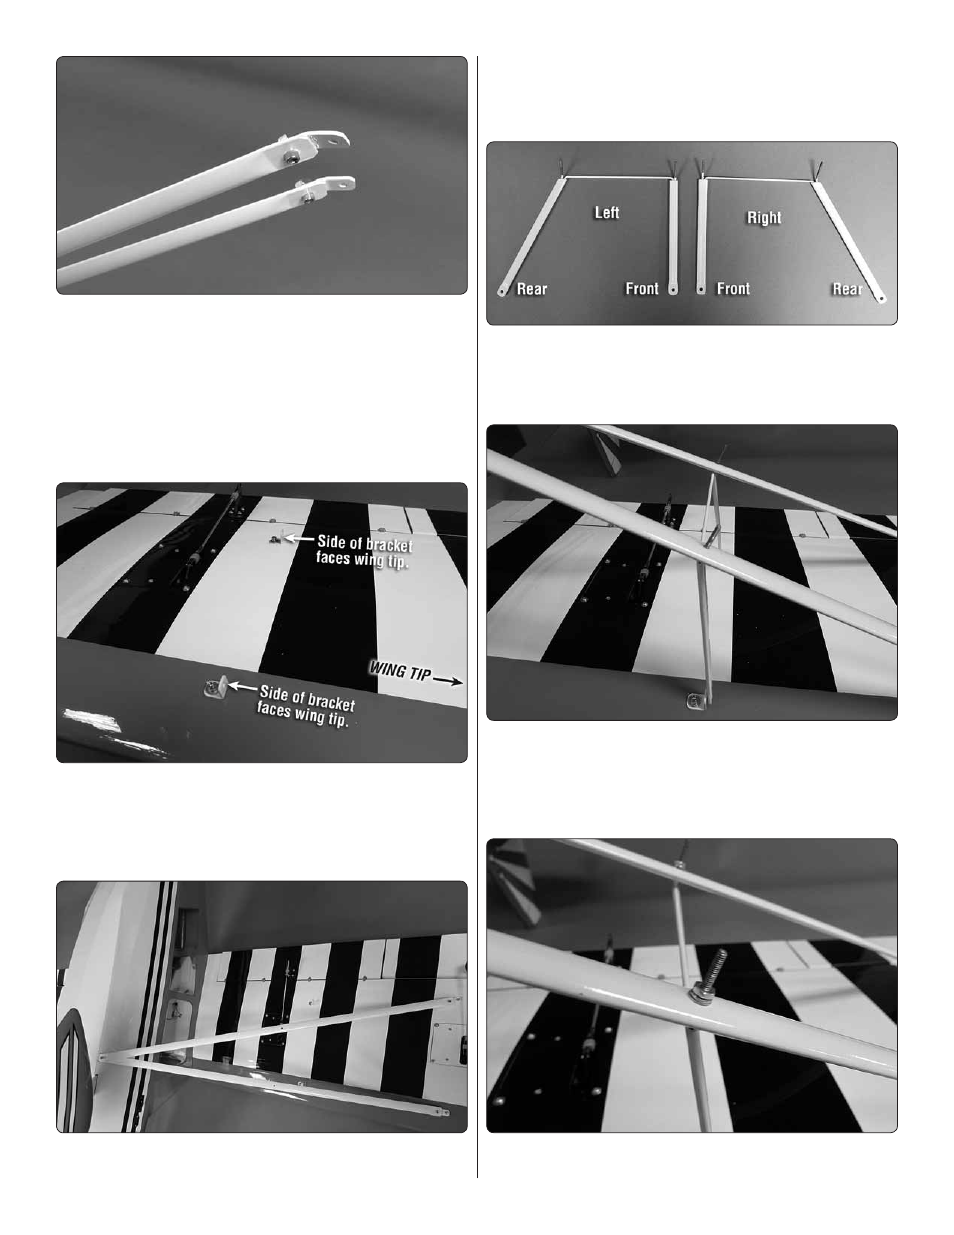
10. Install an angled bracket to the end of each strut with a
4-40 x 1/4" [6mm] socket head cap screw, 4-40 lock washer and
4-40 nut. Be sure to put a drop of thread locker on each screw.
❏
11. Look closely at the bottom of the wing. You will find four
mounting holes for the struts. Each of the mounting holes has a
4-40 blind nut pre-installed in the wing. The two mounting holes
closest to the wing tip are for the long wing struts. The two
holes near the center of the wing are for the interplane struts.
❏
12. Install a 90 degree bracket into each of the two holes
near the center of the wing for the interplane struts. Each
bracket should be secured with a 4-40 x 1/2" socket head
cap screw, #4 lock washer and #4 flat washer. The bracket
should be position as shown
❏
13. Install the wing struts to the wing and the fuselage with a
4-40 x 1/2" [13mm] socket head cap screw, #4 flat washer and
#4 lock washer, mounting it to the bracket extending from the
fuselage and the two blind nuts located in the wing near the wing
tip. Attach the struts to the fuselage with a 4-40 x 1/2" [13mm]
socket head cap screw, #4 flat washer and #4 lock washer.
❏
14. Locate the two interplane struts. You will notice
the threaded wires are a bit loose inside the tube. This is
intentional so you can make the final adjustments required
for the installation of the strut.
❏
15. Insert the threaded portion of the wire through the
strut. You may need to rotate the threaded wire slightly so it
protrudes through the strut as shown in the photo. Once you
have the wires adjusted work some epoxy or medium CA into
the tube to help secure the wire inside the tube.
❏
16. Secure the interplane strut to the wing strut with a 2-56
nut, #2 flat washer and #2 lock washer.