Great Planes Giant Citabria 30cc/EP ARF - GPMA1435 User Manual
Page 15
15
❏
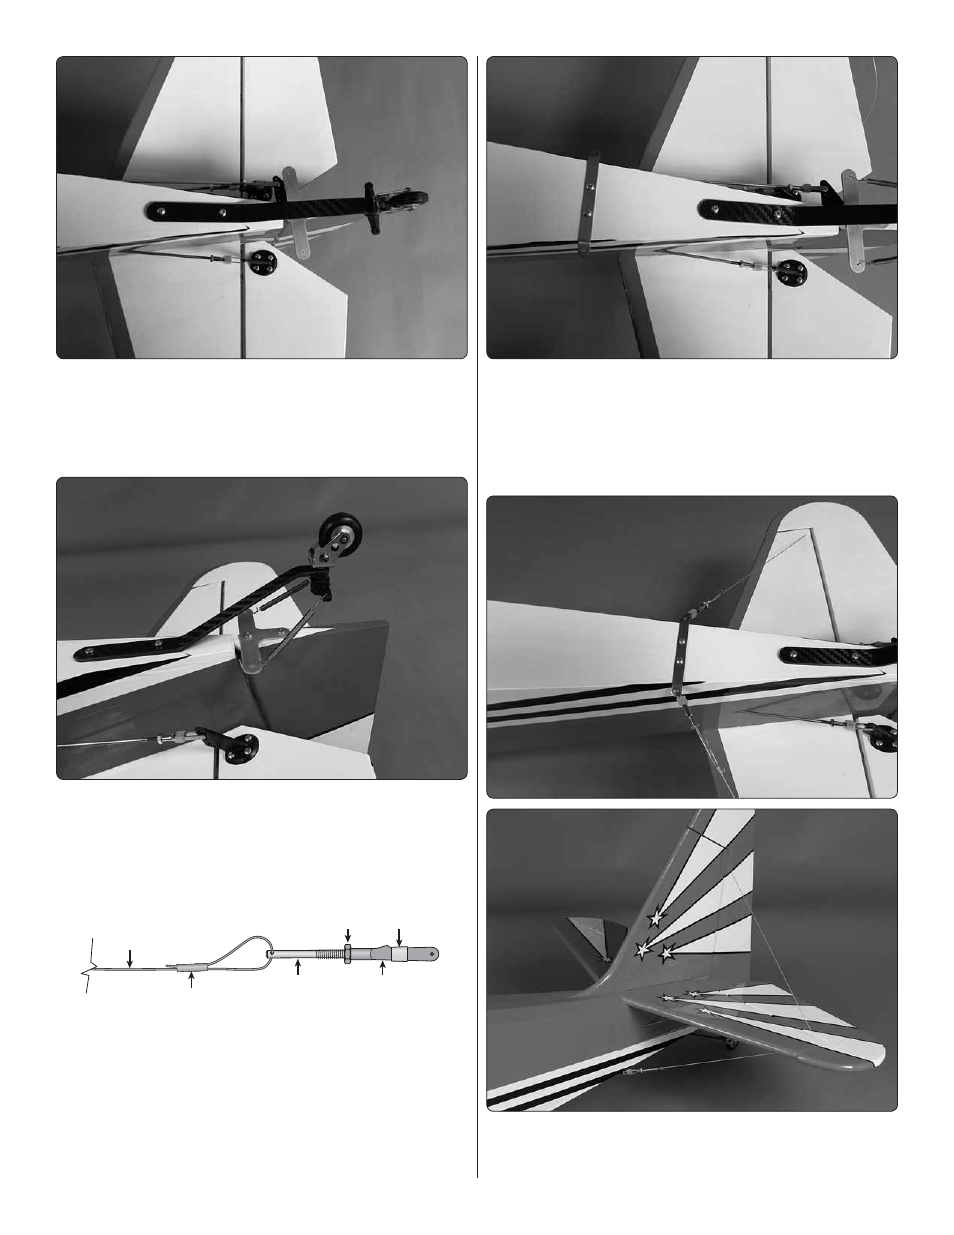
4. On the bottom of the fuselage just ahead of the rudder
are two pre-drilled holes. Insert and then remove a #4 x 3/8"
[9.5mm] screw into each of the holes. Apply a drop of thin CA
glue into each of the holes to harden the threads. Once the
glue hardens secure the tail wheel bracket to the fuselage.
❏
5. Center the rudder and the tail wheel. Secure the two
springs to the arm on the tail wheel assembly and the “T”
bracket by twisting the wire through and around the holes in
the brackets. Keep the tension from the two springs equal on
both sides of the tail wheel bracket.
Brass Crimp
Connector
2-56 Nut
Clevis
Keeper
2-56 Threaded
Clevis
2-56 Brass
Coupler
Braided
Wire
❏
6. Locate the small spool of braided wire, two 2-56 brass
couplers, two 2-56 nuts, two silicone clevis keepers and two
copper crimp connectors. Slide a crimp connector onto one
end of the braided cable. Insert the braided cable into the hole
in the end of one of the 2-56 brass couplers and loop it back
through the crimp connector. Crimp the connector tightly with
a pliers to secure the connector to the braided cable. Install a
2-56 nut, clevis keeper and 2-56 threaded clevis.
❏
7. Locate the aluminum tail wire bracket. Position it on
the bottom of the fuselage over the pre-drilled holes. Insert
and then remove a #4 x 3/8 screw into each of the two holes.
Apply a drop of thin CA glue into the holes to harden the
threads. After the glue has hardened, secure the bracket to
the fuselage with the screws.
❏
8. Attach the clevis to one side of the bracket. Insert the
other end of the wire into the hole in the stab. Continue
inserting the wire into holes in the fin and the opposite side