Install the flap servo – Great Planes Cirrus SR22 .46-55 ARF - GPMA1363 User Manual
Page 8
8
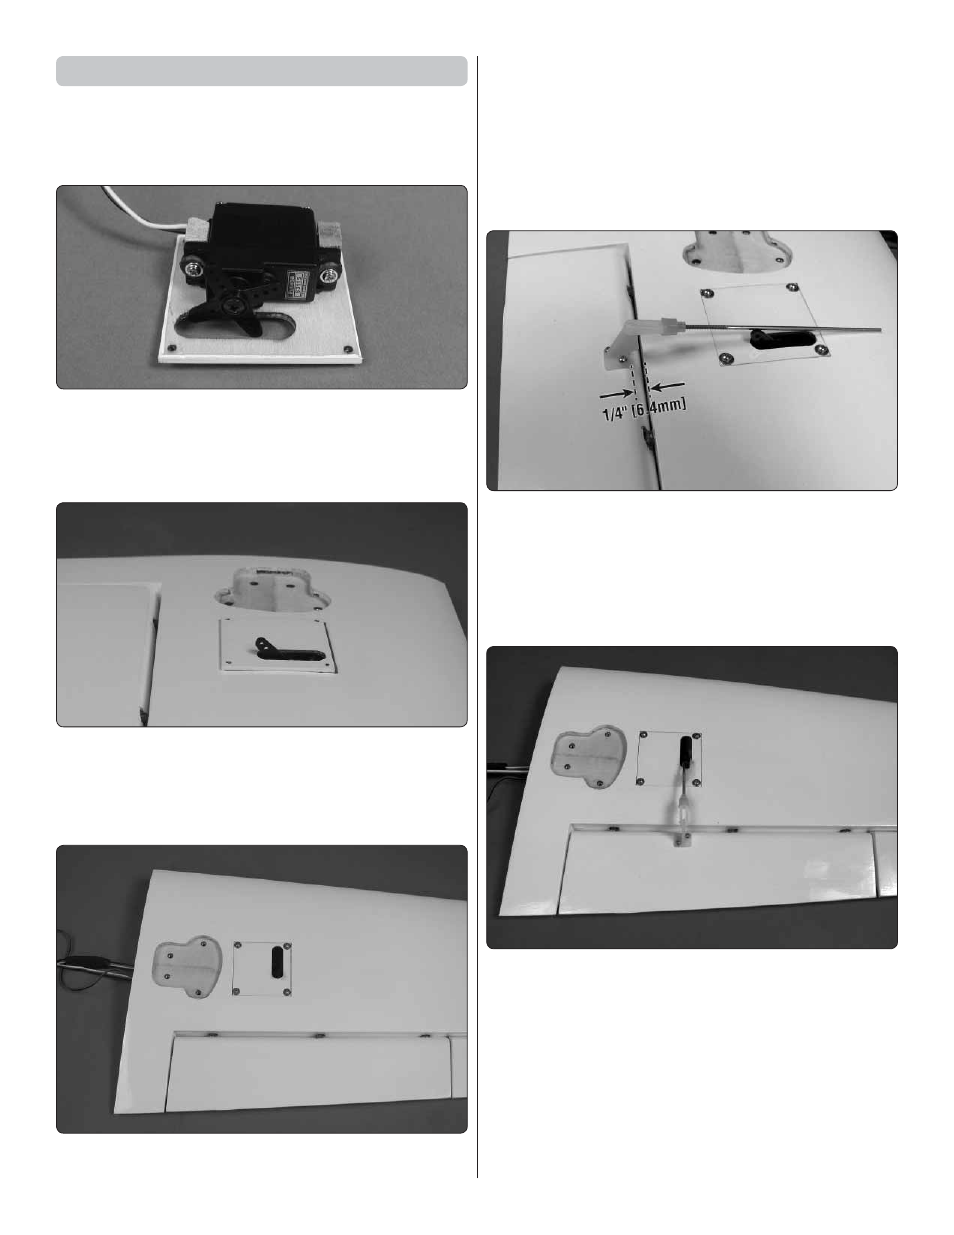
Install the Flap Servo
❏ ❏
1. Connect a 9" [229mm] servo extension to one of the
fl ap servos. Cut a piece of black heat shrink tubing in half.
Slide the heat shrink tubing over the connector. Shrink the
tubing by heating it.
❏ ❏
2. Install the fl ap servo on the fl ap servo cover following
the same procedure used to install the aileron servo.
❏ ❏
3. Use the string in the wing to pull the fl ap servo wire
through the wing.
❏ ❏
4. Plug the fl ap servo into your receiver. Position the
fl ap dial or slider on the transmitter to the fl ap up position.
Position a servo arm on the fl ap servo so that it is rotated
towards the trailing edge of the wing. Move the fl ap control
to check that the servo arm does not hit the fl ap servo cover.
❏ ❏
5. Place the fl ap servo cover with the servo in the wing.
Be certain that the cover is positioned correctly as shown.
Use the servo cover as a guide to drill 1/16" [1.6mm] holes
through the plate in the wing. Secure the cover using four #2
x 3/8" [9.5mm] sheet metal screws and four #2 fl at washers.
Use thin CA to harden the screw threads.
❏ ❏
6. Thread a nylon clevis 20 turns onto the end of a 2-56
x 4" [102mm] metal pushrod. Slide a silicone clevis retainer
over the clevis. Install the clevis in the outer most hole of a
nylon control horn.
❏ ❏
7. Position the control horn so that it is inline with
the fl ap servo horn and the base of the control horn is 1/4"
[6.4mm] from the trailing edge of the wing. On the fl ap, mark
the two mounting holes. Remove the control horn and drill a
1/16" [1.6mm] pilot hole at each mark. Do not drill completely
through the fl ap. Attach the control horn using two #2 x 3/8"
[9.5mm] sheet metal screws. Use thin CA to harden the holes.
❏ ❏
8. With the fl ap in the up position and the servo arm
rotated back, mark the pushrod where it meets the hole
11/16" [17.5mm] from the center of the servo arm. Remove
the pushrod from the fl ap control horn and make a 90° bend
at the mark. Reinstall the pushrod on the fl ap control horn.
Insert the L-bend in the fl ap servo arm and secure it with a
nylon Faslink. Cut the pushrod 1/32" [.8mm] past the Faslink
and slide the clevis retainer over the clevis.
❏
9. Return to step one of Install the Aileron Servo and
install the aileron and fl ap servos in the right wing panel
(page 6).