Install the nose gear – Great Planes Cirrus SR22 .46-55 ARF - GPMA1363 User Manual
Page 12
12
❏
4. Position the control horn on the elevator so that the
four holes on the control horn are inline with the elevator
hinge line. Mark the two control horn mounting holes on the
elevator. Remove the control horn and drill a 1/16" [1.6mm]
pilot hole at each mark. Do not drill completely through the
elevator. Attach the control horn using two #2 x 3/8" [9.5mm]
sheet metal screws. Use thin CA to harden the holes.
❏
5. Center the elevator servo and elevator. Mark the pushrod
where it meets the hole 7/16" [11mm] from the center of the
servo arm. Remove the pushrod from the elevator control horn
and make a 90° bend at the mark. Reinstall the pushrod on the
elevator control horn. Insert the L-bend in the elevator servo arm
and secure it with a nylon Faslink. Cut the pushrod 1/32" [.8mm]
past the Faslink and slide the clevis retainer over the clevis.
❏
6. Install the rudder servo following the same procedure
used to install the elevator servo. Note: Position the rudder
servo so that the rudder pushrod is aligned with the hole
11/16" [17.6mm] from the center of the servo arm.
Install the Nose Gear
❏
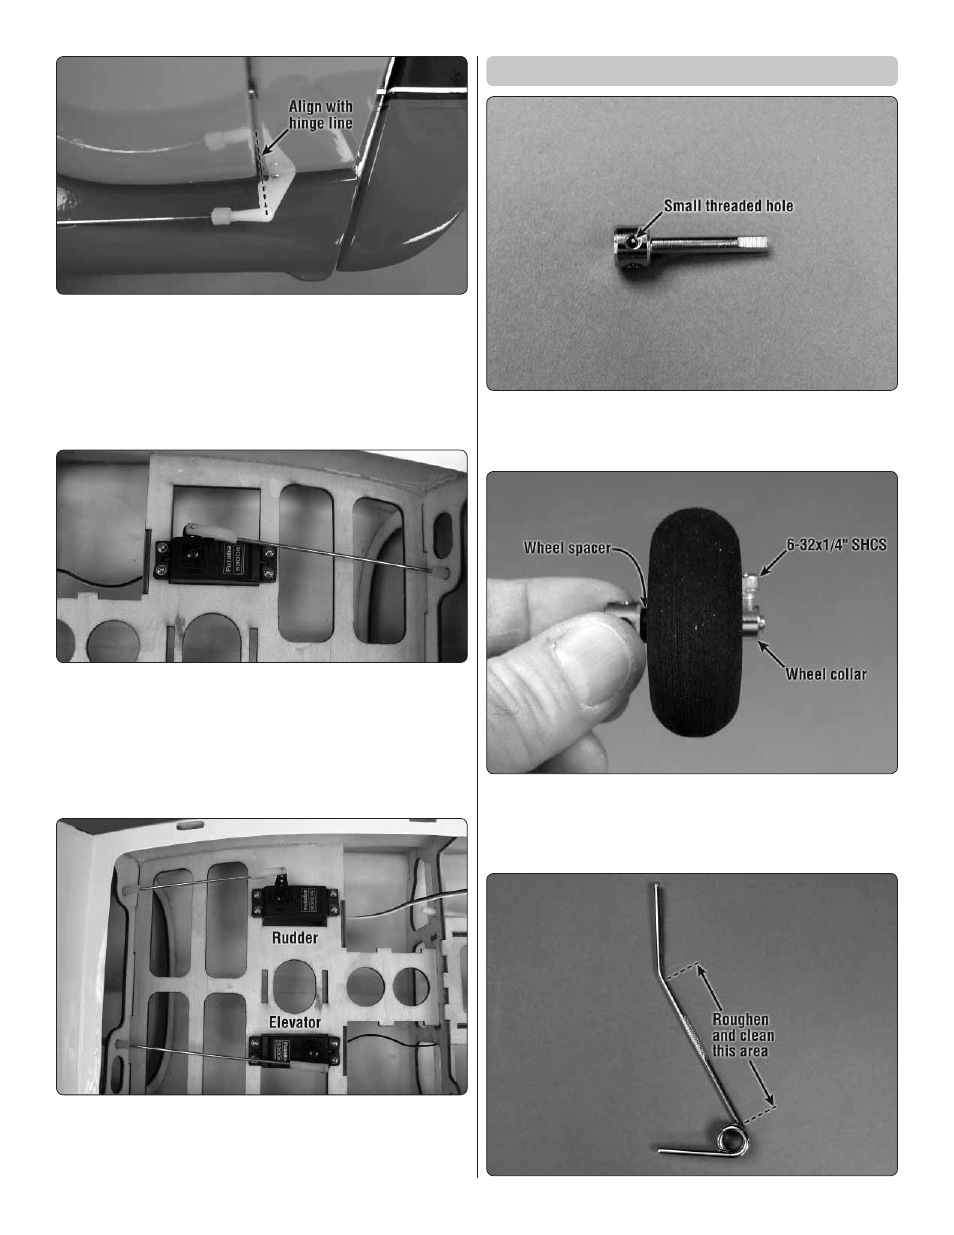
1. File a fl at spot at the end of the nose gear axle. The
fl at spot should be on the same side as one of the small
threaded holes.
❏
2. Slide a black plastic wheel spacer onto the axle, followed
by a foam wheel and a 4mm wheel collar. Apply a drop of
thread locker to a 6-32 x 1/4" [6mm] socket head cap screw
and secure the wheel collar on the axle with the cap screw.