Aircraft with flaps, Elevator/flap mixing, Adjustments and flight techniques – Futaba 8SSAP User Manual
Page 31
ADJUSTMENTS AND FLIGHT TECHNIQUES
•AIRCRAFT WITH FLAPS
Connect the flap servo to channel 6 of the receiver.
• Flaps are normally controlled by the CH6 Knob
6 on the transmitter front. Wide or narrow
(Flap Trim) travel may be selected by Flap
Switch [18] on the trimmer panel.
• Wide throw is often best for normal landing flaps
and airbrake operations.
Narrow (Trim) throw allows Flaps or Flprons
(see page 31 ) to be used for pitch trim adjust-
ments in knife edge and vertical maneuvers.
Narrow throw may also may also be best for
Elevator -> Flap (2 -> 6) mixing.
•ELEVATOR/FLAP MIXING
ELEVATOR -> FLAP MIXING
• Elevator -> Flap (2 -> 6) mixing is unidirectional
with elevator (CH2) acting as the Master chan-
nel. This function can be helpful in looping,
square cornered, and circular acrobatic maneu-
vers. Set up the function as follows:
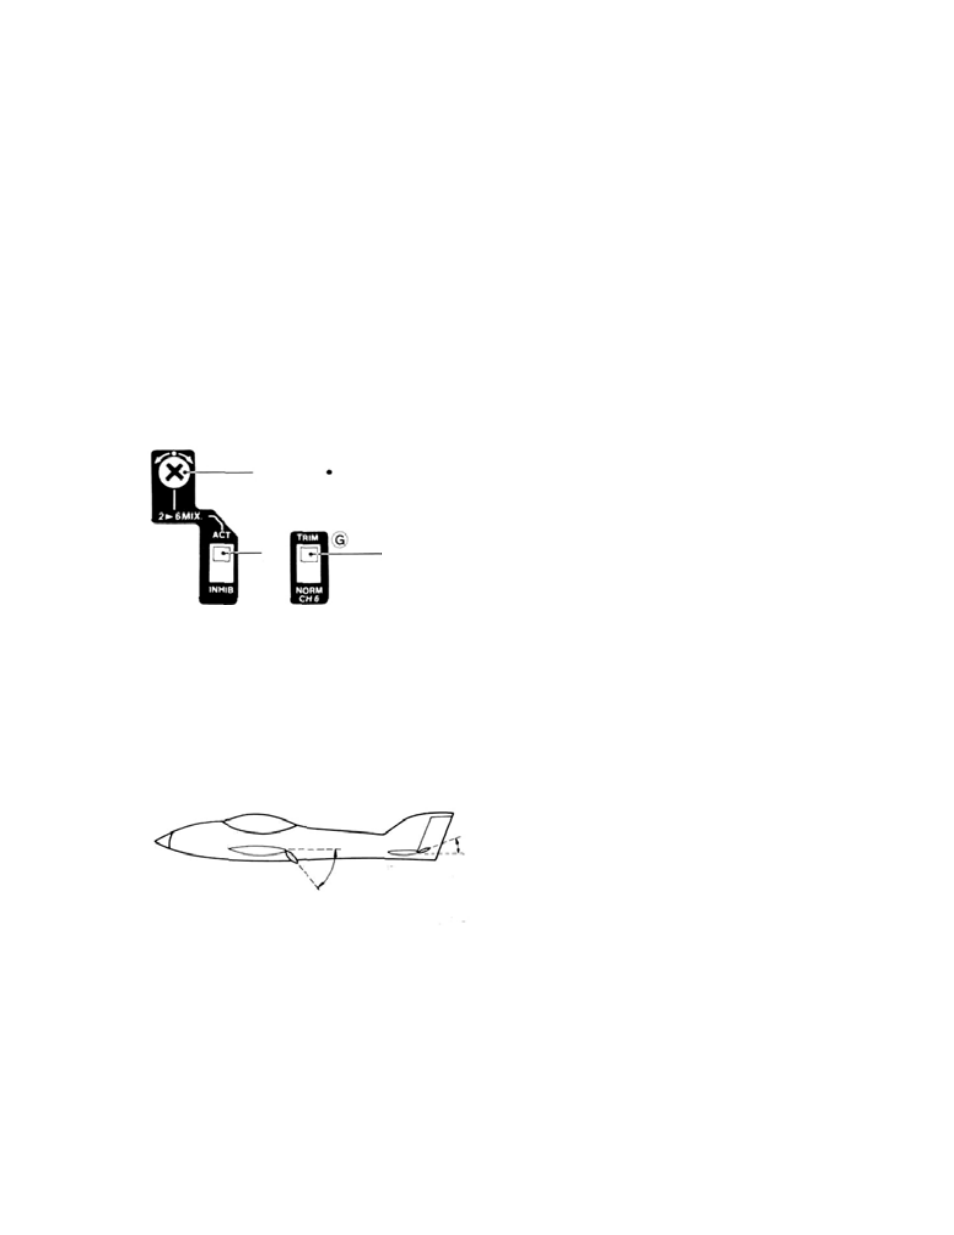
• Switch [10]: ACT
•Switch [18] TRIM
1. Set Safety Switch 10 to ACT and Flap
Switch
18 to TRIM.
2. Set Control Switch 12 to ON and adjust Trim-
mer 9 to give DOWN flaps with UP elevator
Fig. 47 stick
movement.
Initially, set deflection angles so that the flap
down angle is approximately the same as the
elevator up angle.
3. Transmitter Control Switch 12 is used to
turn
this function ON and OFF in flight as desired.
18
10
(6
9
29
FLIGHT ADJUSTMENT
1.Make a test flight with Switch 12 OFF and
adjust the Elevator trim and deflection to suit.
Flaps angle
2.Turn Switch 12 ON and test control response.
If the response is not correct, turn switch 12
OFF, land and adjust flap deflection with Trim-
mer 9.
3. Most common maneuvers can be performed
with the mixing function ON. Rolls and spins
may be better without the mixing depending on
the aircraft. Mixing is generally not recom-
mended for landing.
Elevator angle
Fig. 48