Fleet Engineers INS-07034 User Manual
Page 2
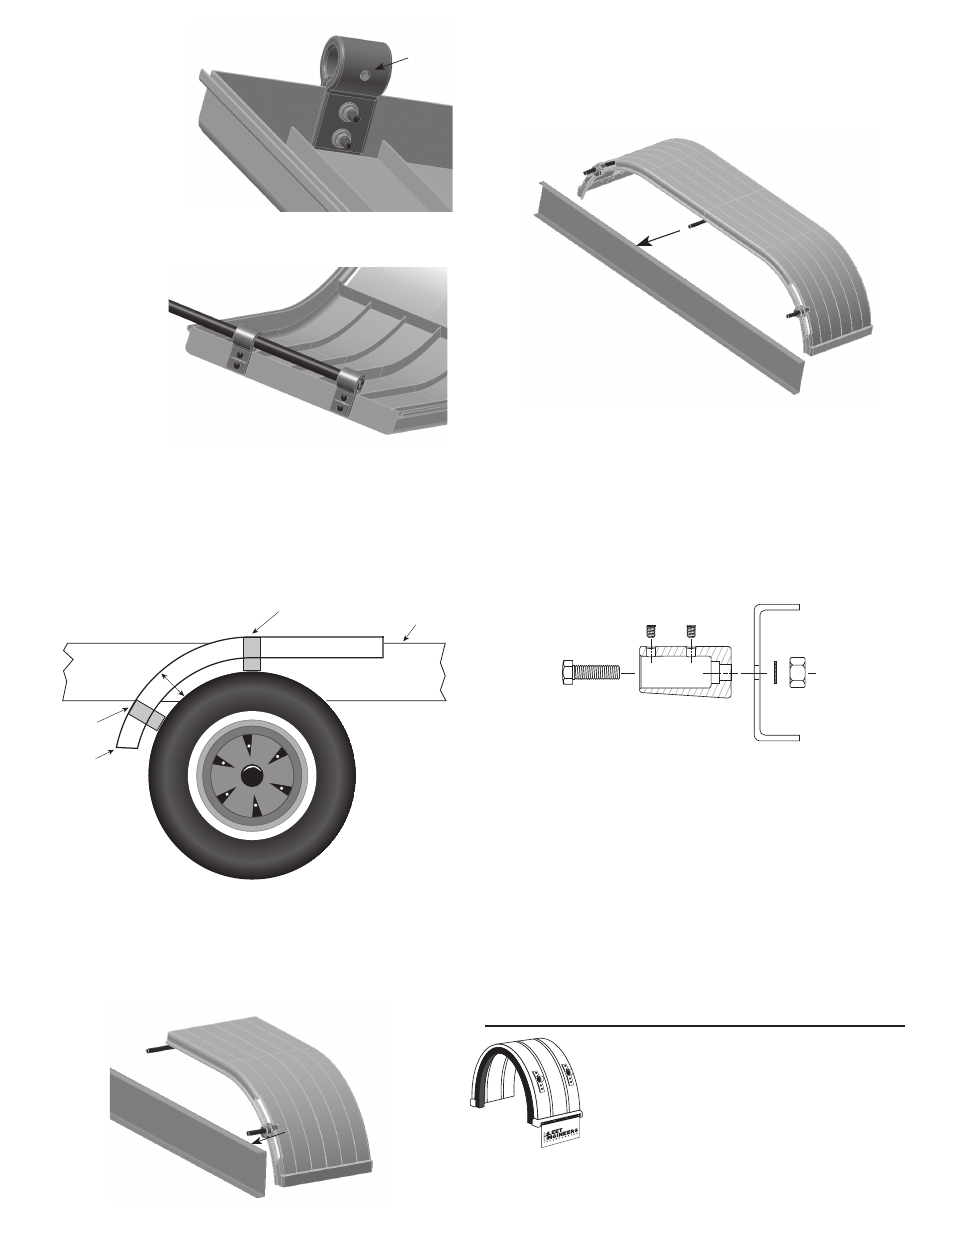
Spacer
Blocks
Spray
Master
Spacer
Blocks
Truck
Frame
3" Minimum
3" Minimum
4. Insert a T-nut into
each of the two
center mount con-
nector clamps from
inside the tube hole.
Select either a bent
tube or the Master
Multi-Mount straight
tube for the cen-
ter mount. (NOTE:
the bent tube uses
either a 1.37 or a 1.87” tube opening connector clamp while
the Master Multi-Mount center mount uses a 1.37” tube open-
ing connector clamp). Take the mounting tube selected and
slide through
both connectors
while holding
the T-nuts in
the connector
clamp in place. If
using the Multi-
Mount, assemble
castings to the
straight tube
using installation
sheet INS-03029
for position
purpose only.
5. Flip fender back over and position over tires. If installing a
Double Radius Fender, watch for “pinched” finger at center
connection. Use 2 x 4 blocks or other suitable spacers to
achieve desired clearance around tires. (S.A.E. recommenda-
tion is 3” minimum).
Note: If you have an air suspension, make sure there is tire
clearance when the suspension is deflated.
6. On the frame side of the fender, position the hidden END
mount clamp (with tube) as necessary to select an existing hole
or mark a space on the frame to drill a new hole. Make sure the
tube is square to the frame and mark the position of the hidden
end mount clamp on the fender.
6A. If installing a double radius fender, do step six to both ends of
fenders.
7. Adjust the center mount tube to select an existing hole if avail-
able, or mark a space on the frame to drill an new hole.
Note: Be sure to follow truck or trailer manufactureres recom-
mended procedures for drilling any required holes in the frame.
8. Remove fender from over tires and drill hole(s) if necessary.
Engage hidden mount teeth of clamp onto the hidden pocket
teeth of the fender and push firmly until they seat over top and
bottom ribs. A tap or two with a soft faced hammer may be
needed. Torque bolt at center rib support to 38 ft. lbs.
Note: If clamp removal or reposition is necessary, an outward
tap with a soft faced hammer will disengage it from the ribs.
9. Mount tube casting sleeve to the truck frame at the end mount
location. See installation sheet INS-03028.
Please Note:
Flap weights are not recommended and may
void the warranty.
Painting Spray Master fenders IS NOT recommended
and may void the warranty. If painting is desired,
use Valspar Plastic Enamel for best results.
10. Position the fender back on the vehicle and connect the END
and CENTER mounts to the vehicle. Check to make sure the
fender is centered over the tires. (In a few cases it may be
necessary to shorten the hidden mount end tube. If this is the
case, be sure to cut the non threaded insert end only!) Tighten
all bolts to proper torque. Install the set screws in both the
center connector clamps and hidden end mount clamps and
tighten to a maximum torque of 48 in. lbs. +/_ 3in. lbs. or 4
ft. lbs. Install end caps on center mount tube per installation
sheet INS-20014. Peal plastic off fender reflectors.
T-nut
Mark position
Mark position
on frame