Starting port monitor, Changing screen appearance, Starting port monitor changing screen appearance – Comtrol RPSH Windows 2000 User Manual
Page 15
Using Port Monitor
15
•
The state of the modem control and status signals
•
Open ports
•
Raw byte input and output counts obtained from the driver
•
Port errors
The available statistics include:
•
Instantaneous characters per second (CPS) calculations
•
Minute, hour, and day CPS averages and peaks
•
Carrier detect (CD) signal runtime and transition count
Reports can be automatically generated on an hourly and/or daily basis, and can cover all ports collectively or
a separate report for each port. You can also set how often the values are recalculated, fine-tuning
thoroughness against system efficiency, and automatically run external batch files to perform additional
processing and analysis.
Starting Port Monitor
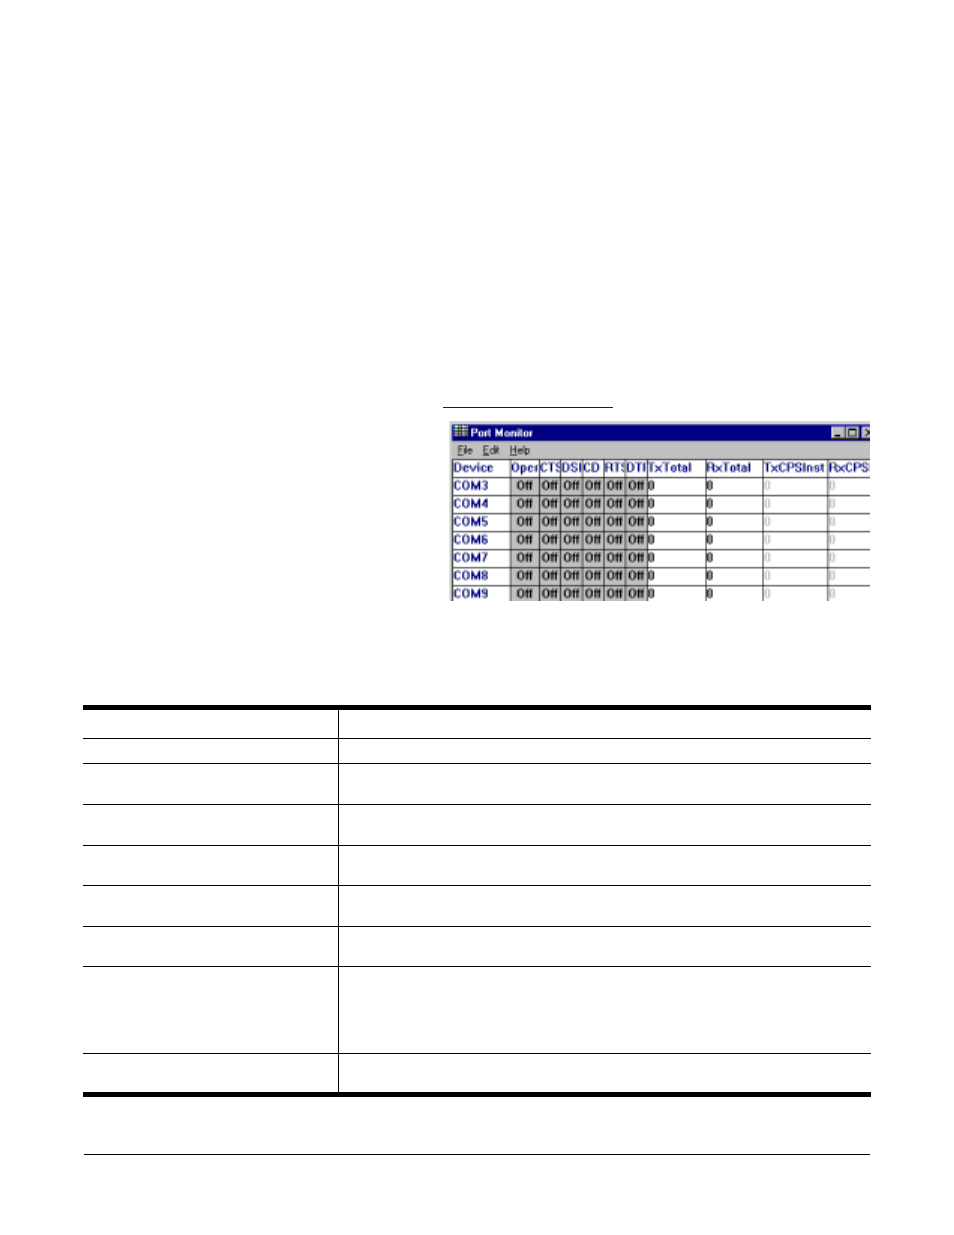
To run Port Monitor, select Port Monitor from the
The monitor window displays:
Note: To change the appearance of the screen, see
the following discussion.
Once the monitor window displays, Port Monitor
is active and collecting data. If any cumulative
data has been saved from previous sessions, it is
automatically brought in and used.
Port Monitor continues to run and collect data
until you terminate it, at which point all
accumulated data is automatically saved for use
in the next session.
Changing Screen Appearance
While Port Monitor is running, there are a number of commands and controls that change the appearance of
the screen.
* The Reset command does not clear raw data from the calcs.dat file. It simply resets the selected display fields
Port Monitor
Screen Commands
Desired Change
Procedure
Change the monitor window font. Select Font from the Edit menu.
Change width of a single column.
Left-click on the column separator (vertical) line and drag it to the
desired width.
Change column placement.
Left-click in the middle of the column you want to move and drag it to the
desired location.
Remove a column.
Right-click on the column you want to remove and select Remove from the
pop-up menu.
Clear all fields and reset them to
null values.
Right-click on the upper left cell in the table and select Reset from the
pop-up menu.*
Clear any single field except the
upper left cell.
Right-click on the field to be cleared and select Reset from the pop-up
menu.*
Add a column.
Right-click on the column now occupying the desired location and select
Add from the pop-up menu. You are prompted to name the variable you
want to display, as well as other information. (See Column Setup, below.)
After you click OK, the column is inserted in the selected location and the
existing column is moved to the right.
Change other properties of a
column.
Right-click on the column and select Properties from the pop-up menu.
(See Column Setup, below.)