Rca video cassettes – RCA P46729 User Manual
Page 22
Attention! The text in this document has been recognized automatically. To view the original document, you can use the "Original mode".
RCA Video Cassettes
We recommend RCA cassettes be used with your camcorder. Use of poor quality or damaged tapes can
contaminate the video heads, resulting in snow or no picture during playback. Head cleaning is not covered
under warranty. It is considered normal maintenance. Playing a new RCA tape for approximately 30
minutes will often satisfactorily clean the heads and improve your picture.
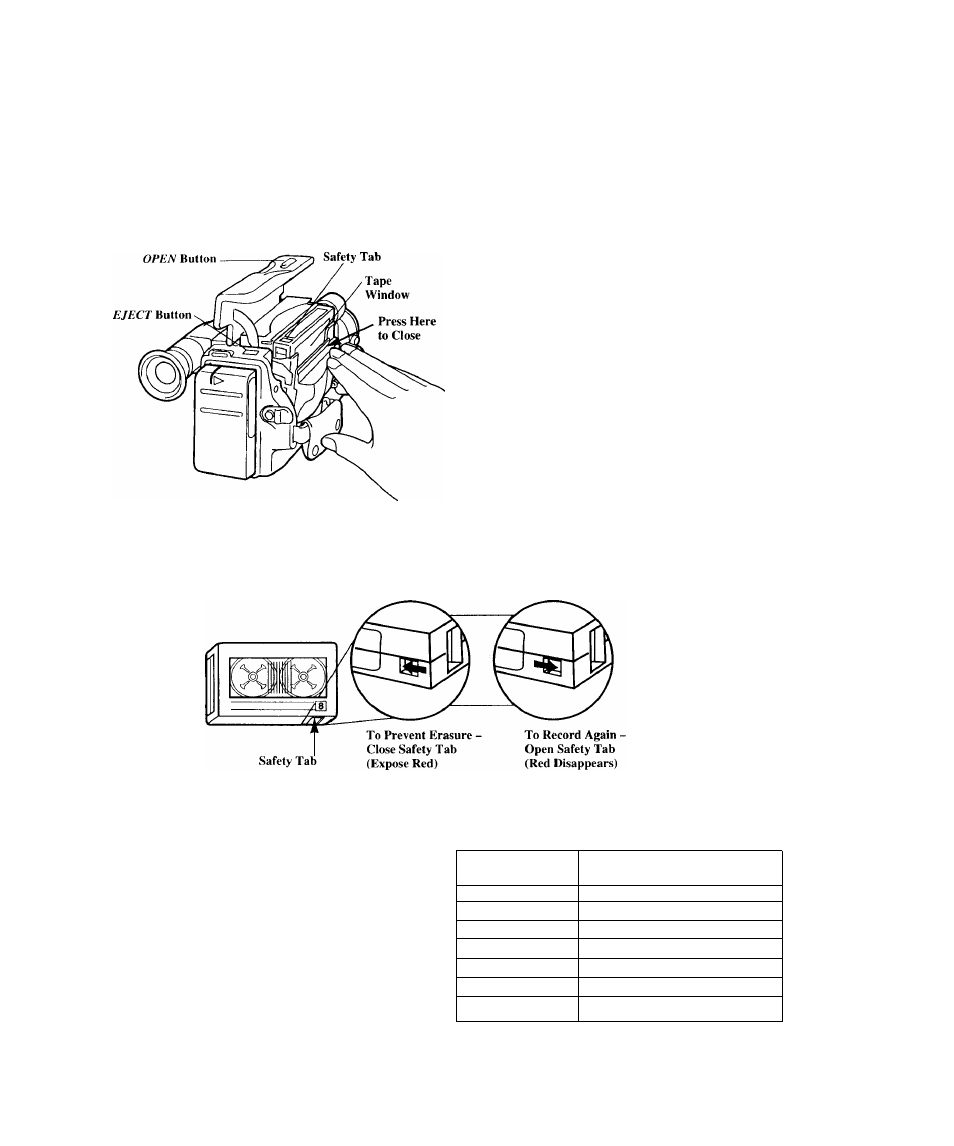
Insert and Remove Cassettes
1. Attach a power supply to the camcorder.
2. Slide the OPEN button and completely open the
cassette compartment cover.
3. Press the E/fCr button to open the cassette
compartment. Insert or remove the cassette.
Caution: Insert the cassétte with the safety
tab facing up and the tape window facing out.
The cassette should slide easily in the
compartntent. Do not force the cassette.
4. Gently press on the area labeled PUSH to close
the cassette compartment door.
5. After the cassette compartment is fully retracted,
close the cassette compartment cover.
Erase Protection-Safety Tab
You can use your video cassettes over and over again. To erase a previous recording, just record over it.
Recording and Playback Speeds and Times
The camcorder records in standard speed (SP). The
chart shows the maximum SP recording times for
some popular 8mm cassettes.
The camcorder can play back tapes in standard
speed (SP) or long play (LP) speed. The playback
speed is automatically selected by the camcorder.
The LP indicator appears in the electronic
viewfinder when the camcorder is playing back a
tape recorded in LP.
Cassette
Recording Time
P6-15
15 Minutes
P6-20
20 Minutes
P6-45
45 Minutes
P6-60
60 Minutes
P6-90
90 Minutes
P6-120
2 Hours
P6-150
2 1/2 Hours
20