Controls / / 4. nomenclature, Names of buttons, English – Clarion ProAudio VRX 935VD VRX935VD User Manual
Page 4: When the display open, When the display closed
VRX935VD
7
5
VRX935VD
6
VRX935VD
English
Owner
’s
manual
English
Owner
’s
manual
English
Owner
’s
manual
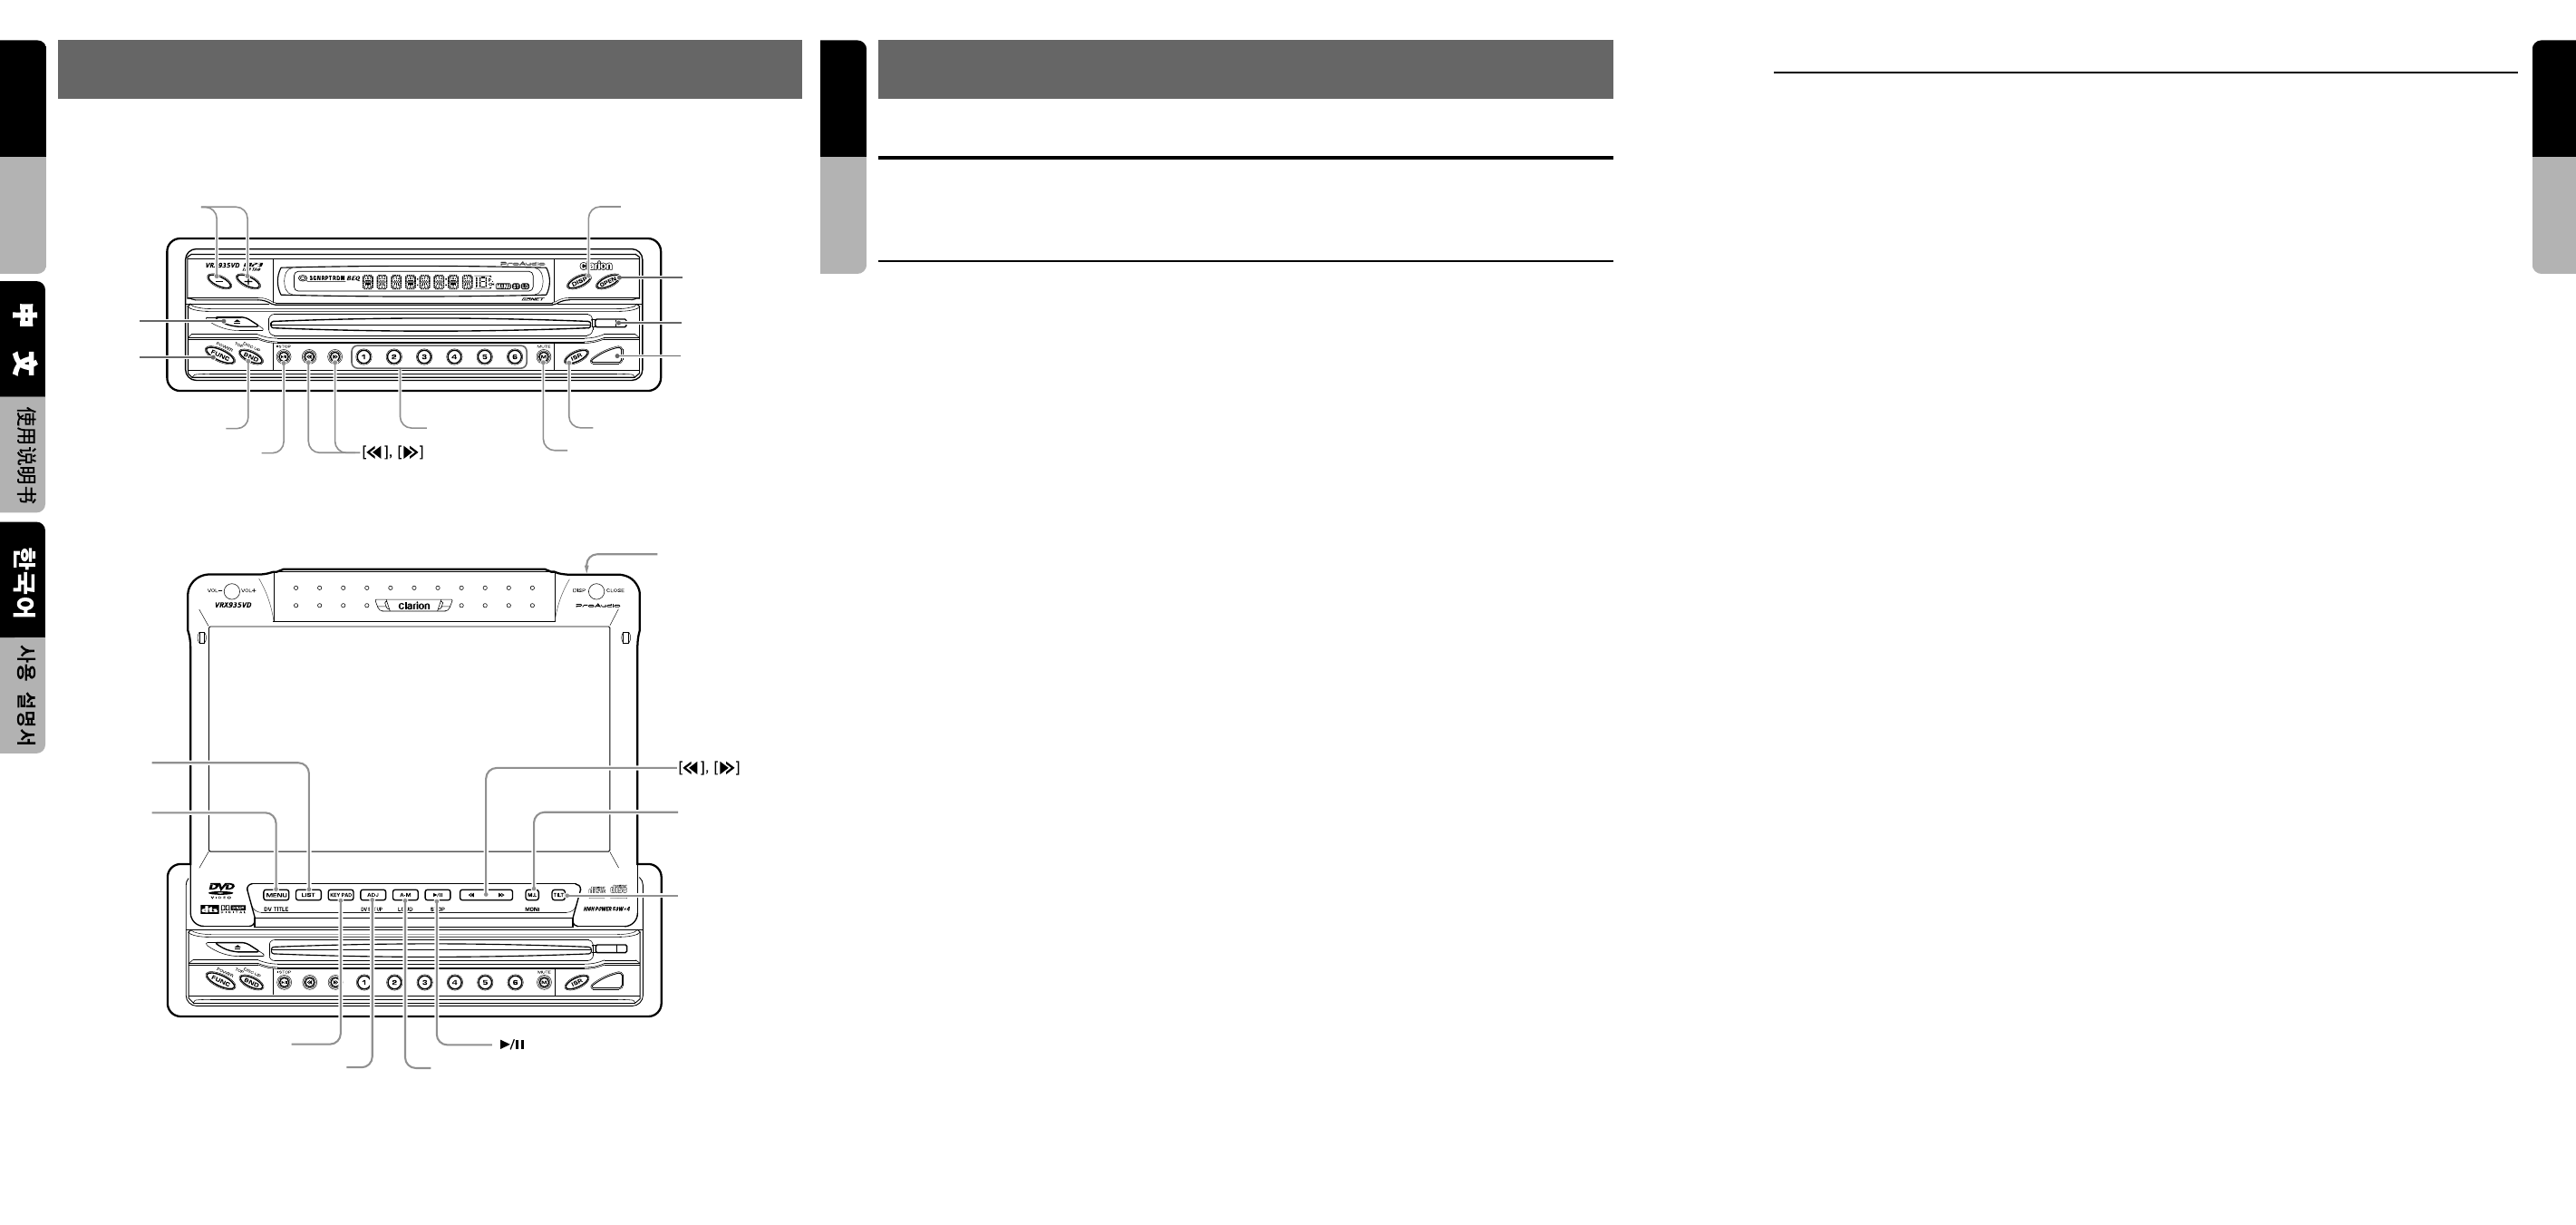
Note: Be sure to unfold this page and refer to the front diagrams as you read each chapter.
Main unit /
/
With the Display closed /
/
With the Display open /
/
3. CONTROLS /
/
4. NOMENCLATURE
When the display open
[
a], [d] button
• Use this button to tune to a station in the ra-
dio/TV mode.
• Use this button to select a track in the CD,
Video CD, MP3 and CD/MD changer mode.
• Use this button to select a chapter in the DVD
video and DVD changer mode.
[M.L] button
• The display panel can be switched to a com-
posite screen to lock the monitor.
• Press and hold this button for about 1 second
or longer to turn off the monitor.
[TILT] button
• Use this button to adjust the angle of the liquid
crystal panel in 5 steps.
• Every time this button is pressed and held for
about 2 seconds or longer, the liquid crystal
panel moves forward/backward in 3 steps.
[
s] button
• Press this button to enter the play pause mode
in the DVD video mode and changer mode.
Press the button again to resume playback.
[A-M] button
• Shows the AUDIO MODE menu for tone ad-
justment, etc. Press and hold this button for 1
second or longer to switch the loudness on or
off (LOUD ON/OFF).
[ADJ] button
• Shows the ADJUST MODE menu to change
the settings.
• Press and hold this button for 1 second or
longer to show the DVD SETUP menu.
[KEY PAD] button
• Press to display the keys (KEY PAD) that cor-
respond to play mode.
[MENU] button
• Press this button to show the DVD menu on
the screen in the DVD video and DVD
changer mode.
• Press this button to show the file selection
screen in the MP-3 mode.
• Press and hold this button for 1 second or
longer to show the DVD title screen.
[LIST] button
• Press this button to show the list of the preset
channel on the screen in the radio/TV mode.
• Press this button to show the disc list on the
screen in the CD/MD/DVD changer mode.
When the display closed
[VOL] button
• Use this button to increase/decrease the vol-
ume.
[DISP] button
• Use this button to switch the indications such
as play status on the information panel.
[OPEN] button
• Use this button to open/close the liquid crystal
panel.
• Press and hold this button for about 2 sec-
onds or longer so that the liquid crystal panel
is positioned horizontally when the liquid crys-
tal panel is open. Press the button again to re-
turn the panel to the original position. Even if
the button is not pressed, the panel returns to
the original position after about 10 seconds.
[RELEASE] button
• Use this button to remove the DCP from the
main unit.
[SENSOR]
• Remote control infrared sensor.
[ISR] button
• Use this button to enter the ISR (Instant sta-
tion recall) standby mode.
[MUTE] button
• Use this button to mute the sound.
Names of Buttons
Note:
• Be sure to read this chapter referring to the front diagrams of chapter “3. CONTROLS” on page 5 (unfold).
[DIRECT] button
• Use this button to select a preset channel in
the radio/TV mode.
• Use this button to select a disc in the changer
mode.
• Press and hold one of the [DIRECT] button for
2 seconds or longer to store the current sta-
tion into preset memory.
[
a], [d] button
• Use this button to tune to a station in the ra-
dio/TV mode.
• Use this button to select a track in the CD,
Video CD, MP3 and CD/MD changer mode.
• Use this button to select a chapter in the DVD
video and DVD changer mode.
[
s] button
• Press this button to enter the play pause
mode in the DVD video mode and changer
mode. Press the button again to resume play-
back.
[BND] button
• Press this button to switch the receiving
bands for radio/TV mode, etc. Press and hold
this button for 1 second or longer to switch the
SEEK/MANUAL tuning modes.
• Use this button to move to the first track on a
disc in the DVD video mode.
• Use this button to switch to the next disc in
the changer mode.
• Use this button to select visual1 or 2 in the VI-
SUAL mode.
[FUNC] button
• Press this button to turn on the power. Press
and hold this button for 1 second or longer to
turn off the power.
• Press this button to switch the modes such as
radio.
[
Q] button
• Use this button to eject a disc.
[DISP] button
• Press and hold this button for 1 second or
longer to call the LCD background screen
setup menu.
• Press this button to show the information on
the screen in the TV, VISUAL, or DVD video
mode.
• Press and hold this button for 1 second or
longer to switch the display sizes while in the
screen where the TV, VISUAL, or DVD video
mode is suspended.
[OPEN]
[VOL]
[DISP]
[RELEASE]
[SENSOR]
[
s]
[
Q]
[BAND]
[FUNC]
[DIRECT]
[ISR]
[MUTE]
[TILT]
[M.L]
[ ]
[A-M]
[ADJ]
[KEY PAD]
[LIST]
[MENU]
[DISP]