Materials needed, Now to, Your rffrigtrator – Kenmore 596.50002100 User Manual
Page 11
Attention! The text in this document has been recognized automatically. To view the original document, you can use the "Original mode".
NOW TO
\m
YOUR
RffRIGTRATOR
If your refrigerator requires an ice maker
water supply connection, refer to
How
to Connect the Water Supply
(page
10) before leveling your refrigerator.
A CAUTION
To protect personal property or
refrigerator from damage, observe
the following:
> Protect soft vinyl or other flooring
with cardboard, rugs, or other
protective material.
> DO NOT
use power tools when
performing leveling procedure.
MATERIALS NEEDED
> %" hex head driver
3^ Level
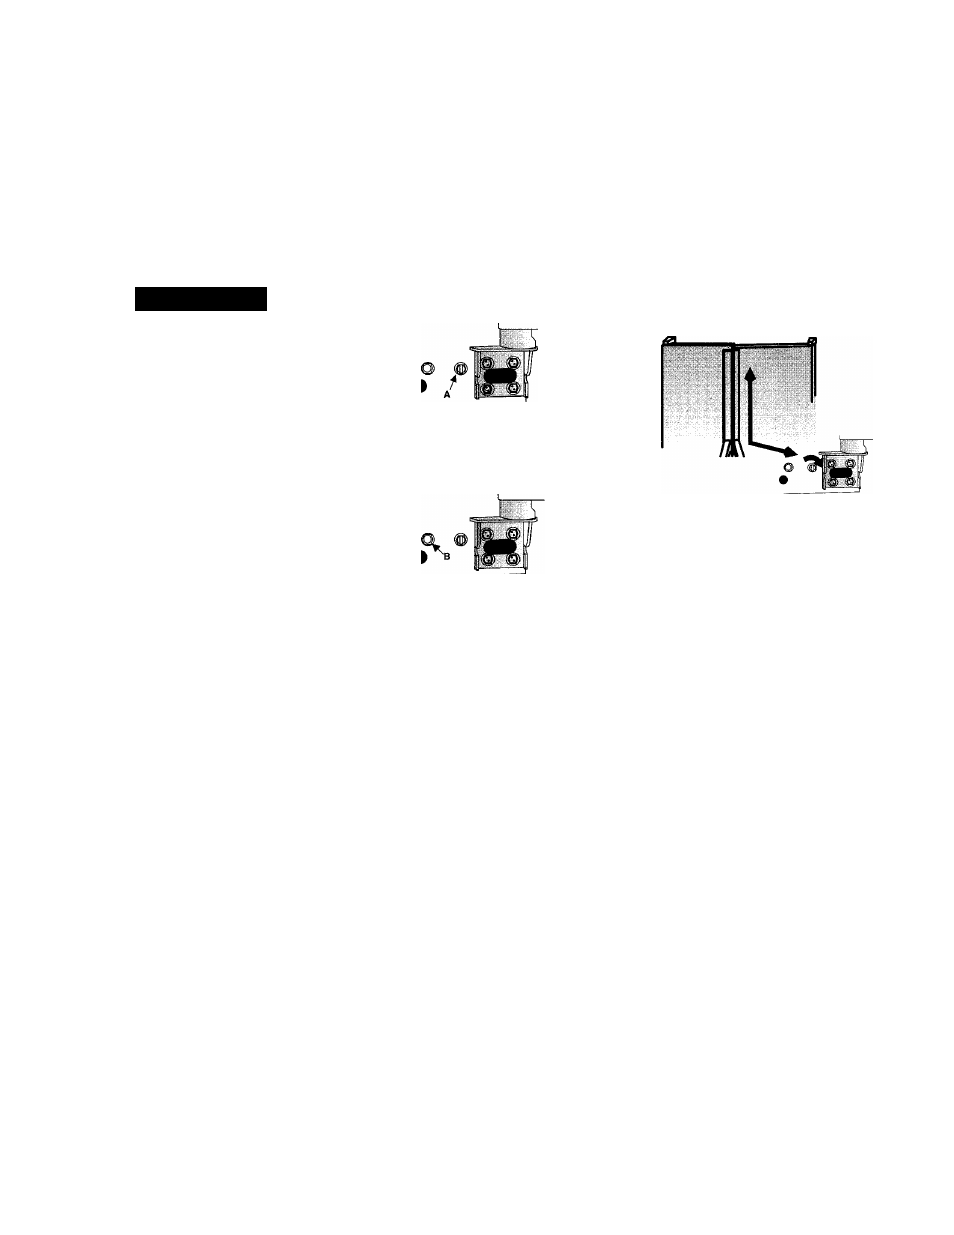
1. Remove toe grille and bottom bracket
covers (see previous instructions).
2. Turn both front adjustment screws (A)
clockwise to raise and counter
clockwise to lower.
3. Turn both rear adjustment screws (B)
clockwise to raise and
counterclockwise to lower.
4. Using a level, make sure front of
refrigerator is 'A" (6 mm) or
'/2
bubble
higher than back of refrigerator. See
leveling step 3 for assistance.
5. If required, correct rocking of
refrigerator by turning rear
adjustment screw clockwise to raise
rocking corner. If doors are
uneven...
> Determine which door needs to be
raised.
5
^ Turn front roller adjustment screw
clockwise to raise front corner of
door.
If the refrigerator has reached the
limit of its adjustment range, and
doors are still not level-lower
opposite door by turning roller
adjustment screw
counterclockwise.
> Check with level to verify'/" tilt to
the back for proper door closure.
> If refrigerator is aligned and stable,
replace toe grille and hinge
covers.
O
(A
11