Put frozen food in the oven and close the door, Touch quick defrost, Using pause – Whirlpool MC8991XT User Manual
Page 19: U u u u, Temperature probe cooking tips, Cleaning the probe
Attention! The text in this document has been recognized automatically. To view the original document, you can use the "Original mode".
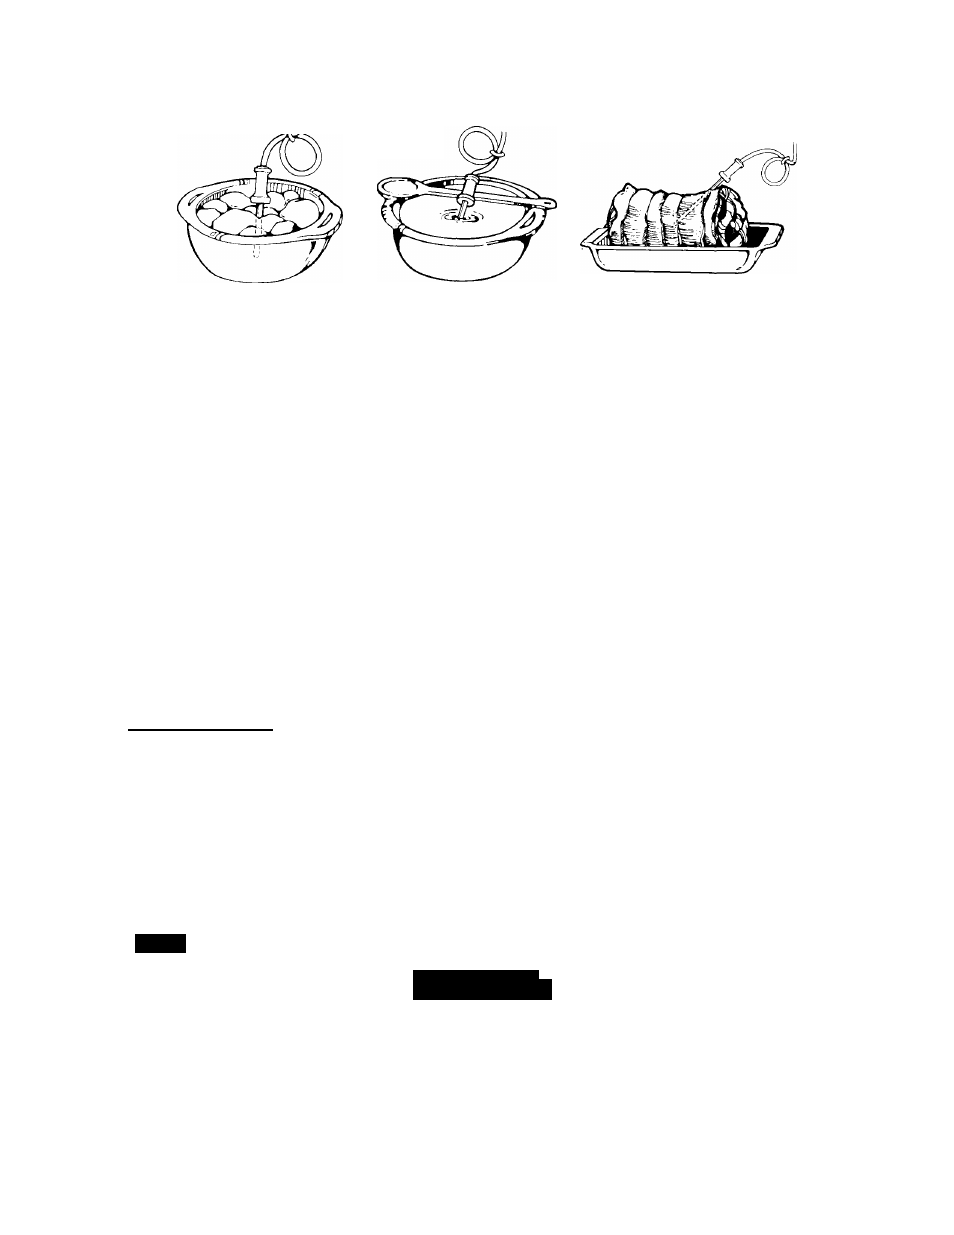
Temperature probe cooking tips
For casseroles, the tip ot
the probe should be in the
center of the food. Stir foods
when recommended.
Replace the probe.
For liquids, balance the
probe on a wooden
spoon or spatula so the
tip of the probe is in the
center of the liquid.
For roasts, the tip of the
probe should be in the
center of the iargest
muscle, but not touching
fat or bone.
• Casseroies cooked using the
Temperature Probe shouid be
made from precooked foods. Do
not use raw meats, raw vegeta
bles and cream sauces in
casseroles.
• Dry casseroles do not work well.
• Thaw frozen casseroles and
meats in the convection micro
wave oven before inserting the
probe.
• If you are cooking individual
servings such as mugs of soup,
check the probe setting in sev
eral of the items - all the mugs
may not heat at the same rate.
• Dry meat loaf mixtures don’t work
well.
• Remember that roasts may vary
in size, shape and composition.
Use the timings for minutes per
pound as a guide as well as the
Temperature Probe.
Cleaning the probe
1. Remove probe from convection microwave oven using hot pads.
2. Wipe probe with a hot sudsy cloth. Use a plastic scouring pad to remove stubborn foods.
Using PAUSE
Your microwave oven can be set to pause halfway through QUICK DEFROST or COOK,afterthe
automatic part of AUTO SENSOR, and between COOK and ROAST TIME or ROAST TIME and COOK to
allow you to stir or turn the food, to add ingredients or to plug in the probe.
Using PAUSE with QUICK DEFROST
DO THIS...
THIS HAPPENS...
1.
Put frozen food in the
oven and close the door.
QUICK
DEFROST
2.
Touch QUICK DEFROST.
/ / / / / / / f
u u u u
The QUICK DEFROST Indicator Light will
come on and the Display will show
four O’s.
continued on next page
19