Carl Goldberg GBGP0102 User Manual
Page 4
4
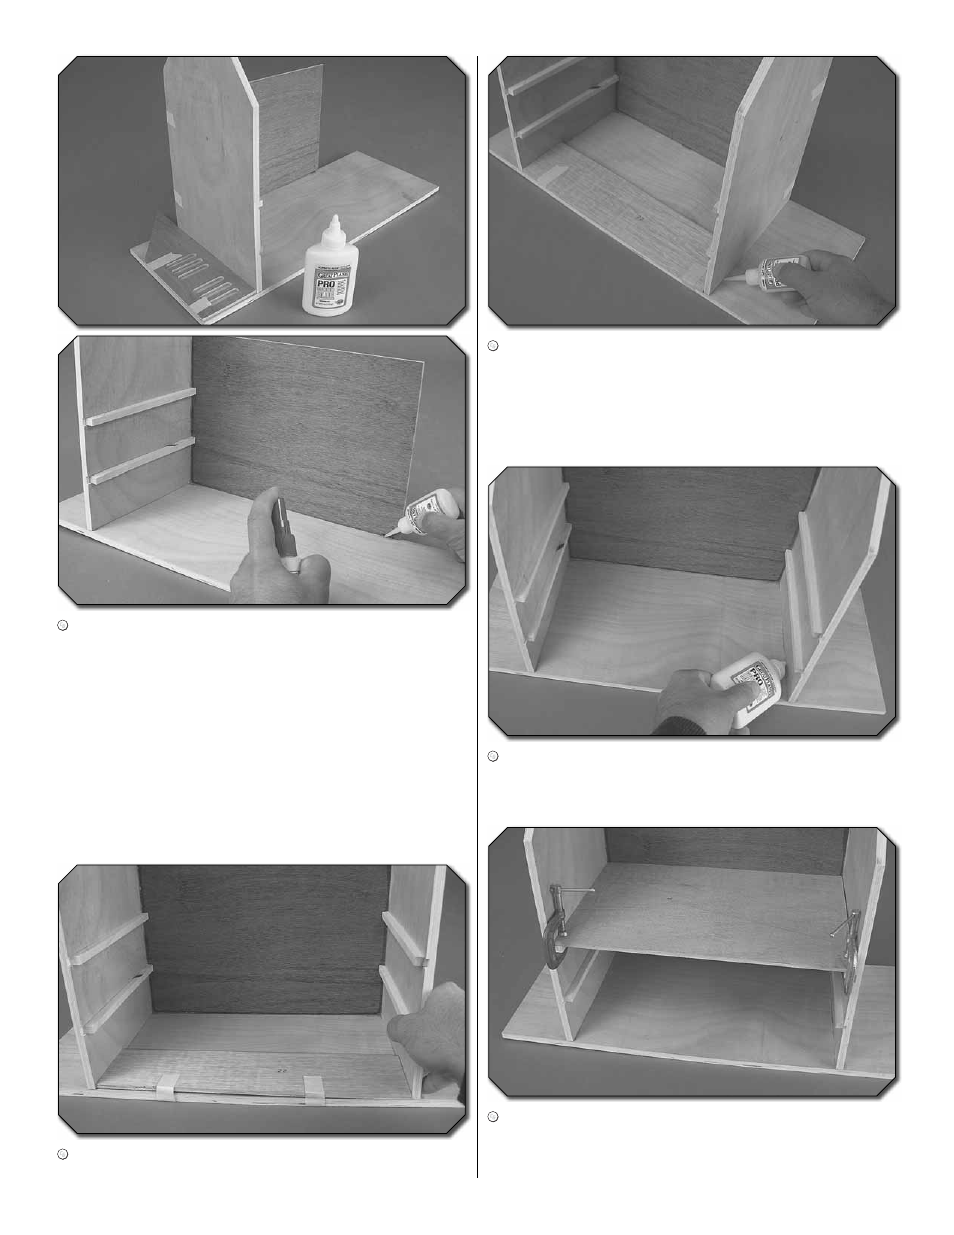
3. Glue the left side upright to the base being careful not
to get glue on the battery box side. Butt the back wall (part
#4) up against the upright and glue it in place. Use the tape
you applied in the last step to hold the back wall tightly up
against the base. Apply a few more pieces of tape to hold
the upright up against the back wall. Remove the battery
box side now and wipe up the excess glue that squeezes
out of the joints. Allow the glue to dry. To help hold all pieces
in alignment, you can use a small drop of thick CA every 2"
[51mm] and cure it with some CA accelerator.
4. Tape the front panel (part #22) to the base as shown.
Butt the panel up against the left side upright.
5. Glue the right side upright to the base and the back
wall using the front panel as a guide to help you position
the upright. Wipe up any excess glue and use a few evenly-
spaced drops of thick CA to tack the upright in place. Remove
the front panel from the base. Clean up any excess glue.
Tape the left upright to the back wall and let the glue dry.
6. Run a bead of glue into all of the joints. Run your
finger over the bead to remove the excess glue and smooth
it into a fillet.
7. Glue the top tray floor (part #7) to the uprights, rails, and
the back wall. Make sure that the uprights are square with the
top tray floor and the back wall. Hold everything in position
with two 1" [25.4mm] steel C-clamps. Allow the glue to dry.