Carl Goldberg GBGP0102 User Manual
Page 14
14
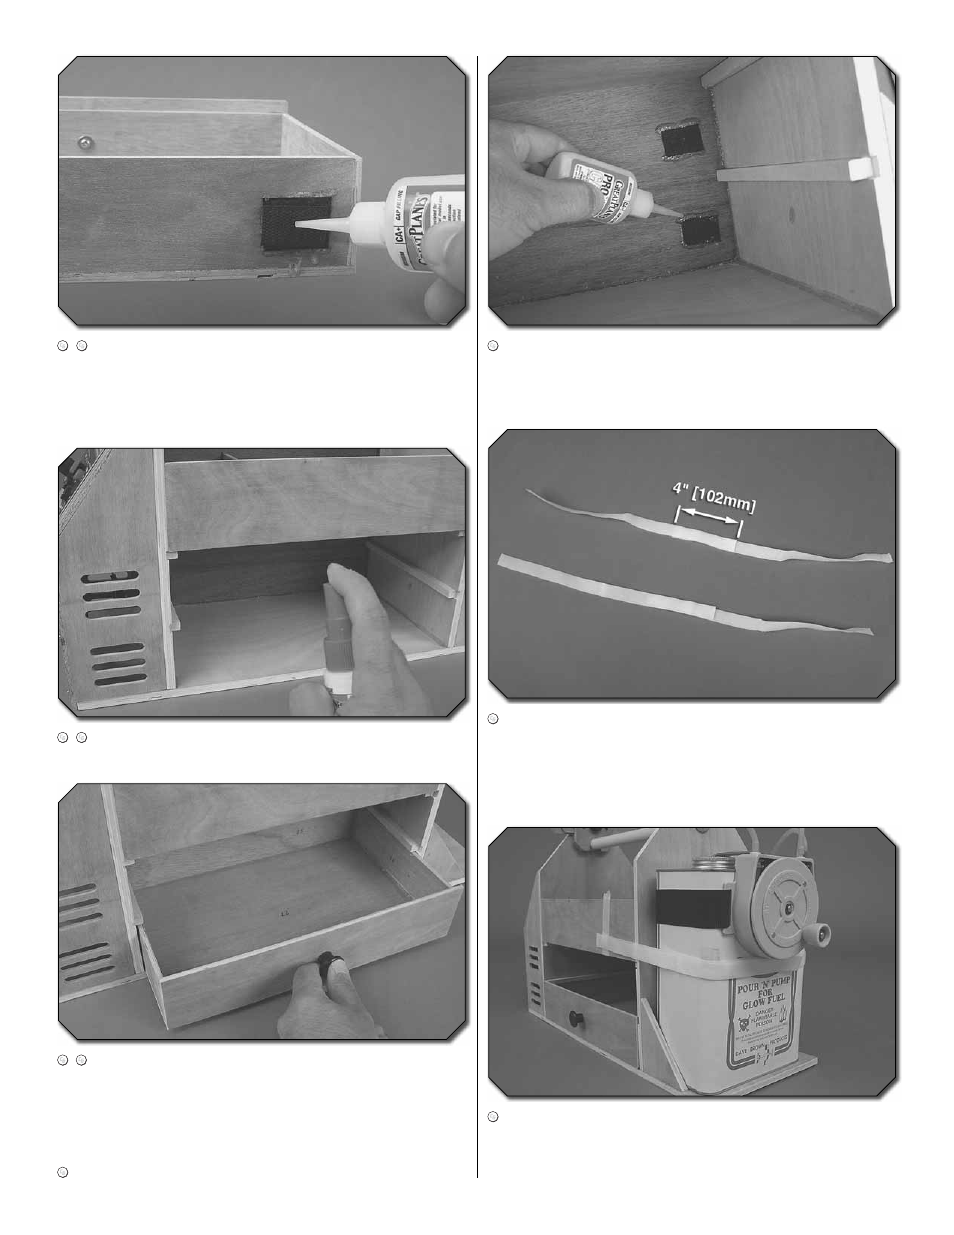
7. Attach the hook side to the loop side of each strip
you glued in place. Working with one drawer now, place a
drop of thick or medium CA on the back side of each hook
fastener and proceed immediately to the next two steps –
do not allow the CA to dry yet.
8. Spray a generous amount of CA accelerator to the
inside back wall of the box.
9. Install the drawer in its proper slot so that the hook
side fastener material contacts the back wall. Allow the CA
about a minute to cure and then gently remove the drawer.
Hint: Reach inside and use your finger to help separate the
hook and loop sides as you gently pull out the drawer.
10. Repeat steps 7 though 9 for the other drawer.
11. Reach back into the field box and thoroughly glue down
the hook side fasteners with CA. Spray some CA accelerator
onto the hook fasteners to thoroughly cure the CA.
12. Locate the long strip of non-adhesive backed hook
and loop fastener material. Cut it in half and separate the
hook side from the loop side. Reattach the two sides so that
they overlap each other by at least 4" [102mm].
13. Place your fuel tank on the tank tray and stretch one
of the straps you made across the upper part of the tank.
Center the attached portion of the strap over the front of
your tank and tape the ends of the strap to the field box.