Carl Goldberg GBGP0102 User Manual
Page 13
13
FINISHING AND OUTFITTING YOUR FIELD BOX
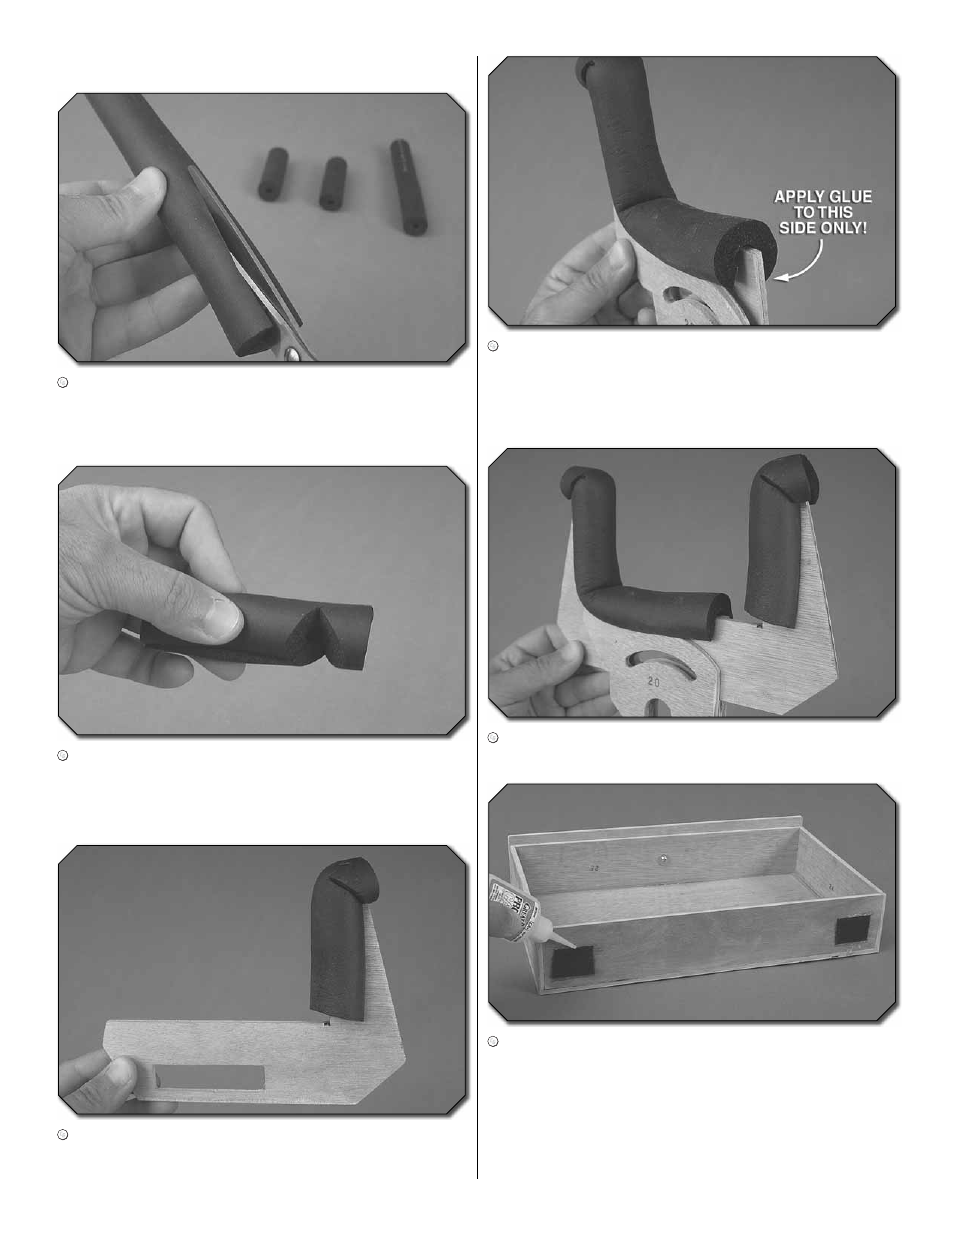
1. Cut two 3-1/2" [89mm] pieces and two 7-1/4" [184mm]
pieces of foam tubing from the single strip provided. Use
scissors to cut a slit in the tubing as shown.
2. Cut a notched section out of each foam piece so that
the center of the notch is 3/4" [19.1mm] from one end of
the tubing.
3. Glue the 3-1/2" [89mm] foam piece to the sliding cradle
arm (part 17) as shown. The notched portion is at the top of
the arm and allows the foam to conform to the bend.
4. Glue the 7-1/4" [184mm] foam piece to the fixed cradle
arm (part 19) as shown. Apply a bead of glue to the back
side of the cradle arm (the side opposite the spacer and
retainer). Do not glue the foam on the spacer/retainer side
– the sliding arm must be free to travel.
5. Reassemble the cradle as shown. Don’t forget to install
the 15mm square piece! Reinstall the cradles to your field box.
6. Cut four 1" [25.4mm] pieces from the long strip of
hook-and-loop material. Separate the hook side from the
loop side of each piece. Use medium or thick CA to glue
the loop side (fuzzy side) pieces to the back of each drawer.
Glue each piece near the side edges as shown. Run a bead
of CA along the top and bottom cloth sides of the loop strips.
This will hold them on permanently. Spray the CA with CA
accelerator to ensure that it fully cures before the next step.