Carl Goldberg GBGA1041 User Manual
Page 6
6
3.
Position the control horn bolt so that it is 1/2”
back from the hinge line on the mark that you
just made.
4.
Using a 9/64" drill bit, make a hole in the
aileron through to the top side.
5.
Insert the 6-32 x 2” screw from the top through
the aileron.
Place the #6 washer and the 6-32 hex nut on
the bolt and tighten. Make sure that you use
thread lock on the bolt and nut.
Screw the adjustable horn bracket on to the
bolt.
6.
Thread on to each end of the 4-40 x 3-3/4”
pushrod a hex nut and a metal clevis.
Install the metal clevis onto the horn bracket
and the servo arm.
Install a clevis clip on to each clevis and tight-
en the hex nut against the clevis.
Repeat the above steps for the second aileron
servo.
7.
Repeat steps 2 thru 6 for the second wing
half.
HINT: Drill the hole from the bottom half way.
Then measure and mark the top of the
aileron and drill down to the hole from the
top of the aileron.
Caution:
Make sure each snap link is fully closed and a
clip is installed before and after each flight.
Note:
Now is the time to decide if you want
to glue the stabilizer to the tubes and
the fuselage, or if you wish to have
removable stabilizers.
Collect the following parts:
(1) Left Stabilizer
(1) Right Stabilizer
(1) 1/2” x 16-1/4” Stabilizer Tube
(2) 4-40 x 1/2 bolts
Mounting Stab
1.
Slide the small stabilizer tube into one side of
the stab. Then slide the assembly into the
hole in the fuselage till the stab is flush against
the fuse. (The side of the stab with the hole is
the bottom of the stabilizer). Slide the second
stab onto the tube sticking out the other side
of the fuselage. Squeeze both stab pieces
together firmly on to the fuselage.
Check that the stabilizer is level with the wing.
Shim the tube in the fuselage up or down if
necessary. Do not go any farther till the stab is
level to the wing.
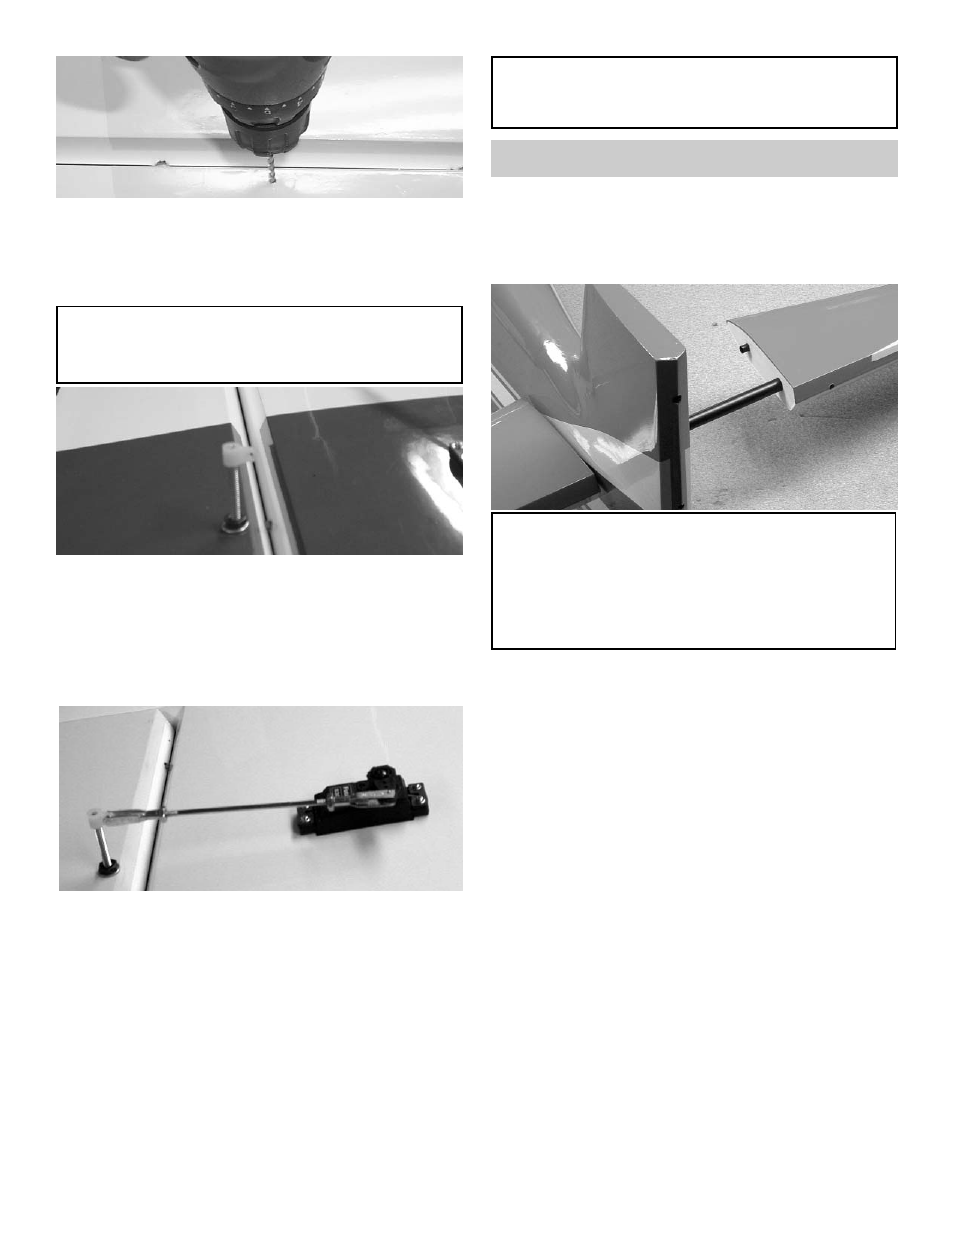
The Stabilizer can be mounted to the
fuselage two ways:
Removable Stabilizer
1.
Using 4-40 bolt, drill and tap the stabilizer tube
at the hole location. This method will allow
you to remove the stab as needed. CAU-
TION:You must watch the bolt holes for
fatigue and drill another hole by rotating the
tube when this happens.