Carl Goldberg GBGA1041 User Manual
Page 10
10
4.
Remove the top canopy hatch. Reach down
inside the fuselage and pull the cables slowly
froward.
Caution: Do not pull the cables all the way
through the hole.
Tape the cables to the rudder servo tray..
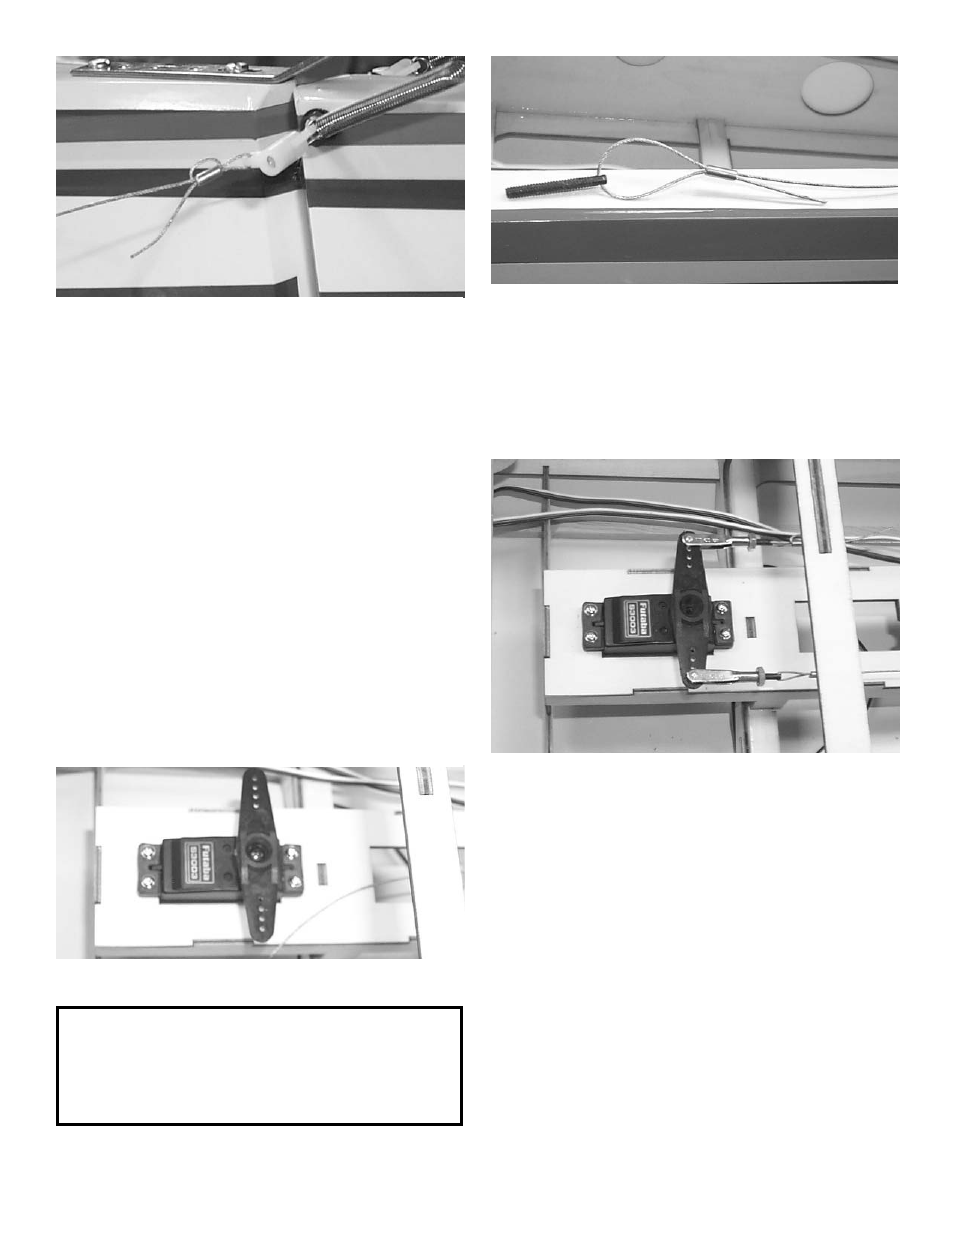
5.
Slide one of the brass tubes over the cable
end next to the rudder.
Loop the end of the cable through the outer
horn bracket on the rudder control horn and
back though the brass tube.
Once more loop the cable around the out side
of the brass tube and pass it through the tube
for the third time. (See the photo above)
Pull on the end of the cable to make the final
loop as small as possible.
When satisfied then crimp the brass tube with
pliers.
Repeat step 5 for the second cable on the
other side of the rudder control horn.
6.
Install the rudder servo in to the rudder servo
tray.
Note:
We have installed a double servo tray for
better rudder performance. This is a option.
We did not include the hardware for this
option.
7.
Remove the cables from the servo tray.
Insert the cable through the brass tube and
then through the hole on the end of the rigging
couplers.
Bend the end of the cable back through the
brass tube.
8.
repeat step 7 for the other cable.
9.
Thread a 4-40 hex nut onto the rigging cou-
pler.
Thread a 4-40 metal clevis on to the rigging
coupler.
Clip the clevis to the rudder servo arm.
repeat for the other cable.
10.
Pull on both cables till tight while keeping the
rudder straight and the servo arm centered.
When satisfied, loop the end of the cable
through the brass tube and crimp the tube
with pliers.
Tighten the hex nut against the metal clevis.