Adjusting the pitch of the awning – Awntech DESTIN User Manual
Page 18
18
ADJUSTING THE PITCH OF THE AWNING
CAUTION: DO NOT ATTEMPT TO ADJUST THE PITCH IN THE RETRACTED POSITION
IF YOU ORDERED AN ADJUSTABLE PITCH CRANK.. DO NOT STOP..GO DIRECTLY TO NEXT
STEP
•
Extend the awning completely.
•
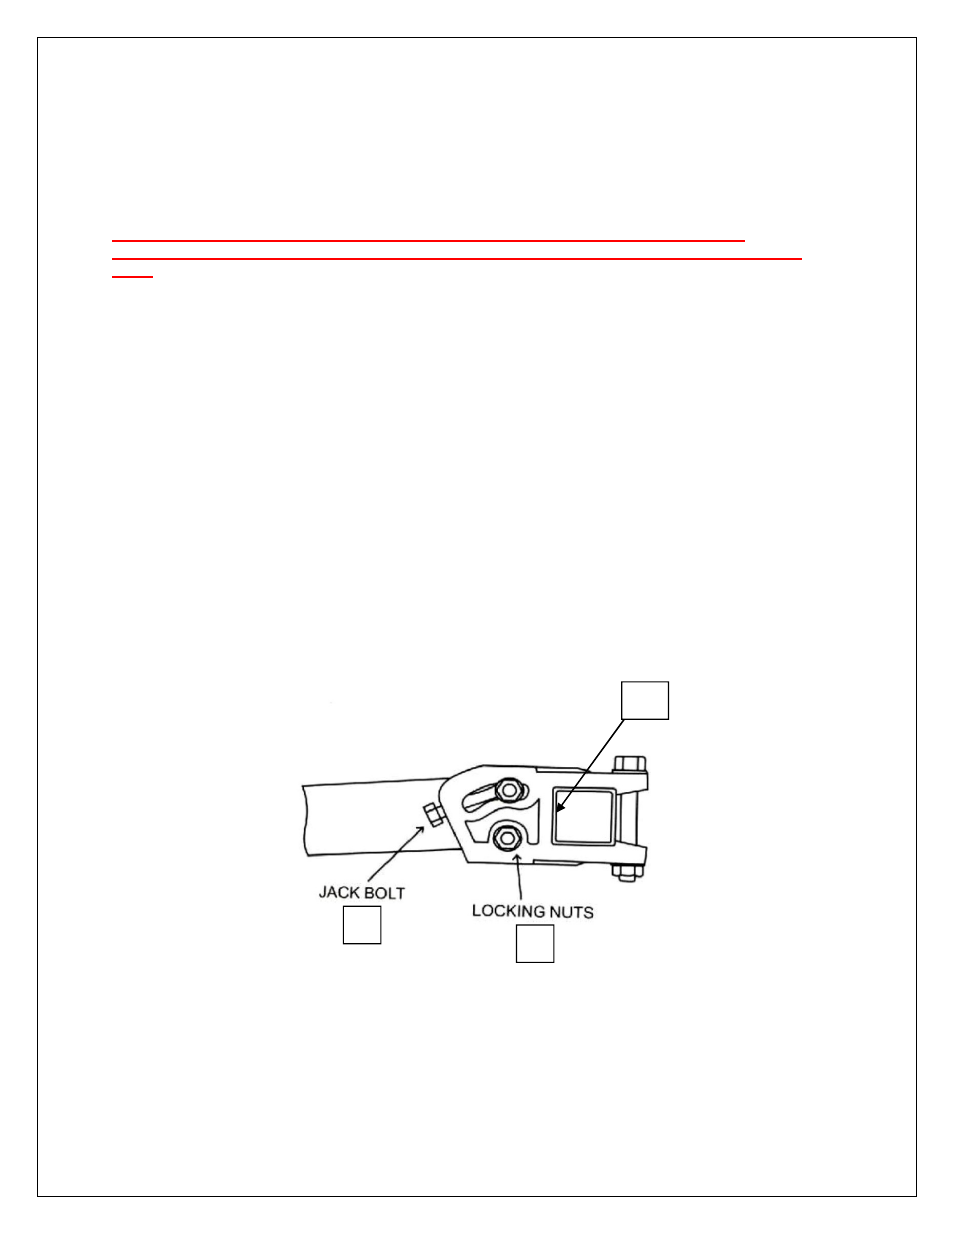
First identify the pitch adjustment brackets (K). (see diagram below)
•
Loosen the top bolt (P) and bottom bolt (R) (do not remove them, just allow them to be
moved) on the bracket at both ends. This operation requires a 6mm and 8mm Allen
wrench.
•
Have your helper(s) hold the front end of the awning.
•
Turn Allen bolt (Q) counter-clock-wise to lower the pitch and clock-wise to raise the pitch
on both ends.
•
Once you adjust the pitch to your desired level, tighten up the top bolt (P) and bottom bolt
(R).
•
If the front bar is lower on one side, simply loosen (P) on the opposite side bracket and
make the appropriate adjustment to (Q). After you are happy with the results retighten (P).
•
The pitch adjustment range is 0 degrees to 15 degrees.
K – PITCH ADJUSTMENT BRACKET
RETROFITTING A MOTOR ON A MANUAL AWNING OR
REPLACING A MOTOR
You must have a 110V outdoor electrical outlet on the wall to the either left or
right side of the awning for a successful installation. Ideally it would be at 6’
above the surface of the patio but standard height will work just fine.
Q
P
R