Cuff connections, Taking blood pressure (auto mode) – American Diagnostic Corporation (ADC) e-sphyg2 9002 User Manual
Page 13
16
13
PLUG / PORT
CONNECTION
AIR CONNECTOR
(Coiled Tubing)
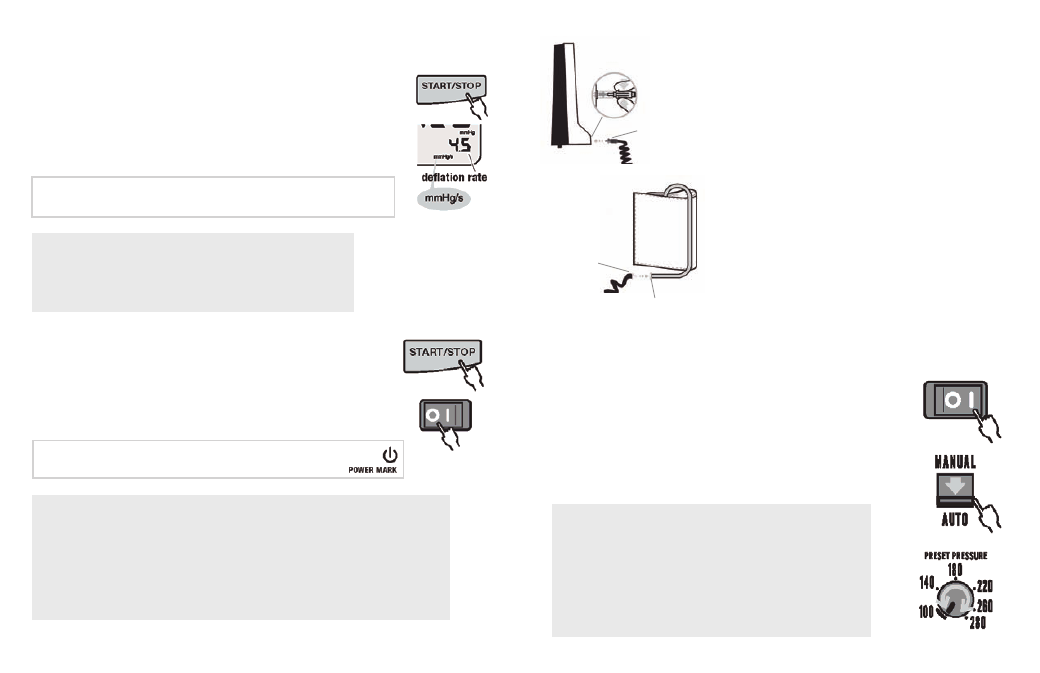
Cuff Connections
1.
Squeeze the middle of the plastic air connector on the
end of coiled tubing between thumb and forefinger,
and insert into the air connection port on the face of the
e-sphyg 2
TM
. Make sure connector firmly “lock” snaps
into the port (Figure 1).
2.
Firmly insert male connector of coiled tubing into
female connector at end of the Adcuff
TM
bladder tubing.
Be sure the connectors are tight (Figure 2).
MALE
CONNECTOR
(Coiled Tubing)
FEMALE CONNECTOR
(Bladder Tube)
Figure 2
Figure 1
Taking Blood Pressure (Auto Mode)
Turn on the device by pressing "
I
" side of MAIN POWER SWITCH.
Move MODE SELECTOR downward and set the device to "AUTO".
See page 15 for "MANUAL" measurement.
Set the initial inflation value with PRESET PRESSURE KNOB.
Select the pressure approximately 30 to 40 mmHg above
expected systolic pressure.
Pressure can be set between 100 mmHg and 280 mmHg.
Set the pressure at 180 mmHg if patient's systolic pressure is
difficult to predict.
The cuff is re-pressurized to a higher value if the preset
pressure is too low for blood pressure to be taken during cuff
deflation.
If cuff inflation was not sufficient, press and hold down
START/STOP button once deflation has started and the cuff
is pressurized again. Pressurization will continue while the
button is pressed. Pressure does not exceed 290 mmHg.
Press START/STOP button when blood pressure is taken and air
is rapidly exhausted from the cuff.
Air is also rapidly exhausted from the cuff when pressure
descends to 30 mmHg.
Turn off the device by pressing "
O
" side of MAIN POWER SWITCH.
The device will be in the energy saver mode approximately after
3 minutes if it is not turned off. See page 10.
Make sure your patient is relaxed, has taken at least 5 minutes of rest before
measurement, and refrains from talking or moving during measurement.
Confirm that the cuff is kept at the height of patient's heart during measurement.
Do not execute repeated measurements for congestion of blood could result
in false measurement. Allow the patient's arm to rest for at least 5 minutes.
Apply the cuff and stethoscope to the patient's arm in the same
manner as the usual auscultatory method.
Press START/STOP button.
The cuff is inflated automatically after zero settings.
Pressurization stops when pressure reaches the preset pressure value and
pressure starts to descend.
Deflation rate is displayed at the lower right corner of the segment LCD.
NOTE: Press START/STOP button whenever the measurement
should be interrupted. The device will rapidly exhaust air from the cuff.