American Diagnostic Corporation (ADC) e-sphyg2 9002 User Manual
Page 12
12
5
17
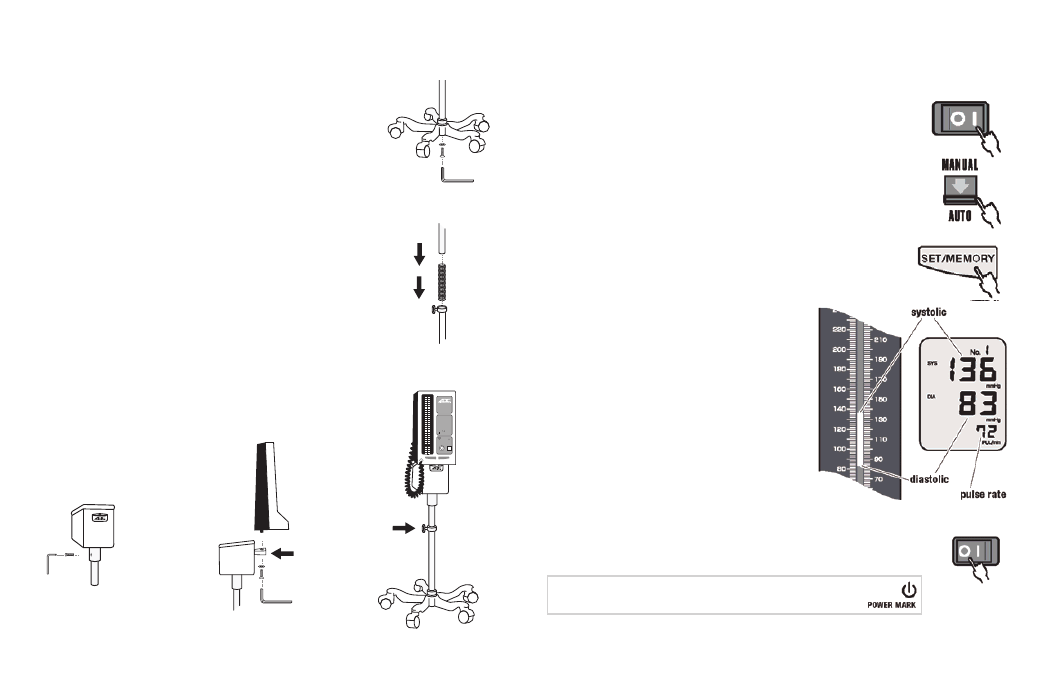
1.
With base on its side connect upright outer pole to base
using large (6mm) allen bolt. Tighten with large (6mm)
allen key provided. Tighten hardware as securely as
possible. (Note: To prevent loosening, hardware must be
tightened securely and periodically checked) (Figure 1).
2.
Slide spring and stainless steel inner pole inside outer
pole with open end up (Figure 2).
3.
Loosen (3mm) allen bolt on collar of cuff storage basket
with small (3mm) allen key provided. Place cuff storage
basket on top of stainless steel inner pole making sure
the pole goes completely inside collar and tighten allen
bolt with key (Figure 3).
4.
Attach manometer to basket using (6mm) allen bolt and
washer as shown. Tighten securely with large (6mm) allen
key (Figure 4).
5.
Connect tubing as noted in Wall configuration #4.
6.
Adjust height of manometer by loosening adjusting knob
and raising or lowering inner pole until gauge is at desired
height. Tighten adjusting knob by hand (Figure 5).
Figure 4
Figure 1
Figure 2
Figure 3
2
e-sphyg
130
82
73
PRESET PRESSURE
MANUAL
AUTO
280
260
220
180
140
100
10
20
40
60
80
100
120
140
160
180
200
220
240
260
280
300
30
50
70
90
110
130
150
170
190
210
230
250
270
290
POWER
LOW BATTERY
AC
START/STOP
SET/MEMORY
Figure 5
How to Assemble Mobile Model
Memory Function
Measured result obtained in "AUTO" mode is automatically saved
in the memory and can be recalled until next measurement is taken.
The result is not saved when the measurement is performed
in "MANUAL" mode.
To recall the result, turn on the device by pressing "I" side of
MAIN POWER SWITCH and set the device to "AUTO" with
MODE SELECTOR.
Press SET/MEMORY button and the last
result from "AUTO" measurement is displayed.
Turn off the device by pressing "
O" side of MAIN POWER SWITCH.
The device will be in the energy saver mode approximately after
3 minutes if it is not turned off. See page 10.