Section 2: engine installation – Hangar 9 Piper J-3 Cub 40 ARF User Manual
Page 9
9
Required Parts
• Fuselage assembly
• Fuel tank assembly
• Engine mount
• 8-32 x 3/4" bolt (4)
• 8-32 X 1" bolt (4)
• 8-32 lock nut (4)
• #8 washer (4)
• 14
1
/
4
" pushrod wire
• Clevis
• Clevis retainer
• Engine mount plate (2)
Required Tools and Adhesives
• Engine w/muffler
• Threadlock
• Ruler
• Phillips screwdriver
Step 1
Secure the engine mount to the firewall using four
8-32 x 3/4" bolts. Use threadlock to prevent the bolts
from vibrating loose during flight.
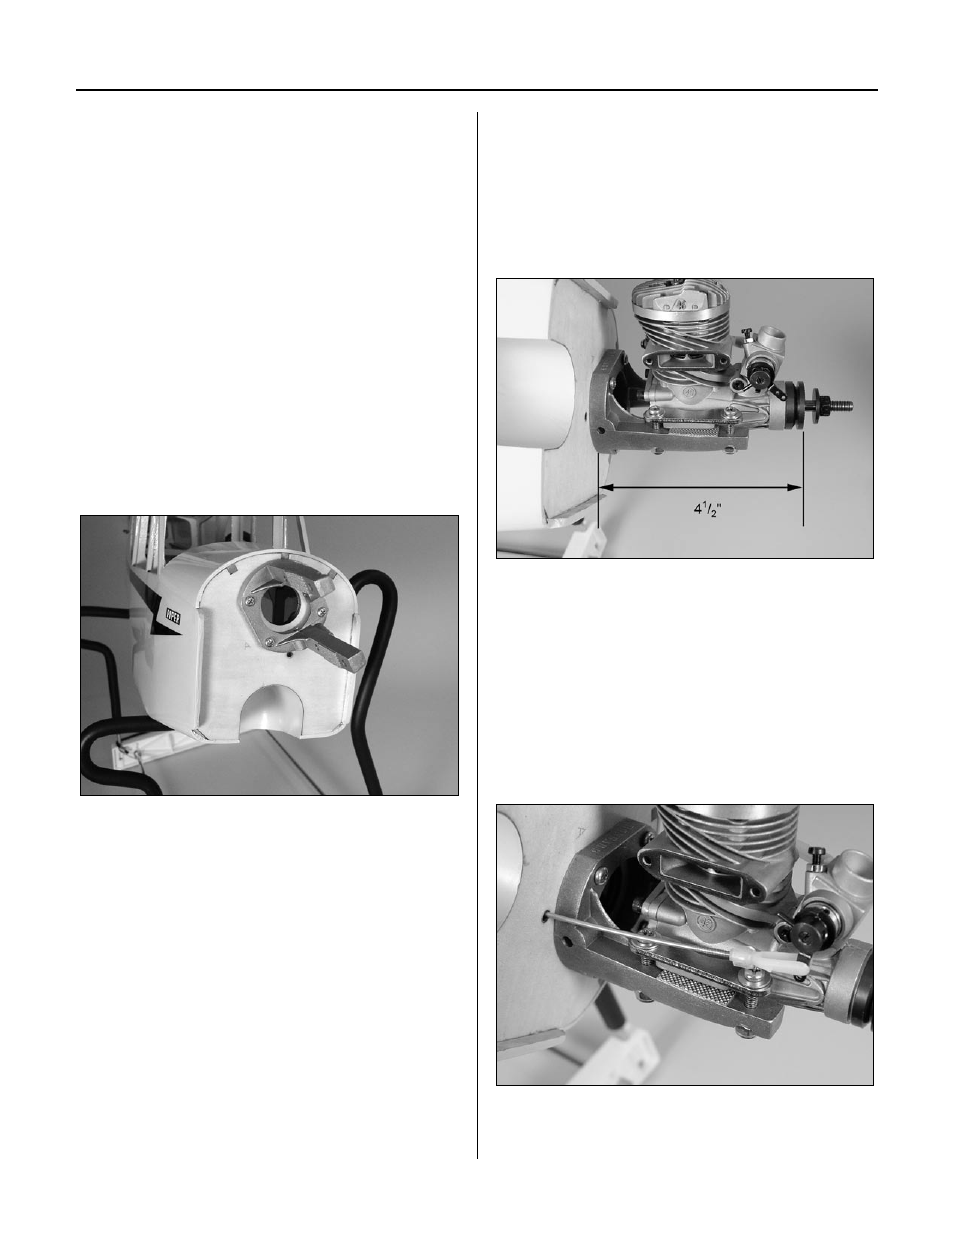
Step 2
Position the engine so the drive washer is 4
1
/
2
"
forward of the firewall. Use the engine mount plates,
8-32 x 1" bolts, 8-32 lock nuts and #8 washers to attach
the engine to the mount. The engine mounting lugs are
sandwiched between the engine mount plates and the
engine mount. Tighten the bolts evenly.
Note: The engine mount plates have texture
on one side, which is placed against the
engine mounting lugs.
Step 3
Place a clevis retainer onto a clevis. Thread the clevis
onto the 14
1
/
4
" pushrod wire. Slide the wire into the
pushrod tube in the fuselage. Attach the clevis to the
carburetor arm.
Section 2: Engine Installation