Section 8: cowling installation – Hangar 9 Piper J-3 Cub 40 ARF User Manual
Page 26
26
Required Parts
• Fuselage
• Propeller
• #2 x 3/8" sheet metal screw (4)
Required Tools and Adhesives
• Phillips screwdriver (small) • Ruler
• Drill
• Drill bit: 1/16", 5/64"
• Hobby scissors
• Felt-tipped pen
• Rotary tool w/sanding drum
Step 1
Remove the propeller nut and washer from the engine.
Position the drive washer so it is keyed onto the engine
shaft. Slide the spinner backplate onto the engine shaft,
and then slide the propeller into position.
Step 2
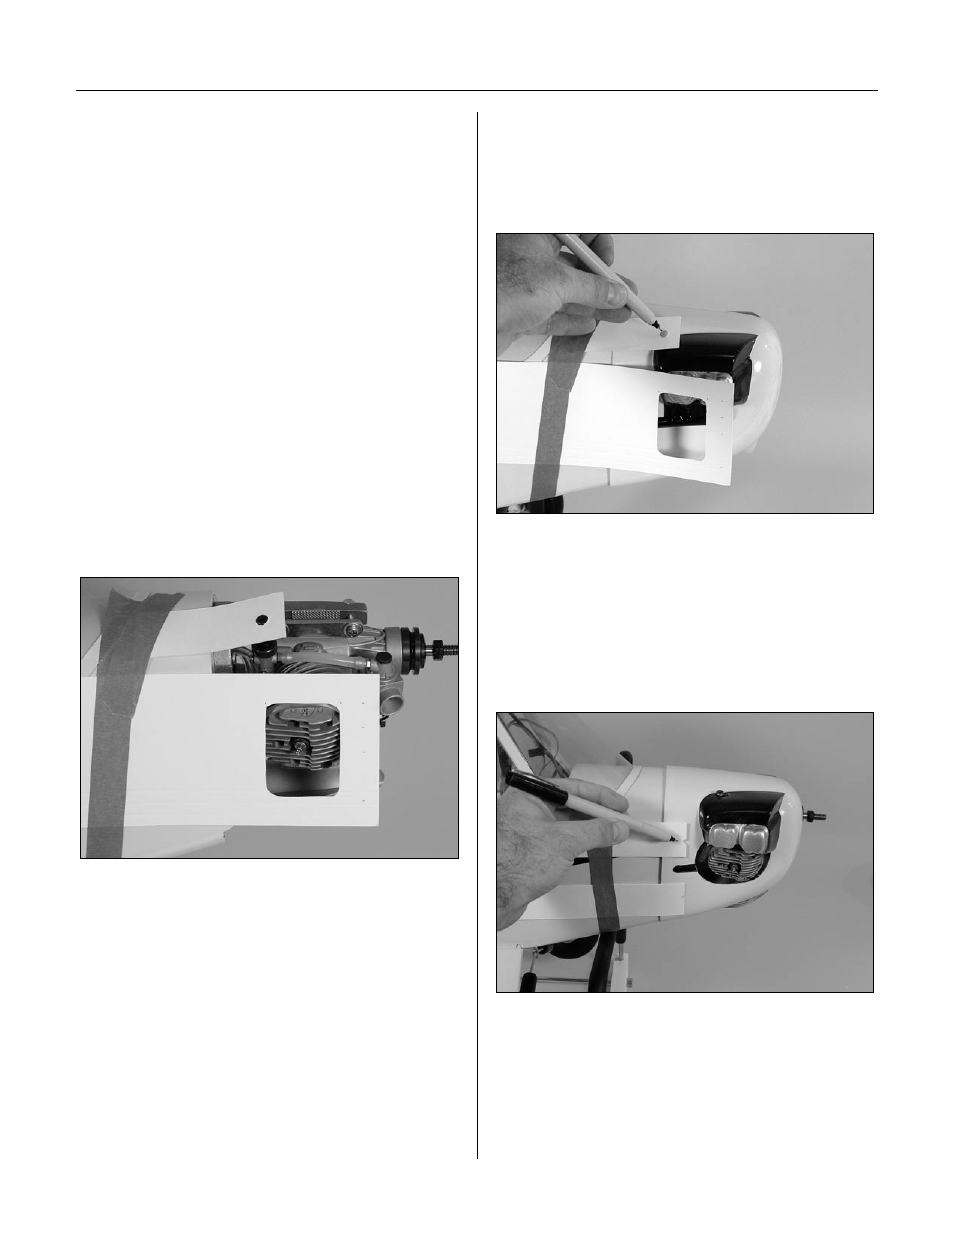
Use card stock taped to the fuselage to indicate the
locations for the needle valve, cylinder head, muffler, and
any other items that will extend outside the cowling.
Step 3
Remove the engine and slide the cowling onto the
fuselage. Position it so the opening for the crankshaft is
4
1
/
8
" forward of the firewall. Transfer the locations from
the card stock onto the cowling using a felt-tipped pen.
Step 4
Carefully trim the cowling to fit over the engine. Work
slowly and remove small amounts of material at a time.
Use card stock to indicate the sides of the fuselage.
Slide the cowl in position, allowing the drive washer to
extend 1/8" forward of the cowl, then mark the positions
for the cowling screws.
Section 8: Cowling Installation